Category: Corporate Media

Professional corporate event photography and videography in Oahu, capturing conferences, product launches, and business events with polished media coverage.

  • How to coordinate with your Oahu event photographer

    How to coordinate with your Oahu event photographer


    TL;DR:

    • Proper coordination with your photographer prevents missed key moments at your Oahu event, ensuring lasting memories.
    • Start planning three to six months in advance using shared tools like Google Drive or Trello to keep all details organized.
    • Clear communication, detailed shot lists, and designated contacts are essential for smooth execution and high-quality photos.

    Planning an event on Oahu is already a big undertaking, and nothing stings more than realizing your photographer missed a key moment because of a miscommunication. Maybe the family portrait was scheduled during cocktail hour, or the cake cutting happened while your photographer was still wrapping up a group shot on the other side of the venue. These gaps are more common than most hosts realize, and they are almost always preventable. This guide walks you through every stage of photographer coordination, from your very first meeting to reviewing final deliverables, so your event photos tell the story you actually lived.

    Table of Contents

    Key Takeaways

    Point Details
    Preparation is crucial Gather all event details and organize them before meeting your photographer.
    Use unified tools Consolidated communication channels reduce confusion and speed up planning.
    Define roles early Assign a single point of contact to streamline conversations and avoid missed moments.
    Verify expectations Review the agreed timeline and shot list ahead of your event for peace of mind.

    Essential preparation: What you need before meeting your photographer

    After understanding why coordination matters, preparation ensures you start the process right. Before you even book a call or send an email, you need to gather specific information that will shape every conversation you have with your photographer.

    Start with the basics: your confirmed event date, start and end times, exact venue address, expected guest count, and the general style you are going for (candid storytelling, posed portraits, or a blend of both). Without these details in hand, your first meeting becomes a guessing game and wastes everyone’s time.

    Critical details to gather before your first meeting:

    • Event date, start time, and end time
    • Venue name, full address, and any access restrictions
    • Estimated guest count and VIP list (family, wedding party, executives)
    • Preferred photography style with sample images
    • Must-capture moments and priority subjects
    • Budget range and package expectations
    • Turnaround time requirements for edited photos

    Once you have this information organized, choose a tool that keeps all communication in one place. Scattered emails make it incredibly easy for key details to slip through the cracks. Consolidated planning tools matter because too many emails and slow quote turnarounds create friction that directly affects photo scheduling and final results.

    Communication tool comparison:

    Method Pros Cons
    Email threads Familiar, easy to start Cluttered, easy to miss updates
    Google Drive folder Centralizes files and mood boards Requires everyone to check regularly
    Trello or Asana board Visual timeline, task tracking Small learning curve for new users
    Shared Google Doc Real-time editing, simple Less structure for complex events

    For most Oahu events, a shared Google Drive folder with a master planning document works extremely well. It gives your photographer instant access to your mood board, floor plan, and timeline without any back-and-forth emails.

    If you are planning a corporate event, reviewing a guide on corporate photography planning can give you a significant head start on what documents and details professionals expect.

    Pro Tip: Build a visual mood board using Pinterest or Canva before your first meeting. Sharing it with your photographer 48 to 72 hours in advance gives them time to prepare ideas and ask targeted questions, turning your first meeting into a productive creative session instead of a general introduction.

    Step-by-step guide: How to communicate and schedule with your photographer

    Once you are prepared, effective communication turns your plan into reality. Following a clear sequence prevents details from falling through the cracks and keeps both parties confident heading into the event.

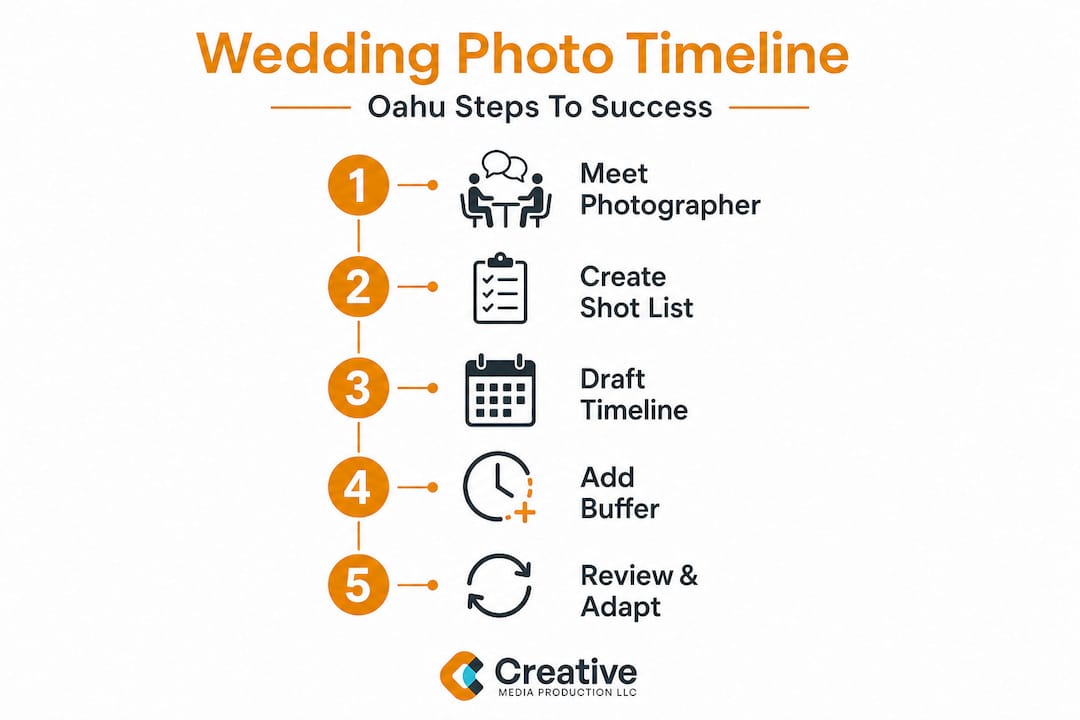
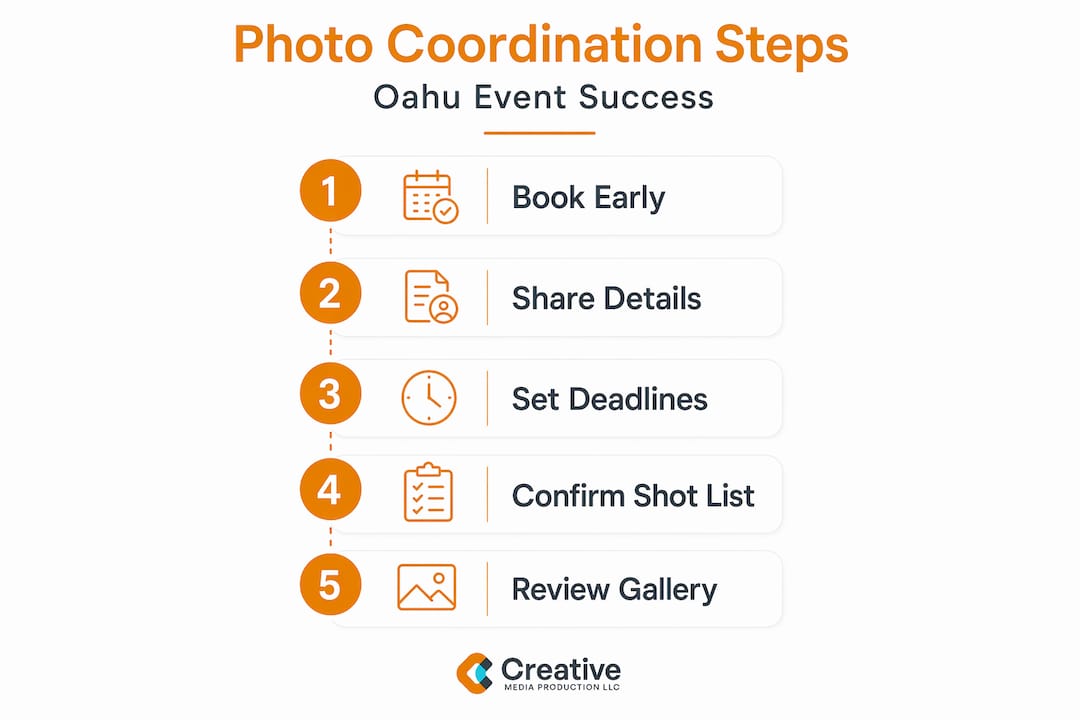
    Your coordination checklist, step by step:

    1. Initial contact: Reach out with your event date, location, and rough timeline. Attach or link your mood board if you have one ready.
    2. Information exchange: Share your full event details document and ask your photographer to confirm their availability and package options in writing.
    3. Contract review: Read every clause carefully, especially around cancellation policies, overtime fees, and file delivery timelines. Ask questions before signing.
    4. Timeline building: Work together to map out a shot-by-shot schedule, including buffer time between locations or setups.
    5. Shot list creation: Finalize a written list of must-have photos, organized by moment or priority. A strong shot list guide helps you cover every angle without forgetting anyone important.
    6. Final confirmation: Send a summary email or shared document update at least one week before your event, confirming time, location, logistics, and any last changes.
    7. Day-of briefing: Give your photographer a five-minute walkthrough when they arrive, pointing out key spaces, VIPs, and any updates not covered in the written plan.

    Using a single communication channel for schedule updates is one of the most underrated moves you can make. When your photographer, your venue coordinator, and your planner are all working from the same document, timeline conflicts surface early instead of on the day of your event.

    Example timeline vs. common pitfalls:

    Coordination stage Recommended timing Common mistake
    Initial booking contact 3 to 6 months before event Waiting until 4 to 6 weeks before
    Contract signed 4 to 8 weeks after booking Leaving contract unsigned until close to event
    Shot list submitted 2 to 3 weeks before event Sending it the night before
    Final timeline review 5 to 7 days before event Skipping this step entirely
    Day-of photographer briefing On arrival at venue Assuming photographer knows the plan

    Planner manages event chat on laptop

    Effective photoshoot planning shows that structured pre-event preparation directly reduces on-the-day surprises and improves overall photo quality because your photographer can focus on capturing moments rather than logistics.

    Infographic with steps for coordinating event photography

    Pro Tip: Set hard deadlines for every confirmation. For example, “Please confirm the final shot list by [specific date].” This simple practice prevents the last-minute scramble that causes more missed moments than almost any other single factor.

    Troubleshooting and avoiding common mistakes

    After setting up your coordination system, it pays to know what can still go wrong and how to prevent it before it costs you a precious memory.

    The five most common coordination mistakes:

    • Delayed replies: When a photographer sends questions about the timeline or venue and doesn’t get a response for several days, scheduling conflicts get locked in before you even notice them.
    • Missing or unsigned contracts: A verbal agreement does not protect either party. Without a signed contract, there is no agreed standard for deliverables, timing, or dispute resolution.
    • Vague shot lists: Writing “family photos” on a shot list is not enough. A vague list forces your photographer to guess, and those guesses often miss the specific combinations that matter most to you.
    • Last-minute changes without notification: Switching a ceremony start time by 30 minutes can cascade into every other scheduled shot being off by an hour.
    • Unclear roles on the day: When multiple people try to direct the photographer, the resulting confusion wastes shooting time and creates tension during what should be a joyful event.

    Critical note: Slow communication is the hidden problem most event hosts underestimate. When responses take too long and planning tools are scattered, consolidated planning tools become not just helpful but essential. The friction from disorganized communication quietly affects photo scheduling in ways you only notice once your gallery comes back missing key shots.

    Understanding photographer contract clarity before you sign anything is one of the most valuable things you can do for your peace of mind and the quality of your final photos.

    Pro Tip: Designate one person as the single point of contact for all photography communication. Whether that is you, a planner, or a trusted family member, having one voice prevents conflicting instructions and keeps your photographer focused on shooting instead of fielding questions from five different people.

    Verifying expectations and ensuring successful results

    With troubleshooting covered, a final verification pass guarantees that what you planned is what actually happens and that you know exactly what to do if something needs correction after the event.

    Your pre-event verification checklist:

    • Confirm the photographer has the finalized shot list in writing
    • Verify the agreed event timeline matches what is in the signed contract
    • Double-check the delivery format (digital files, prints, online gallery link)
    • Confirm the number of edited images included in your package
    • Verify the expected turnaround time for the first gallery delivery
    • Make sure the photographer has parking and venue access details
    • Confirm backup equipment policy in case of technical issues
    • Reconfirm your single point of contact’s phone number is current

    One area where many Oahu hosts get caught off guard is post-event corrections. If your gallery arrives and something is missing or not what you expected, knowing the process in advance saves you from a frustrating back-and-forth. Always confirm whether your contract includes a round of revision requests and what the timeline for those corrections looks like before the event ever happens.

    For birthday events and celebrations with multiple moving parts, a well-organized birthday event workflow can serve as a practical reference when building your own verification checklist. The principles apply across event types, from milestone birthdays to corporate anniversaries and family reunions.

    When your gallery is delivered, review it against your shot list within the first 48 hours while memories are fresh. Note any specific images that seem to be missing, check the technical quality on a larger screen, and compare the delivered count against your contract. Consolidated planning tools make this review process significantly easier because your original shot list, contract terms, and timeline are all in one place, so you are comparing apples to apples instead of searching through old email threads.

    Reach out to your photographer politely and specifically if anything needs to be addressed. Specific requests (“We did not receive the photo of the grandparents during the first dance”) are far more effective than vague complaints and lead to faster, more satisfying resolutions.

    Fresh perspective: Why event hosts struggle and how Oahu can do better

    Here is what most coordination guides miss: the biggest enemy of great event photos is not technical failure or bad lighting. It is mismatched expectations that were never surfaced before the event day.

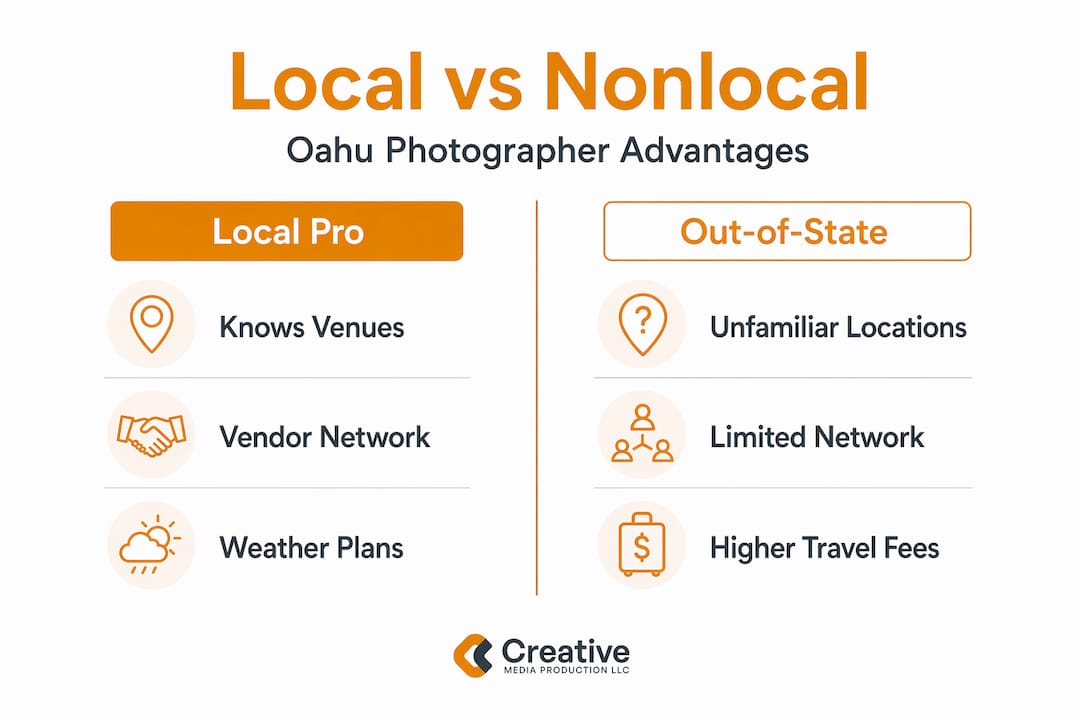
    Most coordination problems on Oahu stem from two things. First, hosts assume their photographer will naturally understand their vision without being told explicitly. Second, photographers sometimes underestimate how unfamiliar a couple or family is with the realities of event photography logistics. Both sides are operating with incomplete information, and neither realizes it until something goes wrong.

    Oahu also has some genuinely unique logistical challenges. Island geography means vendor travel times are longer than people expect. Parking at many Waikiki venues is complicated. Outdoor locations like Kailua Beach Park have variable light conditions that shift fast, and some of the most beautiful ceremony sites have strict vendor access rules that need to be confirmed weeks in advance, not the day before. A photographer who does not know a site well and has not received clear location information from you is at a real disadvantage before they ever pick up a camera.

    The insight most guides do not offer is this: your photographer is not just a vendor you hire to show up and click a button. They are a creative partner with a professional perspective on timing, light, and composition that you simply do not have. When you treat the relationship that way from the start, and actually ask for their input on the timeline rather than just dictating it, the results are dramatically better. We have seen this play out over more than 15 years of covering events across the island.

    Choosing a photographer who aligns with your communication style is just as important as choosing one whose portfolio you love. A technically brilliant photographer who is slow to respond and vague about their process will cause more headaches than a slightly less polished shooter who communicates clearly and shows up prepared. And when you have a shared online board loaded with creative event photography ideas for your specific event, both of you walk into that event day energized and aligned rather than guessing.

    Next steps: Find your ideal Oahu event photographer

    You now have a clear framework for coordinating with your photographer from first contact to final gallery delivery. The next step is putting it into action with a team that already knows Oahu venues, lighting conditions, and event logistics inside and out.

    https://creativemediaprod.com

    Whether you are planning a wedding, a corporate function, or a milestone family celebration, Creative Media Productions has covered it all across Honolulu, Waikiki, Kailua, and beyond for over 15 years. As a trusted event photographer on Oahu, we bring both the technical expertise and the communication practices this guide describes so your event runs smoothly and your photos reflect every moment that mattered. If you are a couple, exploring our wedding photo timeline resource is a great starting point. For companies and organizations, our corporate event photographer services are designed around your unique scheduling and branding needs. Reach out to start a conversation and let us help you build a coordination plan your whole team can feel confident about.

    Frequently asked questions

    How early should event planners start coordinating with their photographer in Oahu?

    Begin coordination three to six months before your event to secure your preferred photographer and leave enough time for thorough planning and timeline building. Popular Oahu venues book up quickly, and your photographer’s availability often mirrors that demand.

    What’s the most effective tool for communication with photographers?

    Consolidated planning tools like Google Drive or Trello are most effective because too many emails and slow responses create friction that affects scheduling and photo quality. A single shared document keeps everyone aligned without the clutter.

    How can couples avoid confusion about the photographer’s shot list?

    Request the shot list in advance and review it together before the event, making specific adjustments based on your priorities and the key people who need to be captured. Written confirmation from both sides prevents misunderstandings on the day.

    What’s the best way to deal with last-minute changes?

    Assign one designated point of contact and use real-time communication tools to update your photographer immediately, since even small schedule shifts can affect the entire photography timeline. The faster the update reaches your photographer, the more flexibility they have to adjust without missing critical moments.

  • Outdoor Beach Ceremony Audio Recording Tips

    Outdoor Beach Ceremony Audio Recording Tips

    The moment the vows begin, the ocean rarely stays quiet out of respect. Waves roll in, wind shifts without warning, and guests settle into the sand just as the most meaningful words of the day are spoken. That is why outdoor beach ceremony audio recording tips matter so much. Beautiful footage can carry a wedding film visually, but if the vows are thin, distorted, or buried under wind, the emotional impact drops fast.

    Beach ceremonies are some of the most visually stunning weddings to film, especially here on Oahu. They are also among the most demanding environments for clean sound. Salt air, open space, moving wind, and natural surf all work against audio quality. Capturing clear ceremony sound takes planning, the right gear, and a backup mindset from the start.

    Why beach ceremonies are harder to record well

    A ballroom gives you walls, a ceiling, and some control over the environment. A beach gives you none of that. Sound disperses quickly in open air, and microphones pick up much more than the officiant and couple. Even a calm-looking shoreline can produce constant low-frequency rumble from the surf, and a light breeze can turn into harsh wind distortion in seconds.

    Distance is another issue. If your camera is placed where it should be for a clean composition, it is often too far away to capture usable dialogue on its own. That is why relying on in-camera audio for a beach ceremony is rarely enough. It might work as ambient support, but it should not be your primary source for vows.

    Start with a layered audio plan

    The strongest outdoor beach ceremony audio recording tips all come back to one principle: never trust a single source. Professional ceremony audio is built in layers. One microphone or recorder may sound excellent during setup, then fail once the wind shifts, clothing rustles, or someone turns away.

    A dependable approach usually includes a lavalier mic on the officiant or groom, a recorder connected to the PA system if one is being used, and on-camera audio to capture natural ambience and crowd response. Each source serves a different purpose. The lav gets you intimate speech, the board feed can provide clean amplified sound, and the camera track helps the final edit feel grounded in the setting.

    This is where experience matters. The right setup depends on whether the ceremony is fully unplugged, lightly amplified, or run through a speaker system. There is no one-size-fits-all beach audio setup, because every shoreline, guest count, and ceremony format changes the risk profile.

    Mic placement matters more than expensive gear

    Good equipment helps, but placement usually makes the bigger difference. A properly placed lav mic on the officiant often captures both the officiant and the couple better than a poorly placed lav on the bride or groom. The officiant usually stands centered, speaks consistently, and remains active throughout the ceremony.

    If the groom is mic’d, placement should be secure, shielded from direct wind, and tested for clothing noise. Jackets, loose leis, long hair, and delicate fabrics can all create friction against a mic. On a beach, that problem gets worse because wind pushes fabric around constantly.

    Hidden mics can look clean, but concealment creates trade-offs. Tucking a lav too deeply under clothing may reduce visual distraction while also making voices sound muffled. For premium results, the goal is not just hiding gear. The goal is balancing clean visuals with clear, reliable speech.

    Use wind protection every time

    This is non-negotiable. Even a mild breeze can ruin a clean signal if the microphone is not protected. Foam covers alone are often not enough for oceanfront ceremonies. Professional wind protection designed for lavaliers and camera-mounted microphones makes a major difference, especially when gusts are inconsistent.

    It is easy to underestimate wind during setup because beaches can feel calm one minute and completely different ten minutes later. Always plan for more wind than you hear during arrival.

    Test the environment before guests sit down

    The best time to solve audio issues is before the ceremony starts, not during the processional. Arrive early enough to listen, not just to unload gear. Stand where the couple will stand. Listen for wave intensity, traffic nearby, aircraft overhead, public beach activity, and the direction the wind is coming from.

    You should also check whether the ceremony arch, floral install, or seating layout creates noise risks. Fabric draping can flap against stands. Decorative elements can rattle. A speaker placed too close to a recorder can introduce feedback or uneven levels. These are small details that become big problems in post.

    On Oahu beaches, conditions can shift quickly based on time of day and beach orientation. A site that looks ideal for portraits may need a slightly adjusted ceremony angle for better sound control. That kind of planning protects both the film and the client experience.

    Coordinate with the officiant and DJ

    Strong ceremony audio is not just a technical job. It is also a communication job. If there is an officiant, musician, DJ, or planner involved, coordinate with them before the ceremony begins. Confirm who is using a microphone, whether there is a speaker system, and when handheld mics will be passed.

    If a DJ provides amplification, ask about a clean output for recording. If that is not possible, place a dedicated recorder near the speaker as a backup. If live musicians are part of the processional or ceremony, make sure your audio levels account for those volume changes. Music can spike much louder than spoken vows.

    This coordination also helps avoid a common problem: the officiant stepping away from the couple or turning their body while speaking. Small movement changes affect mic pickup more than many clients realize.

    Record backups like you expect one source to fail

    That mindset saves weddings. Batteries die. Memory cards fill up. A connector can loosen. Wind can hit one mic harder than another. Backup recording is not overkill for a beach ceremony. It is standard professional practice.

    At minimum, record primary speech on more than one device. If the officiant is wired, consider a second recorder on the groom if wardrobe allows. If a speaker system is present, capture that feed separately. Keep camera audio rolling for the full ceremony, even if it will not be the hero track.

    Redundancy is what turns a stressful environment into a manageable one. Premium coverage is not about hoping the first setup works. It is about building a system that still works when conditions change.

    Don’t let visuals compromise the vows

    Couples understandably want a clean, natural look. On a beach, that often means minimal gear in sight. The challenge is that the more invisible the audio setup becomes, the easier it is to lose clarity if the placement is too compromised.

    This is where service and guidance matter. A professional team should explain what is worth hiding and what is worth prioritizing. A tiny mic placement adjustment may have almost no visual impact, while dramatically improving the sound of the vows. Those choices are easier to make when they are discussed in advance rather than rushed at the shoreline.

    Ambient sound should support, not compete

    Ocean ambience is part of the story. It should be captured and preserved. But ambience works best as a supporting layer, not as the main audio track for the ceremony itself. Clean dialogue first, atmosphere second. In the final edit, that balance creates a cinematic result without sacrificing intelligibility.

    That is especially important for highlight films and full ceremony edits. Clients want to hear the emotion clearly, not just remember that the beach sounded beautiful in person.

    Post-production can help, but only to a point

    Audio cleanup tools are useful, but they are not magic. Wind distortion, clipped audio, and heavily muffled vows can only be repaired so much. Noise reduction can reduce surf and background distractions, but aggressive processing can also make voices sound thin or artificial.

    The best results come from getting strong source audio in the field, then refining it in editing. That is a craftsmanship issue as much as a gear issue. A polished wedding film depends on both capture discipline and careful post-production judgment.

    For couples planning a beach wedding, the practical takeaway is simple: ask how your photo and video team records ceremony audio. Ask what backups they use. Ask how they handle wind. These questions matter because clear sound is part of how your story is preserved.

    At Creative Media Production LLC, we treat ceremony audio with the same care as the visuals because the most meaningful moments deserve more than a good-looking frame. When the setting is open, windy, and unpredictable, preparation is what keeps the vows clear and the final film true to the moment.

    A beach ceremony should feel effortless for the couple. Behind the scenes, that usually means the audio plan was anything but casual.

  • Why Oahu local photographers deliver real event value

    Why Oahu local photographers deliver real event value


    TL;DR:

    • Hiring a local Oahu photographer provides a distinct advantage through venue knowledge, weather familiarity, and strong vendor relationships. Their community investment ensures seamless coordination and authentic storytelling across family milestones and events. Choosing local professionals guarantees cost-effectiveness, trusted reviews, and ongoing relationships rooted in the island’s unique culture.

    Choosing the right photographer for your Oahu event feels overwhelming, especially when national portfolios look polished and out-of-state photographers market themselves aggressively online. But here’s what most booking guides won’t tell you: the photographer who knows your venue, understands the afternoon tradewinds at Kailua Beach, and has the venue coordinator’s cell number already saved is almost always going to outperform one flying in with a carry-on and a Google Maps search. Local expertise is not just a convenience. It’s a competitive advantage that shows up directly in your final photos.

    Table of Contents

    Key Takeaways

    Point Details
    Local edge for Oahu events Oahu-based photographers know venues, weather, and local traditions for seamless event coverage.
    Trustworthy by reputation It’s easier to vet and trust local photographers through real community reviews and local portfolios.
    Lower costs and risk Hiring locally reduces travel expenses and brings peace of mind with accessible contracts and follow-up.
    Stronger long-term relationships Local professionals build genuine client bonds, leading to repeat business and memorable storytelling.
    Community-first experience Choosing local means your event is cared for by pros invested in the island and its people.

    Local know-how: Why Oahu expertise matters

    When you’re planning a wedding at Waimea Valley, a birthday luau in Kapolei, or a corporate function at a Waikiki hotel ballroom, the photographer’s familiarity with that exact location changes everything. Local Oahu photographers have visited these venues dozens of times. They know which direction the golden hour light falls, which corners of the room create unflattering shadows, and which outdoor spots turn into wind tunnels by early afternoon.

    This goes beyond aesthetics. Hiring a local wedding photographer can reduce logistical stress by enabling smoother coordination with venue staff and more accessible planning. That smoother coordination means your photographer is not asking guests to wait while they figure out where the bridal suite is or scramble for a power outlet.

    Infographic contrasting local and out-of-state photographers

    When you’re choosing an event photographer in Oahu, ask specifically about their venue experience. A local photographer who has shot at your venue before will walk in knowing the backup indoor spot if afternoon rain rolls in, the quietest corner for formal portraits, and the loading dock entrance so their equipment doesn’t clutter the main lobby.

    Factor Local Oahu photographer Out-of-state photographer
    Venue familiarity High, often repeat visits Low, first-time arrival
    Weather anticipation Understands island microclimates Relies on generic forecasts
    Vendor relationships Pre-established Starting from scratch
    Travel fees Rarely charged Often significant
    Communication access Easy and ongoing Time zone dependent

    Pro Tip: Ask your photographer to name at least two backup locations at your venue site in case of rain or harsh midday light. A local pro will answer immediately. A visiting one may hesitate.

    Here’s what this expertise looks like in practice. A local Kapolei event photographer shooting a backyard birthday celebration already knows that late afternoon on Oahu’s leeward side means intense, direct sunlight. They’ll arrive early to scout shade positions and angle shots away from the harsh glare. A photographer flying in from the mainland is still adjusting to the intensity of Hawaii’s sun when your cake cutting begins.

    Key benefits of local Oahu expertise include:

    • Deep venue knowledge that reduces setup time and eliminates guesswork
    • Weather awareness built from years of shooting across the island’s distinct microclimates
    • Cultural sensitivity to Hawaiian traditions, local customs, and family dynamics common in Oahu celebrations
    • Equipment decisions based on real local conditions, not assumptions from prior mainland shoots

    How local relationships create smoother events

    Local photographers don’t just know the venues. They know the people running them. After years of working the same properties across Honolulu, Waikiki, and surrounding communities, a seasoned Oahu photographer has personal relationships with venue managers, catering teams, and event planners. That network is something you can’t buy or fake.

    Local photographers often have relationships with venue management and staff, which leads to smoother logistics and a day that flows more seamlessly. When your florist is running late or the ceremony timeline shifts by 20 minutes, a photographer who’s on a first-name basis with the coordinator can adapt quietly and keep everything on track without pulling you into the chaos.

    “The best event photos happen when everyone behind the scenes is already on the same page. That kind of seamless coordination only comes from people who’ve worked together before.”

    This is especially important when something goes wrong, because something always does. A missed shuttle, a delayed caterer, a sudden downpour. The photographers who handle these moments gracefully are the ones who’ve faced them before on this island, with these vendors, at these locations.

    Pro Tip: When interviewing photographers, ask which vendors and planners they’ve worked with recently. A local pro will rattle off names you recognize. That shared network is a built-in safety net for your event day.

    Photographer coordinating with vendor at Oahu event

    Strong event day logistics depend on more than a detailed timeline. They depend on trust between the people executing it. A local photographer who has worked with your caterer, your DJ, and your coordinator before is already halfway to a perfect event before the first guest arrives.

    Benefits of these established local relationships include:

    • Faster problem-solving when the unexpected happens, because local connections mean faster answers
    • Cooperative vendor teams that prioritize each other’s timelines and workflows
    • Referral confidence, because local vendors only recommend colleagues they trust completely
    • Backup resources if equipment fails or a second shooter is needed last minute

    The real impact of community reputation and reviews

    When you’re trusting someone with photographs of your wedding, your child’s milestone birthday, or your company’s flagship event, reputation matters enormously. And with local photographers, reputation is something you can actually verify.

    Reviews strongly influence decisions for local businesses, and local photographers who earn and manage reviews can be easier to evaluate than national or visiting alternatives. A quick search turns up honest feedback from your neighbors, your coworkers, people who had events at the same venues you’re considering.

    BrightLocal’s Local Consumer Review Survey 2026 reports that 97% of consumers read reviews for local businesses before making a decision. That number tells you something important: reviews are not optional research, they’re the foundation of trust in the local market.

    Review source What to look for Red flags
    Google Reviews Volume and recency of feedback No reviews or very few recent ones
    Portfolio galleries Full event galleries, not highlights only Only hero shots, no candids
    Social media Community engagement and tagged clients Generic stock-style images
    Word of mouth Referrals from local vendors or venues No known local connections

    When you review a local photographer’s portfolio, look beyond the stunning sunset portraits. Ask to see full galleries from similar events, not just a curated highlight reel. A local photographer with genuine community roots will have real, full coverage across dozens of Oahu celebrations with the kind of candid, in-the-moment shots that actually tell the story of your day.

    Benefits of reviewing local photographers specifically:

    • Authentic testimonials from clients in your community who attended similar events
    • Verifiable venue experience through event-specific gallery examples
    • Transparent pricing that reflects standard Oahu market rates with no surprises
    • Accessible references you can contact directly and who understand your expectations

    Comparing costs, contracts, and convenience

    Let’s talk money and paperwork, because this is where many families and couples get surprised by out-of-state photographers. The base package price might look competitive at first glance, but local-market focus cuts travel and logistics costs and supports more consistent client relationships for photographers who stay local.

    When a photographer flies to Oahu from the mainland, those costs get passed to you. Flights, hotel accommodations, rental car, meal per diems, and sometimes even baggage fees for equipment. Add those figures to a quote and what looked affordable becomes expensive fast.

    Here’s a practical cost comparison:

    Cost category Local Oahu photographer Out-of-state photographer
    Travel fee None $500 to $1,500+
    Hotel accommodation None $150 to $400/night
    Local familiarity surcharge None Time spent scouting
    Contract disputes Easy local resolution Complicated by distance
    Follow-up for prints/albums In-person meetings available Remote only

    Review photographer contract essentials before signing anything. Local Oahu photographers operate under standard Hawaii business agreements, understand local permit requirements for beach shoots, and carry appropriate insurance recognized by island venues. Out-of-state photographers may carry coverage that your venue’s management doesn’t accept, creating a last-minute headache you didn’t expect.

    Here’s what to confirm before booking any photographer:

    1. Confirm they carry liability insurance recognized by your specific venue
    2. Clarify travel and accommodation costs in writing before signing
    3. Verify turnaround time for edited photos and albums, and confirm it’s contractually binding
    4. Ask about backup equipment and what happens if their gear fails on event day
    5. Review cancellation and rescheduling terms with Hawaii’s weather variability in mind

    Oahu families planning corporate events will find that a corporate event photography planning guide helps clarify what professional local photographers can deliver specifically for business contexts, including headshots, event coverage, and branded content creation.

    Pro Tip: Always request an itemized quote. A local photographer’s quote will rarely surprise you. An out-of-state quote that grows with add-ons is a signal to negotiate or walk away.

    Local focus fuels lasting client relationships

    Here’s something that rarely gets discussed in photography booking guides: the best event photos over your lifetime will probably come from one photographer who knows your family’s faces, understands your story, and has been there for multiple milestones. That kind of continuity is only possible with someone local.

    Local-market focus supports consistent client relationships, including repeat bookings and word-of-mouth, and builds a reputation as a trusted visual historian of the community. When your photographer shoots your daughter’s first birthday and then shows up for her quinceañera, her high school graduation, and eventually her wedding at a Kailua venue, they bring an irreplaceable visual continuity to your family’s story.

    “A photographer who has documented your family across the years doesn’t just take pictures. They understand how you laugh, how you hold each other, and what moments you’ll want to relive in 20 years.”

    Local business lead generation research consistently shows that word-of-mouth referrals from satisfied customers in tight-knit communities drive the majority of new local bookings. That means Oahu’s best photographers succeed specifically because their previous clients trust them enough to send friends and family their way. That earned trust is your clearest signal of quality.

    The advantages of building a long-term relationship with a local photographer include:

    • Consistent visual style across years of family milestones and celebrations
    • Personalized attention because your photographer genuinely knows you as a client
    • Priority booking access for peak dates during busy event seasons
    • Curated event photography shot lists built from real knowledge of your preferences and must-have moments

    The overlooked advantage: Local photographers as invested storytellers

    After more than 15 years documenting events across Oahu, from intimate birthday gatherings in Kaimuki to large-scale corporate galas in downtown Honolulu, here’s what we’ve come to believe deeply: a local photographer isn’t just technically skilled. They are invested in the story in a way that a visiting photographer simply cannot replicate.

    When you hire someone who lives on this island, whose kids go to school here, who eats at the same spots and attends the same community events as your family, you’re hiring someone with something real at stake. Their reputation lives here. Their neighbors will see those photos at the next school fundraiser. The venue manager they worked with last Saturday will remember them next month.

    This isn’t sentimentality. It’s a genuine quality driver. A photographer whose entire professional future depends on Oahu’s community word-of-mouth has every reason to pour everything into your event. Destination photographers, no matter how talented, move on to their next location. Local photographers are here for the long haul.

    The event photo and video teams that thrive in this market are the ones that treat every event as a community contribution, not just a job. They know that the photos from your company’s holiday party will be seen by employees’ families, shared on social media, and referenced for years. That awareness shapes every frame they take.

    What visiting photographers can’t replicate is the lived context of the island. The way families celebrate in Hawaiian culture. The specific light at Magic Island in late afternoon. The rhythm of a local birthday party versus a mainland-style celebration. These are things you absorb from years of being part of the community, not from a research session before a flight.

    Partner with Oahu’s local photography experts

    Your Oahu event deserves photography that reflects the spirit of the island and the people who make it special.

    https://creativemediaprod.com

    At Creative Media Productions, we’ve spent over 15 years building relationships across every corner of Oahu, from intimate family photoshoots in Kailua to large Oahu event photography projects in Waikiki and Honolulu. We understand the venues, the light, the culture, and the moments that matter most to local families and businesses. Whether you’re planning a wedding, corporate function, birthday celebration, or memorial, explore our full range of event photography types to see how we cover every occasion. Businesses can also review our dedicated corporate photography planning resources for professional, branded event coverage. Reach out today and experience what it means to work with a team that calls Oahu home.

    Frequently asked questions

    What should I ask a local photographer before booking?

    Ask about their specific experience at your venue, request full event galleries from similar celebrations, and carefully review contract terms and insurance coverage before committing.

    How do local Oahu photographers help with tricky weather or lighting?

    Local photographers understand Oahu’s microclimates and come prepared with specific backup plans, alternate locations, and timing strategies for weather shifts or harsh light conditions.

    Are local photographers more expensive than out-of-state options?

    Local photographers are typically more cost-effective overall because travel costs are eliminated, and they operate under standard Oahu contract and insurance practices without surprise add-ons.

    How important are reviews for local event photographers?

    Reviews are essential. 97% of consumers read local business reviews before booking, making verified community feedback your most reliable tool for evaluating a photographer’s track record.

    Can local photographers deliver both photo and video for events?

    Yes. Many established Oahu-based photography teams offer coordinated photo and video services under one booking, simplifying your planning and ensuring consistent visual style across all your event coverage.

  • Why hire pro photo and video for your wedding day?

    Why hire pro photo and video for your wedding day?


    TL;DR:

    • Most couples in the U.S. hire professional wedding photographers and videographers because of their ability to create emotionally resonant and consistent memories. Choosing a coordinated team enhances coverage, minimizes stress, and ensures cohesive final products, whereas hiring unconnected vendors increases risks of missed moments and mismatched styles. Investing in professional media is crucial for preserving treasured memories, as unprofessional coverage often leads to regret and incomplete storytelling years later.

    Nearly nine out of ten couples in the United States choose to hire a professional photographer for their wedding. That number alone tells you something powerful: professional wedding media is not a luxury most couples weigh against a nice centerpiece upgrade. It is a near-universal expectation. Yet many couples still walk into the planning process unsure whether quality photo and video coverage is truly worth the investment, or whether a talented friend with a good camera can get the job done. This article breaks down exactly what you gain, what you risk, and how to make the best choice for your big day in Oahu.

    Table of Contents

    Key Takeaways

    Point Details
    Professional teams deliver reliability Experienced photo and video teams work seamlessly to cover every special moment without overlap or missed shots.
    Most couples hire pros Nearly 9 in 10 couples trust professionals with their wedding memories, making it the norm rather than the exception.
    DIY risks are real Uncoordinated or amateur coverage can lead to gaps, stress, and regret over missed or low-quality moments.
    Prioritize value, not just price Choose providers based on their collaboration, style, and ability to anticipate key moments, not just cost alone.
    Ask the right questions Spend time talking to potential teams about their workflow, experience, and how they’ll handle your unique day.

    Why most couples hire pros for weddings

    The numbers behind wedding photography are striking. According to The Knot Real Weddings Study, 89% of couples hire a professional photographer and 27% hire a professional videographer for their wedding day. Those figures reflect a collective wisdom built from millions of couples who have already been through it and know what they wish they had done differently.

    Professional coverage does more than document a timeline. It creates visual memories that carry emotional weight for decades. Think about the difference between a snapshot your aunt grabbed at the reception and a perfectly timed, beautifully composed image of the two of you exchanging vows as golden Hawaiian light falls through a window. One sits in a phone album somewhere, half-forgotten. The other hangs on your wall and stops you in your tracks every time you pass it.

    Here is what couples consistently report gaining from professional photographer benefits:

    • Consistent image quality across all lighting conditions, from bright midday beach shots to low-light reception moments
    • Intentional composition that tells the story of your day rather than just documenting it
    • Coverage of emotions, not just posed shots, capturing tears, laughter, stolen glances, and spontaneous celebrations
    • Shareable, print-ready files that look stunning on screens, albums, and canvas prints
    • Professional editing that gives your photos a cohesive, polished look

    Hiring reliable wedding videographers adds another dimension entirely. Still photos freeze a moment. Video gives you back the sound of your partner’s voice cracking with emotion during vows, the laughter rippling through the crowd, and the energy of your first dance. That combination of sight and sound triggers memory in a way photos alone simply cannot replicate.

    The bottom line is that the demand for Oahu wedding media services has never been stronger, and for good reason. Couples are investing in something they will actually use and treasure, not just a line item on a vendor list.

    How photo and video teams improve your wedding experience

    There is an important distinction that many couples overlook when booking their wedding media: hiring a photo and video team that already works together is fundamentally different from booking two separate vendors who have never met before your wedding day.

    Photo and video team reviewing footage at reception

    When photographers and videographers have an established working relationship, they develop a shared rhythm. They know each other’s positioning habits, they anticipate where each person needs to be during critical moments, and they communicate without needing to disrupt what is happening in front of them. Coordinated photo and video workflow reduces on-the-day friction dramatically, making both your photos and your video feel cohesive rather than like two separate stories stitched together afterward.

    Here is a direct comparison of what you get with a coordinated team versus separate, unconnected vendors:

    Factor Coordinated team Separate vendors
    Shot positioning Pre-agreed, no blocking Potential for camera conflicts
    Communication Seamless, pre-established Requires on-day coordination
    Coverage flow Unified storytelling approach Two independent timelines
    Stress on your day Minimal, handled in advance Higher, especially if vendors clash
    Final product cohesion Photos and video match in feel Possibly mismatched styles

    Pro Tip: When you interview a potential photo and video team, ask them how many weddings they have worked together. A duo that has shot 20 or 30 events as a unit will handle unexpected moments, like a sudden rain shower or a venue lighting failure, far more smoothly than two strangers trying to collaborate under pressure.

    The event videography team approach also means your videographer knows exactly when to hold still so the photographer can capture a clean shot, and the photographer knows how to move without crossing into frame. It sounds simple, but on a busy wedding day with dozens of guests, a ceremony officiant, a floral arch, and two nervous people at the altar, that kind of coordination is genuinely hard to pull off without practice.

    “The best wedding media feels invisible on the day. You should not be thinking about where your photographers are. You should be thinking about your partner.”

    Understanding the studio team workflow before you book gives you confidence that your day will unfold naturally, without unnecessary interruptions or awkward camera moments. The professional photoshoot benefits extend far beyond technical quality. They include peace of mind, and that is priceless on your wedding day.

    It is also worth noting that lasting photo memories are significantly more durable and emotionally resonant when produced by professionals using quality equipment and archival-grade editing processes. Your photos will still look vibrant and beautiful in 30 years.

    What happens if you skip pro wedding media?

    Let’s be honest about the trade-offs. There are real reasons couples consider skipping professional photo and video coverage, and budget is usually at the top of the list. A full photo and video package can represent a meaningful percentage of your total wedding budget. But before you hand your cousin’s DSLR-toting boyfriend the keys to your memories, consider what you are actually risking.

    Here are the most common outcomes couples report when they skip professional media:

    • Missed key moments: Friends and amateurs often get caught up in the celebration itself and are not in position when critical moments happen
    • Technical failures: Incorrect exposure settings, missed focus, or inadequate equipment for low-light reception venues can ruin entire sections of coverage
    • Incomplete storytelling: Professionals know which moments to anticipate. Amateurs capture what they see, which often misses the emotional connective tissue of your day
    • No editing expertise: Raw images and unedited video look very different from professionally finished deliverables
    • Stress on your guests: Asking a friend to “handle photos” puts an unfair burden on someone who should be celebrating with you

    The photos vs video debate is real, and understanding which matters more for your specific needs is a worthwhile exercise. That said, a valuable perspective from a wedding planning resource frames it this way: videography is deeply personal, and some couples who do not typically watch home videos may not get much use from a full film. The honest advice is to think carefully about how you actually engage with visual media in your everyday life before deciding whether to prioritize photography, video, or both.

    Media type Best for Potential regret risk
    Pro photography only Couples who love still images, prints, albums Missing audio of vows and music
    Pro video only Couples who love rewatching footage Missing specific posed and candid stills
    Both photo and video Couples who want full, layered coverage Minimal, highest satisfaction rates
    Amateur/DIY Couples with very limited budgets High, particularly for missed moments

    Infographic comparing wedding photo and video options

    Knowing the best questions to ask your videographer before you book can also help you assess whether a provider’s approach genuinely fits your vision, rather than discovering a mismatch after the fact.

    Choosing the right team: What to look for

    Once you decide that professional media is the right call, and for most couples planning a wedding in Oahu, it absolutely is, the next challenge is identifying a team that will actually deliver on their promises. Here is a practical, sequential approach to evaluating your options:

    1. Review a full gallery, not just highlight shots. Anyone can pull together 20 gorgeous images for a portfolio. Ask to see a complete wedding gallery so you can assess consistency, variety, and how they handle low-light moments, group shots, and candid coverage.

    2. Confirm the team has worked together before. As established earlier, a duo with an established working relationship handles your day differently than two strangers. Ask specifically how many weddings they have shot as a unit. A photo and video duo that has already worked out shared space, timing, and movement patterns will deliver more cohesive results.

    3. Assess their communication style during the booking process. If a vendor takes five days to return an email before you have paid them, that is a strong signal about how they will communicate during the planning process and on your actual day.

    4. Ask about their contingency planning. Equipment failures happen. What is their backup gear situation? Do they have a second shooter available if a team member gets sick? Professional teams plan for this. Amateurs rarely do.

    5. Request client references, not just written reviews. A quick phone call with a past client tells you more than any star rating. Ask specifically whether the team handled unexpected challenges well and whether the final deliverables matched the initial promise.

    6. Clarify deliverable timelines. You should know exactly when to expect your photos and video after the wedding. Top-tier teams in Oahu offer clear timelines and often faster turnaround than industry averages.

    Pro Tip: Visit the Oahu wedding media packages page of any provider you are considering to see whether they offer clearly defined service tiers. Vague pricing or undefined packages can be a sign that deliverables are equally unclear.

    Our perspective: What couples often miss when choosing wedding media

    After working on hundreds of events in Oahu over more than 15 years, one pattern stands out clearly. Couples almost universally underestimate how much their wedding day memories will mean to them five, ten, or twenty years later. In the weeks before the wedding, it is easy to treat photo and video as just another vendor checkbox. Years later, those images and films become the primary way couples revisit one of the most significant days of their lives.

    The couples who express regret about their media choices almost never wish they had spent less. They wish they had spent smarter. They booked the cheapest available option, or leaned on a well-meaning friend, and ended up with photos that do not hold up to printing, video that was unusable due to poor audio, or entire stretches of their reception that simply were not captured at all.

    There is also a subtler point that rarely gets discussed. The best wedding media teams do not just document your day. They anticipate it. They know from experience that the father of the bride will need a moment alone with his daughter before the ceremony, and they are already in position when it happens. They know the lighting will shift dramatically at golden hour and have already scouted where to place you for the best possible shot. That kind of anticipatory intelligence is not something you can buy with a fancier camera. It comes from experience, from working together, and from caring deeply about the outcome.

    Planning a professional photoshoot is not just a logistical step. It is an act of respect for your own story. Treat it that way, and you will make better decisions throughout the entire booking process.

    Let the right Oahu team capture your big day

    If this article has helped clarify what real professional wedding media looks like and why it matters so much, the next step is finding the right team for your specific vision and venue.

    https://creativemediaprod.com

    Creative Media Productions has been serving couples across Oahu for over 15 years, with deep experience shooting weddings in Honolulu, Waikiki, Kailua, and beyond. Our photo and video teams work together seamlessly, so you never have to worry about coverage gaps, clashing vendors, or missed moments. Whether you are still weighing which wedding media fits your needs or you are ready to explore full packages, we would love to help you plan coverage that truly honors your day. Visit our Oahu wedding media packages page or connect with our event photographer Oahu team to start the conversation.

    Frequently asked questions

    Is professional wedding photography really worth it?

    With 89% of couples hiring a professional photographer, most find it invaluable for preserving memories that simply cannot be recreated. The emotional value alone tends to far outweigh the cost over time.

    Should we hire photo and video from the same team?

    A unified photo and video team coordinates coverage far more effectively than separate vendors, reducing the risk of missed moments, conflicting positions, and mismatched final styles.

    What if we have a tight wedding budget for media?

    Focus your investment on what you will genuinely use and revisit. Many couples prioritize professional photography and then make informed trade-offs around video add-ons or coverage hours to stay within budget without sacrificing core quality.

    What risks do we take if we let a friend handle photos?

    Without professional skills and day-of coordination, you risk missing critical moments, poor image quality in challenging lighting, and on-the-day friction that a trained team would handle seamlessly. Friends also carry the unfair burden of working instead of celebrating with you.

  • 8 Wedding Storytelling Film Examples

    8 Wedding Storytelling Film Examples

    Some wedding films look beautiful for five minutes and then blur together. The ones people rewatch on anniversaries usually do something more precise – they tell a story with intention. If you are searching for wedding storytelling film examples, it helps to look beyond pretty shots and study how a film creates emotion, rhythm, and meaning from a real day.

    A strong storytelling film does not just document events in order. It shapes a narrative around the couple, the people around them, and the atmosphere of the celebration. That can be quiet and intimate, editorial and polished, or energetic and cinematic. The best approach depends on the wedding, the personalities involved, and what the couple wants to feel when they press play years later.

    What makes wedding storytelling films work

    Story-driven wedding films are built on choices. The videographer decides what the emotional thread is, which voices carry the story, and how much space to give key moments. A polished film can still feel flat if it is all visuals and no emotional anchor. On the other hand, even a simple film can feel powerful if the audio, pacing, and structure are handled with care.

    Most effective storytelling films rely on a few core elements. Natural audio matters more than many couples expect. Vows, letters, speeches, laughter, ambient sound, and small unscripted exchanges give the visuals weight. Structure matters too. The film does not need to follow the day minute by minute, but it should feel guided rather than random. Finally, coverage matters. If the team misses emotional reactions, family interactions, or transitional moments, the final edit has less to work with.

    Wedding storytelling film examples worth studying

    1. The vow-led narrative film

    This is one of the most reliable wedding storytelling film examples because it gives the edit a built-in emotional spine. The film opens with either private vows or letters read during getting ready. Those words then continue over preparations, first look footage, ceremony details, and reception highlights.

    What makes this style work is contrast. You hear deeply personal audio while seeing the scale and beauty of the day unfold. It feels cinematic, but still grounded in the couple’s real voice. The trade-off is that it depends heavily on clean audio capture and a couple comfortable expressing themselves out loud.

    2. The chronological documentary-style film

    Some couples do not want a heavily stylized edit. They want the day to feel honest, clear, and emotionally complete. In that case, a chronological storytelling film can be the better fit. It starts in the morning, builds naturally through the ceremony, and lands in the energy of the reception without forcing too much editorial manipulation.

    This format works especially well for larger weddings with lots of family presence and cultural or religious traditions. It preserves context. The challenge is pacing. Without careful editing, a chronological film can feel long or repetitive. With the right discipline, though, it feels elegant, immersive, and true to the day.

    3. The speech-driven reception story

    Sometimes the strongest narrative does not come from vows at all. It comes from toasts. Parents, siblings, and best friends often reveal details about the couple that no shot list can capture. A speech-driven film uses those words to shape the emotional rise of the edit.

    This style often works well when the reception is a major emotional centerpiece. You might hear a father’s toast over the bride getting ready, then a best man’s speech over cocktail hour and dance floor footage. When done well, it gives the wedding film personality and depth. It depends, of course, on strong speakers and a sound team that captures every word clearly.

    4. The location-forward cinematic story

    For destination weddings or visually rich settings, the location can become an essential character in the film. On Oahu, for example, ocean light, mountain backdrops, wind, movement, and golden-hour transitions can shape the tone of the entire edit. In a location-forward film, the place is not just decoration. It supports the story of why this wedding happened here and what the setting meant to the couple.

    The risk is obvious. Some films lean so far into scenery that the couple becomes secondary. The strongest versions balance both. They use establishing shots, natural sound, and environmental movement to create atmosphere, while keeping people and emotion at the center.

    5. The quiet, intimate micro-wedding film

    Not every wedding story needs grand pacing. A micro-wedding or elopement film often benefits from restraint. This kind of edit uses fewer clips, longer holds, softer audio moments, and a more reflective structure. Instead of trying to manufacture scale, it leans into closeness.

    These films are effective because they match the event. A small ceremony with immediate family, handwritten vows, and a private dinner should not be edited like a packed ballroom celebration. Good storytelling respects tone. When the coverage team understands that, the finished film feels premium, personal, and honest rather than overproduced.

    6. The dual-perspective love story

    In this format, the film introduces each partner separately before weaving them together. You might hear the groom reading a letter while seeing the bride with her family, then hear the bride’s voice over the groom preparing with his side. The story converges at the first look or ceremony.

    This is one of the most cinematic wedding storytelling film examples because it creates anticipation. It also works well for couples who want equal emotional focus rather than a film centered mostly on one side of the day. The key is balance. If one partner has stronger audio or more dynamic footage, the editor has to shape the film carefully so it still feels unified.

    7. The family-centered legacy film

    Some wedding films are really about more than the couple alone. They become a record of generations gathering in one place. Grandparents, children, cultural rituals, family prayers, and reunion-style moments carry as much emotional value as the kiss or first dance. A legacy film recognizes that and builds the story around connection across the whole family.

    This format is especially meaningful for multicultural weddings or celebrations where tradition has a central role. It asks more from the videography team because those moments can be subtle and easy to miss. But when captured well, the result feels timeless. It becomes a family document as much as a wedding film.

    8. The short highlight with a clear narrative arc

    Not every storytelling film needs to be long. A four- to six-minute highlight can still have a beginning, middle, and emotional payoff. The strongest short films establish the couple quickly, build tension or anticipation, and finish with a sense of release – often through the ceremony, sunset portraits, or the first dance.

    This style is popular because it is easy to share and easy to revisit. But short does not mean simple. It requires very selective editing. Every shot has to earn its place, and the audio has to guide the viewer fast. When the pacing is right, a short highlight can feel more memorable than a much longer film.

    How to evaluate wedding storytelling film examples

    When couples watch sample films, many focus first on visuals. That makes sense, but it only tells part of the story. Look at whether the film helps you understand who the couple is. Notice whether the pacing holds your attention. Pay attention to audio quality, transitions between scenes, and whether important people are meaningfully included.

    It also helps to ask what is missing. Does the film only show staged portraits and decor, or does it include reactions, nerves, laughter, and in-between moments? Does the emotion feel earned, or is it mostly music doing the work? A premium wedding film should feel crafted, not generic.

    For couples planning in Hawaii, this matters even more because beautiful scenery can disguise weak storytelling. A sunset on the beach will always look good. The real difference is whether the film captures your personalities, your people, and the atmosphere of your day with precision.

    Choosing the right film style for your wedding

    The right storytelling approach depends on your priorities. If your vows are deeply personal, build around audio. If your family traditions are central, make sure coverage allows time and attention for those moments. If you are hosting a lively celebration, you may want a film that moves with more energy and rhythm.

    This is where planning matters. An experienced team will ask how you want the film to feel, what moments matter most, and what kind of pace suits your event. That conversation can prevent a mismatch between your expectations and the final edit. A polished film is not only about camera quality. It is about preparation, timing, and knowing how to capture the right moments without disrupting them.

    At Creative Media Production LLC, that balance between cinematic quality and dependable service is what gives a wedding film lasting value. Great storytelling is creative, but it is also operational. Clean audio, punctual coverage, thoughtful shot planning, and fast turnaround all shape the final experience.

    When you watch wedding film examples, trust your emotional response but also pay attention to the craft behind it. The film you love most will usually be the one that feels true, well-paced, and unmistakably personal – the kind you still want to watch long after the flowers, table settings, and timeline have faded from memory.

  • Event photography tips for graduates: Capture your best moments

    Event photography tips for graduates: Capture your best moments


    TL;DR:

    • Preparation, proper gear, and scouting venues are crucial for capturing high-quality graduation photos.
    • Mastering Hawaii’s indoor and outdoor lighting conditions enhances image clarity and emotional impact.
    • Following a professional workflow and planning group shots ensures a complete, memorable graduation gallery.

    Graduation day arrives once, and blurry, poorly lit photos are a real heartbreak when you look back years later. Whether you’re walking across the stage at a university in Honolulu or celebrating with family at a beach party in Kailua, the difference between forgettable snapshots and images you’ll frame on your wall comes down to preparation, technique, and timing. This guide breaks down exactly what you need to know, from camera gear to posing strategies, so you can capture every emotional, joyful moment of your milestone with the quality it deserves.

    Table of Contents

    Key Takeaways

    Point Details
    Dual camera setup Using a wide-angle and telephoto lens guarantees you capture both sweeping scenes and close-up moments.
    Lighting mastery Knowing when and how to use high ISO, fast shutter speeds, and golden hour lighting prevents blurry or harsh images.
    Essential shot list Aisle, handshake, family hug, and candid reactions tell a meaningful graduation story.
    Group photo tips Staggered heights and dynamic movements make group portraits look natural and fun.
    Pro workflow advantage Applying pre-event scouting and organized shot lists elevates your photos from casual snapshots to treasured keepsakes.

    Gear and prep: What you need before the ceremony

    Having the right tools before the big day is more important than any single technique you’ll use during it. Think of it this way: even the best chef can’t cook a great meal without the right ingredients in the kitchen.

    Camera and lens selection

    A two-body setup with one wide-angle and one telephoto lens gives you the flexibility to capture both sweeping scene shots and tight, emotional close-ups without missing moments while fumbling with gear. The wide-angle lens (roughly 24mm to 35mm) handles group shots, venue context, and candid scenes. The telephoto lens (70mm to 200mm range) gets you close to the stage handshake, the tassel flip, and that priceless look on a parent’s face from across the room.

    Infographic comparing dual camera and single zoom setups

    If you’re working with just one camera, use a versatile zoom lens in the 24mm to 105mm range. It won’t give you the same reach as a dedicated telephoto, but it’s far better than switching lenses mid-ceremony and risking a missed shot.

    Outfit and prop prep

    Steam your outfit the night before and choose neutral tones such as white or black that complement your gown without clashing. Bring a touch-up kit (powder, lip balm, a small brush), and pack props like confetti, your diploma, or a meaningful accessory that tells your personal story. For more detailed guidance on outfit selection and what reads well in photos, check out these graduation outfit tips that apply directly to grad portraits.

    Scouting your venue

    Walk the ceremony venue at least once before the day itself. Look for where the light falls during the time your event starts, identify any columns or obstructions that might block key sightlines, and figure out parking so you’re not rushing in stressed. Stress translates into rushed, unfocused shooting.

    Pro Tip: Avoid using flash during the ceremony. Flash draws attention, can disrupt the event, and often creates flat, unflattering light. Instead, rely on your camera settings to handle available light, which we’ll cover in the next section.

    Gear item Purpose Recommended spec
    Wide-angle lens Group and venue shots 24mm to 35mm
    Telephoto lens Stage and close-up moments 70mm to 200mm
    Extra batteries Avoid power loss mid-event Two minimum
    Memory cards Backup storage Two 64GB minimum
    Touch-up kit Outfit and appearance refresh Powder, brush, lip balm
    Props Personalization Diploma, confetti, flowers

    Lighting and timing: Mastering Hawaii’s indoor and outdoor conditions

    With your prep ready, perfecting your lighting and timing is the next critical step in creating great images. Hawaii’s natural light is genuinely stunning, but it also creates unique challenges that catch many photographers off guard.

    Indoor ceremony settings

    Most university auditoriums and event halls in Hawaii use fluorescent or mixed artificial lighting, which can cast a yellow or green tint on skin tones. For indoor low-light shooting, set your ISO between 3200 and 5000, use a wide aperture of f/2.8, and keep your shutter speed between 1/150 and 1/800 of a second to freeze movement without blur. These settings work together to let in enough light while keeping your subject sharp even when they’re moving.

    Silent shutter mode (available on most modern mirrorless cameras) is another tool worth using in quiet ceremony moments. It lets you fire off shots without the mechanical “click” that can turn heads and disrupt the atmosphere. For more on working with challenging indoor environments, explore these low-light photography tips that translate directly to graduation settings.

    Outdoor portrait sessions

    Hawaii’s golden hour, the 60 to 90 minutes after sunrise or before sunset, is the single best time to schedule outdoor graduation portraits. The light is warm, directional, and flattering, which means less editing work later. As outdoor lighting research shows, shooting during golden hour or in open shade avoids the harsh midday shadows that fall directly under the brim of graduation caps, effectively hiding the graduate’s eyes in shadow.

    Open shade is any shaded area where the sky still serves as your light source. Think of standing under a large tree near a bright open field. You get soft, even light without the squinting and harsh shadows that direct midday sun creates.

    Pro Tip: Try your camera’s silent shutter mode during quiet moments of the ceremony like speeches and the processional. You’ll capture more genuine, unposed expressions when people forget the camera is there.

    Shooting condition ISO Aperture Shutter speed
    Bright outdoor midday 100 to 200 f/8 to f/11 1/500 to 1/2000
    Golden hour outdoor 200 to 400 f/2.8 to f/4 1/250 to 1/500
    Open shade outdoor 400 to 800 f/2.8 to f/4 1/125 to 1/250
    Indoor fluorescent 3200 to 5000 f/2.8 1/150 to 1/800

    For a deeper look at how lighting choices shape the entire feel of an event, the principles behind event lighting mastery apply directly to graduation photography decisions.

    Essential shots: Don’t miss the big and emotional moments

    With your lighting and timing mastered, here’s what to focus on for capturing the moments that matter most. A strong graduation gallery tells a complete story from anticipation to celebration.

    Ceremony must-haves

    The core ceremony shots that every graduation gallery needs include:

    1. The aisle walk – Capture the graduate processing in with full regalia, ideally from slightly to the side to show both face and movement.
    2. The stage handshake – Position yourself where the graduate’s face is visible when they receive the diploma, not just the back of their head.
    3. The tassel flip – This is a split-second moment, so use burst mode (continuous shooting) to catch every frame.
    4. Crowd reactions – Parents tearing up, siblings cheering, friends waving from the stands. These are gold.
    5. Family hugs after the ceremony – The relief and joy on everyone’s face right after the ceremony ends is raw and genuine.

    Detail shots that tell the story

    Don’t skip the small stuff. A close-up of the diploma against the gown, a shot of the decorated cap, the tassel on its own, a hand holding the degree. These images might seem minor, but they anchor the larger emotional story of the day.

    Graduation cap, diploma, and lei detail

    Candid emotional moments

    Candid reactions and emotional moments alongside posed shots create the emotional storytelling that makes a gallery feel alive. Parents tearing up, friends embracing, a quiet moment of a graduate looking out at the venue before the ceremony starts. These aren’t shots you can plan. They’re shots you have to be ready for. For guidance on building a structured approach to these moments, a solid graduation portrait session or a detailed shot list approach helps you stay organized without becoming rigid.

    Pro Tip: Use your camera’s burst mode (continuous shooting) for the tassel flip, diploma handshake, and any moment where the graduate is in motion. Shoot five to ten frames per second and pick the sharpest, most expressive image afterward.

    For capturing those raw, unscripted moments throughout the day, the techniques behind candid event photography translate beautifully to graduation settings where real emotion is always close to the surface.

    Group dynamics and posing: Get everyone looking their best

    Once individual moments are captured, mastering group shots adds variety and energy to your graduation gallery. Group photography is genuinely one of the hardest things to do well, and it’s also where most amateur photographers lose control of the moment.

    Height staggering and positioning

    For group photos, stagger heights by placing taller individuals at the back and shorter people at the front. This creates a natural visual hierarchy and ensures every face is visible in the frame. Avoid flat, straight lines where everyone stands side by side at exactly the same distance from the camera.

    Adding movement and energy

    Encourage the group to lean in toward the camera, jump on the count of three, throw confetti, or simply walk toward the lens together. Movement kills stiffness. Even a slight lean forward from the back row changes the energy of the entire image. These dynamic approaches to event group shots are what separate lively, memorable galleries from collections of static lineups.

    Props and personalization

    Matching accessories, school colors, meaningful objects, or even just coordinated outfits add personality to group images. You don’t need to be overly formal. Some of the best graduation group shots look more like a celebration than a posed portrait because they capture who the people actually are.

    Key tips for smooth group organization:

    • Assign one trusted person (a sibling, close friend, or partner) as your “group coordinator” to help gather and position people quickly
    • Announce each group shot in advance so people know when they’re needed
    • Shoot each group combination at least three times to guarantee at least one sharp, eyes-open frame
    • Keep the session moving briskly, especially with elderly relatives or young children who lose patience fast

    Pro Tip: Plan your group shot order from largest group to smallest. Start with the biggest family configuration when everyone is fresh and present, then work down to smaller, more intimate combinations. People naturally drift away as time goes on, so capture the hardest shots first.

    Studies consistently show that group photos taken within the first 30 minutes after a ceremony end capture the highest percentage of all invited guests, since people haven’t yet left to find parking or head to restaurants.

    Why pro workflow makes a difference in graduation photos

    Here’s an honest truth that most photography guides skip: the gap between a good graduation photo and a great one is rarely about camera brand or lens price. It’s almost entirely about workflow, which means the decisions made before, during, and after the shoot.

    Professional photographers who cover graduation events don’t arrive and improvise. They scout the venue days in advance. They build a shot list tailored to that specific ceremony layout. They prepare two camera bodies so a battery failure or memory card error never costs them a critical moment. They understand the lighting at 10am versus 2pm at that specific venue. This advance preparation is what allows them to be present and reactive during the event itself, rather than problem-solving.

    The dual camera setup is a perfect example of workflow thinking in action. Switching lenses mid-ceremony takes 30 to 60 seconds. The diploma handshake happens in under 10 seconds. If you’re fumbling with a lens, you simply miss it. Two bodies eliminate that risk entirely. Amateurs can apply exactly this kind of workflow thinking by preparing checklists, creating shot lists, assigning helpers, and scouting locations in advance, all before picking up a camera.

    The other thing professionals do well is capture reactions, not just actions. The graduate walking across the stage is the action. The parent grabbing their partner’s arm in excitement at that exact moment is the reaction. Both together make the story complete. Developing the habit of constantly scanning for reactions while the main event unfolds is a skill worth practicing at any event, not just graduation.

    If you’re curious about how this kind of structured, professional approach translates to every type of celebration, the principles behind a solid event photography workflow are directly applicable to graduation day and well worth exploring before you shoot.

    Connect with Hawaii’s event photography experts

    You now have the tools, the settings, and the strategies to shoot graduation photos that genuinely tell the story of this milestone. But sometimes knowing all the right techniques and executing them flawlessly in a fast-moving, emotionally charged ceremony are two very different things.

    https://creativemediaprod.com

    That’s where a seasoned local professional makes all the difference. At Creative Media Productions, we’ve spent over 15 years capturing milestones across Oahu, from Honolulu to Kailua to Waikiki, and we know exactly how to handle every lighting scenario, venue layout, and family dynamic Hawaii throws at us. Explore the full range of event photography services we offer, or connect directly with an experienced Oahu graduation photographer who can make sure every moment of your ceremony is documented with the care and quality it deserves.

    Frequently asked questions

    What camera settings are best for indoor graduation ceremonies?

    Use high ISO 3200 to 5000, a wide aperture of f/2.8, and a fast shutter speed between 1/150 and 1/800 of a second to produce sharp, well-exposed images in dim or fluorescent-lit venues.

    What time of day is ideal for Hawaii graduation photos outdoors?

    Golden hour or later afternoon delivers soft, warm, directional light that is far more flattering than harsh midday sun, which creates deep cap shadows over the graduate’s face.

    How can I organize large family and group graduation shots?

    Stagger heights with taller people in the back, encourage natural movement like leaning in or jumping, and assign a trusted helper to gather groups quickly between each configuration.

    What props or accessories help create unique graduation photos?

    Bring confetti, diplomas, and touch-up kits to add personality and polish, keeping shots feeling celebratory and personal rather than stiff or generic.

  • How photographers capture graduation milestones in Oahu

    How photographers capture graduation milestones in Oahu


    TL;DR:

    • Professional graduation photographers on Oahu handle challenging lighting, crowds, and weather with advanced planning and technical skill. They scout venues, establish shot lists, use preset white balance, and capture emotional moments to create lasting family memories. Unlike casual snapshots, their work emphasizes storytelling, cultural details, and expert execution for this significant milestone.

    Graduation is one of those rare moments your family will talk about for decades, yet most people assume a phone camera and a willing relative is all it takes to document it properly. That assumption costs families more than they realize, especially on Oahu, where outdoor ceremonies, unpredictable trade winds, and packed venues create conditions that quickly expose the gap between casual snapping and real professional skill. This article breaks down exactly what a graduation photographer does, why their work is far more demanding than it looks, and how understanding their process helps you make a smarter decision for one of the most important days in your graduate’s life.

    Table of Contents

    Key Takeaways

    Point Details
    Preparation is everything Photographers scout locations and prep equipment before ceremonies to overcome Oahu’s unique challenges.
    Lighting matters most Expert handling of lighting makes graduation photos stand out, especially in gyms or outdoors.
    Skill beats luck Professional techniques ensure memorable, high-quality photos even amidst chaos.
    Local expertise counts Oahu photographers understand island traditions, venues, and weather patterns better than outsiders.
    Hiring a pro preserves memories A skilled photographer turns graduation moments into lasting family treasures, not just snapshots.

    Why photographers are essential at graduation ceremonies

    There is a common belief that graduation photos are “just snapshots.” Point the camera at the stage, press the button, done. But anyone who has attended a University of Hawaii at Manoa outdoor commencement, a crowded McKinley High gymnasium ceremony, or a seaside graduation at one of Oahu’s many community colleges knows that reality is far messier and far more beautiful than a simple snapshot can capture.

    Graduation represents years of effort, late nights, family sacrifice, and individual growth. The photographs from that day become the visual record of all of it. Decades from now, those images are what your graduate’s children and grandchildren will hold. That weight is not something a hasty phone photo carries well.

    “A great graduation photo does not just show a student receiving a diploma. It shows the moment a family exhales with pride.”

    Professional photographers understand this emotional significance and plan their entire approach around it. They think about which parent’s face to catch when the name is called, how to frame the diploma handshake so it feels triumphant rather than bureaucratic, and how to document the spontaneous tearful embrace after the recessional.

    The obstacles are real and serious. Challenging lighting, crowds, unpredictable weather, and the sheer chaos of post-ceremony celebrations are constant threats to image quality. Indoor gyms throw harsh fluorescent light that turns skin tones greenish and creates unflattering shadows. Outdoor ceremonies on Oahu’s beautiful but sun-drenched campuses create intense midday contrast that blows out backgrounds and silhouettes faces. Crowds shift, tall relatives block sightlines, and the ceremony rarely pauses for anyone to reposition.

    Key obstacles graduation photographers on Oahu regularly navigate include:

    • Fluorescent or mixed artificial lighting in indoor venues
    • Harsh midday sun at outdoor ceremonies near the water
    • Competing family members blocking key sightlines
    • Sudden weather changes, including rain and strong trade winds
    • The fast, unpredictable movement of post-ceremony crowd celebrations
    • Multiple graduates with families who all want personalized shots

    As a trusted graduation photographer overview resource confirms, solving these problems requires preparation, positioning, and practiced technical skill, not luck.

    Skills and strategies used by professional graduation photographers

    Understanding the obstacles is one thing. Knowing how professionals solve them is what separates a confident photographer from a frustrated one. Skilled photographers do not simply show up and hope for the best. They build a deliberate strategy that covers every phase of the event.

    Pre-scouting locations is one of the most underappreciated skills in graduation photography. A photographer who has never visited the venue before the ceremony is already behind. On Oahu, venues range from open-air amphitheaters where natural light shifts rapidly throughout the afternoon to tightly packed indoor halls where available positions are extremely limited. Scouting gives photographers a mental map of where to stand, where not to stand, and how to move efficiently when the action speeds up.

    Here is how professional photographers approach graduation events from start to finish:

    1. Scout the venue in advance to identify lighting conditions at the time of the ceremony and map out optimal shooting positions.
    2. Review the ceremony program to understand the order of events, so no key moment is missed while repositioning.
    3. Arrive at least 60 to 90 minutes early to secure the best angles before family members and other photographers fill the space.
    4. Set white balance presets matched to the specific lighting conditions of the venue, whether fluorescent, daylight, or mixed.
    5. Use golden hour or open shade for any outdoor portraits before or after the ceremony to ensure flattering, even light.
    6. Maintain multiple vantage points by moving between the processional aisle, stage area, and family seating sections.
    7. Stay alert during post-ceremony chaos to capture unscripted emotional moments before they pass.

    White balance presets and early arrival are two of the most cited professional techniques for handling the mixed lighting challenges common at graduation venues, and they are exactly the kind of detail a casual photographer never considers.

    Pro Tip: If you are booking a photographer for an outdoor Oahu ceremony, ask them specifically how they plan to manage midday sun. A confident pro will describe their scouting process and mention strategies like positioning graduates in open shade or scheduling portraits during the golden hour window just before sunset.

    Understanding how lighting works in real event conditions is a deep skill. Our guide to mastering event lighting goes into detail about why this makes such a significant visual difference in the final images. For ceremonies that run into late afternoon or early evening, the strategies covered in our low light photography tips resource are equally relevant.

    Planning a detailed shot list planning framework is another hallmark of professional practice, ensuring nothing important gets overlooked in the rush of the day.

    A photographer’s workflow: Before, during, and after the graduation

    Breaking down the photographer’s work into three stages makes it easier to appreciate how much thought goes into what looks effortless in the final gallery.

    Photographer prepares camera gear before graduation

    Before the ceremony, the photographer functions almost like a project manager. Equipment is checked and double-checked. Batteries are fully charged, memory cards are formatted, and backup gear is packed. The venue has been scouted. A shot list has been built in collaboration with the family, covering must-have moments and any special requests, like a three-generation family portrait or a specific group photo with a beloved teacher.

    Stage Key responsibilities Common challenges
    Pre-ceremony Scouting, equipment prep, shot list Venue access, lighting unknowns
    Ceremony Processional, diploma moment, reactions Crowds, poor positioning, speed
    Post-ceremony Group photos, candid celebrations Chaos, scattered families, fading light

    During the ceremony, the photographer works almost invisibly. The goal is to document without disrupting. This means anticipating moments before they happen, like watching a parent’s face carefully during the graduate’s name announcement rather than focusing solely on the stage. Multiple vantage points and pre-arrival scouting give the photographer the flexibility to cover the processional from one position and the diploma handshake from another without missing either.

    After the ceremony is where post-ceremony chaos becomes the central challenge. Families scatter, graduates cluster in groups, and the lighting rapidly changes if the event runs late. A skilled photographer manages this by having a pre-planned sequence for group shots, moving efficiently from the nuclear family portrait to the extended family gathering to friend group photos, before the moment slips away.

    Key post-ceremony priorities include:

    • Immediate family portrait before guests disperse
    • Graduate with each parent individually
    • Sibling and extended family groupings
    • Friend group shots and candid celebration moments
    • Detail shots: lei, diploma, cap and gown, campus landmarks

    Using a smart event shot lists approach and experience with senior portraits on Oahu both contribute to capturing a complete visual story, not just a handful of lucky shots.

    Professional vs. amateur graduation photography: Why skill matters

    The difference between professional graduation photography and a well-meaning family member with a nice camera is not about equipment alone. It is about judgment, preparation, and consistency under pressure.

    Factor Professional photographer Casual photographer
    Lighting management White balance presets, scouting, shade techniques Auto mode, available light only
    Positioning Secured early, multiple angles planned First available spot, fixed position
    Shot list Pre-built, discussed with family Improvised on the day
    Post-processing Color correction, culling, professional editing Basic filters or unedited
    Handling chaos Systematic post-ceremony sequence Follows the crowd
    Emotional awareness Anticipates reactions, captures context Reacts to obvious moments
    Delivery Organized gallery, consistent quality Mixed results, high volume of unusable shots

    The storytelling ability of an experienced photographer is the most undervalued difference on that list. A professional does not just document what happened. They create a visual narrative that shows how it felt. The nervous smile during the processional. The shaking hands receiving the diploma. The tearful laugh shared between a graduate and their grandmother immediately afterward.

    Infographic comparing pro and amateur graduation photography

    Challenging lighting, crowds, and post-ceremony chaos are consistent features of graduation events that professionals train to handle and casual photographers discover too late they cannot manage.

    Pro Tip: When reviewing a photographer’s portfolio, look specifically for images from ceremony venues similar to yours. If their portfolio shows beautiful outdoor beach portraits but nothing from an indoor auditorium or crowded ceremony stage, ask pointed questions about their experience in those specific conditions.

    Professional equipment also plays a meaningful role. Long telephoto lenses allow photographers to capture intimate stage moments from the family seating section without disrupting the ceremony. Fast lenses with wide apertures perform significantly better in dim indoor venues. These are tools a casual photographer simply does not carry, and their absence shows in the final images.

    When evaluating graduation photo quality for your specific needs, reviewing sample galleries from similar events is the single most reliable way to assess whether a photographer can deliver what you are hoping for.

    The real value: Why graduation photographers in Oahu make memories last

    Here is something most articles about graduation photography will not tell you directly: the photographs matter more to the family than they do to the graduate, at least at first.

    The graduate is living the experience in real time. But the parents, grandparents, and siblings are watching it happen from a distance, and photographs become the way they hold onto it. We have seen this pattern consistently across hundreds of events over more than 15 years of working with Oahu families. The graduate looks back fondly at the images years later. The parents treasure them immediately and deeply.

    This is why the emotional awareness of a photographer is not a soft skill. It is the core competency. Technical excellence handles the light and the focus. Emotional awareness decides where to point the camera at the precise second that matters.

    Oahu’s culture adds another layer that outsiders often miss. Lei presentations are a beloved local tradition, and the moment when a graduate is adorned by family members carries tremendous cultural weight. The specific gesture of a grandparent placing a ti leaf lei over a graduate’s head deserves the same careful framing as the diploma handshake. A photographer with genuine local experience understands this instinctively. One who is unfamiliar with local traditions may miss it entirely.

    An event photographer expertise shaped by years of working specifically in Hawaii recognizes these moments and prioritizes them. Local graduation photographers who are embedded in the community bring cultural fluency that no amount of technical skill can fully substitute.

    The uncomfortable truth about graduation photography is that most families do not realize what they missed until they see someone else’s gallery from the same event. By then, the moment is gone. That realization is what drives so many families to prioritize professional photography the second time around, for a sibling’s graduation or the next milestone event.

    Connect with expert graduation photographers in Oahu

    Your graduate worked years for this moment, and your family deserves photographs that genuinely capture what that achievement means.

    https://creativemediaprod.com

    At Creative Media Productions, we bring over 15 years of local Oahu experience to every graduation we cover. We know the venues, we understand the traditions, and we build detailed shot lists around what matters most to your family. Explore our types of event photography to see the full range of what we offer, connect with our Oahu event photographer team to discuss your specific ceremony, or browse our dedicated graduation photography services page to view sample galleries and package options. We would love to help your family hold onto this moment the right way.

    Frequently asked questions

    What should I look for when hiring a graduation photographer in Oahu?

    Choose a photographer with local venue experience, a portfolio that shows work from similar ceremonies, and proven strategies for challenging lighting, crowds, and chaos. Ask about their scouting process and how they handle post-ceremony group photos.

    How do photographers handle difficult lighting at graduation venues?

    Professionals use white balance presets calibrated to the venue’s specific lighting conditions, and they scout locations in advance to identify the best positions using golden hour light or open shade for outdoor portraits.

    Can a photographer capture both posed and candid graduation moments?

    Yes. Skilled photographers build a structured shot list for posed portraits while staying alert to post-ceremony spontaneous moments, ensuring both planned and unscripted images are part of the final gallery.

    How early should a photographer arrive at a graduation ceremony?

    Arriving early for positioning is essential. Most professionals aim to arrive 60 to 90 minutes before the ceremony begins, allowing time to scout the venue, set up equipment, and claim the best vantage points before the space fills with guests.

  • How to Plan an Event Recap Video for Social Media

    How to Plan an Event Recap Video for Social Media

    Some of the best event moments are over in seconds – the welcome hug, the keynote applause, the packed dance floor, the quick reaction after a big announcement. If you want those moments to keep working after the event ends, an event recap video for social media needs more than random clips stitched together. It needs a clear story, clean execution, and a plan built before the first guest arrives.

    For brands, couples, families, and community organizers, that matters for different reasons. A corporate team may need content that supports promotion and internal marketing. A wedding couple may want something emotional and easy to share with loved ones. A family hosting a milestone birthday may care most about authentic reactions and the energy of the room. The format changes, but the goal stays the same – create a short, polished video that feels true to the event and strong enough to post with confidence.

    What makes an event recap video for social media work

    A strong recap video does two jobs at once. First, it preserves the feeling of the event. Second, it turns that feeling into content people will actually watch on their phones.

    That sounds simple, but it is where many recap videos fall short. If the video is too slow, viewers scroll away. If it is too focused on visual effects, the event can feel generic. If it misses key people, brand details, or emotional beats, it may look polished but still feel incomplete.

    The best social recap videos are selective. They do not try to document every minute. They highlight the moments that represent the full experience – the setup, the arrivals, the details, the interactions, the peak moments, and the close. Even in a 30 to 60 second edit, viewers should understand what happened and what it felt like to be there.

    Start with the purpose before the camera rolls

    The quality of the final video usually depends on decisions made well before the event begins. That is why pre-event planning matters so much.

    If the video is for a corporate event, the priorities may include sponsor visibility, branded signage, crowd energy, speaker coverage, and strong shots of networking. If the event is a wedding, the priority may shift toward emotion, atmosphere, family connection, and cinematic detail shots. For birthdays, graduations, and family gatherings, the strongest recaps usually center on personality rather than formality.

    This is also where platform use should be discussed. A vertical edit for Instagram Reels or TikTok is not framed the same way as a horizontal video intended for a website or presentation screen. Trying to force one set of footage into every format can work, but it often creates compromises. When the shooting plan matches the delivery format, the final result feels much more intentional.

    A professional production team will usually ask the right questions early. What is the main message? Who needs to appear on camera? What moments cannot be missed? What kind of pace should the edit have? Those answers shape everything from camera placement to clip selection.

    The footage matters more than the effects

    Editing can improve a video, but it cannot replace missing moments. If the footage is weak, the recap will feel weak no matter how polished the graphics are.

    A good event recap video for social media depends on coverage that is both wide and specific. Wide shots establish the setting and scale. Medium shots show interaction. Tight shots capture emotion, texture, and movement. You need all three to create rhythm.

    That rhythm is what gives a recap its professional feel. A sequence might move from venue signage, to guests arriving, to hands clapping, to a speaker on stage, to audience reactions, to branded details, to a final crowd moment. None of those shots is complicated on its own. What matters is getting them cleanly and at the right time.

    Lighting, audio awareness, and timing also play a major role. Indoor ballrooms, outdoor ceremonies, and fast-moving receptions all create different shooting challenges. Experienced event videographers know how to adapt quickly without slowing down the event itself. That is especially important when clients want a stress-free experience and still expect premium results.

    Social media recaps should be short, but not rushed

    Short-form video has changed audience expectations. People want quick pacing, but they still want clarity. That creates an important balance.

    A recap that moves too slowly loses attention. A recap that cuts too fast can feel chaotic and disposable. The right pacing depends on the event. A high-energy product launch can support faster edits and punchier music choices. A wedding or memorial may need a more measured pace to preserve dignity and emotional weight.

    This is one of those areas where “more exciting” is not always better. A respectful event should still feel respectful in the edit. A luxury event should feel refined, not frantic. A family celebration should feel warm and genuine, not over-produced.

    Strong pacing comes from contrast. Quiet details followed by crowd energy. A reaction shot after a main moment. A quick build that leads to the event’s peak. Those choices make a short video feel complete instead of random.

    What to include in a recap video

    Every event is different, but most social recaps benefit from a few core ingredients. They should show where the event happened, who was there, what made it special, and why the moment mattered.

    For corporate events, that often means venue branding, guest interaction, speakers, activations, and applause moments. For weddings, it may mean the setting, the vows, close family reactions, and reception highlights. For community events, visuals of participation and atmosphere often matter just as much as formal programming.

    Details also do more work than many clients expect. Floral arrangements, table settings, signage, stage design, printed materials, food presentation, and photo booth activity all help establish the quality and personality of an event. In social video, those visual details often create the polish viewers notice first.

    At the same time, not every moment belongs in the final cut. A recap is not a full documentary. It should be curated. The discipline to leave out repetitive or weaker shots is part of what makes a video feel premium.

    Fast turnaround is part of the value

    For social media, timing matters almost as much as quality. If the recap arrives too late, the audience has already moved on.

    That is why fast turnaround has become a major advantage for event clients. Businesses often want to post while the event is still fresh. Couples and families want to share highlights while guests are still talking about the day. A delayed recap can still be beautiful, but it loses some promotional and emotional momentum.

    Fast does not mean careless. It means the production process is organized from the start. Clear shot planning, efficient file handling, and an experienced editor all contribute to quicker delivery without sacrificing quality.

    For clients on Oahu, where destination weddings, tourism-related events, local celebrations, and business functions all move on tight schedules, reliability is not a bonus. It is part of professional service. That is one reason many clients look for a team that can handle both the creative side and the logistics with equal confidence.

    Why professional coverage changes the final result

    Phone footage can absolutely capture fun moments. But if the goal is a polished social asset that reflects the quality of the event, professional coverage usually makes a visible difference right away.

    That difference shows up in steadier motion, cleaner framing, stronger low-light performance, and more consistent storytelling. It also shows up in anticipation. A seasoned team knows where moments are likely to happen before they happen. They are ready for the laugh, the embrace, the applause, or the brand reveal instead of reacting late.

    That kind of coverage is especially valuable for events that cannot be repeated. Weddings, memorials, milestone birthdays, and major company gatherings all carry real emotional or business value. Missing the key moment is not a small issue when the event only happens once.

    Creative Media Production LLC approaches recap coverage the same way it approaches every event service – with planning, professionalism, and a clear standard for premium visuals. That combination helps clients get content that feels cinematic while still being dependable and practical for real-world sharing.

    A recap video should fit the event, not a trend

    Social trends come and go quickly. Some are useful. Some make every event look the same.

    A better approach is to create a video that reflects the actual tone of the day. If the event is elegant, the recap should feel elegant. If it is energetic, the edit can lean more dynamic. If it is a memorial or celebration of life, the storytelling should be respectful and restrained.

    That does not mean ignoring what performs well on social platforms. It means using current formats without losing the event’s identity. The strongest recap videos are shareable because they feel real, not because they copy whatever style is popular that week.

    When the planning is thoughtful, the coverage is complete, and the edit is shaped with purpose, a short recap can do a lot. It can help a business extend the life of an event, help a family hold onto meaningful moments, and help guests remember how it all felt. That is the value of getting it right from the start.

  • Business event photo packages: find your best fit

    Business event photo packages: find your best fit


    TL;DR:

    • Choosing the right photography package for an Oahu business event hinges on event duration, goals, and desired image output to balance coverage and budget effectively. Tailored packages range from hourly to multi-day options, with key features like same-day delivery and usage rights critical for PR and social media success. Clear communication of specific needs and understanding local venue nuances ensure compelling images that tell your organization’s story authentically.

    Selecting the right photography package for your Oahu business event can feel like navigating a maze without a map. You have a venue booked, a guest list confirmed, and a program ready to go, but one critical piece keeps getting pushed to the last minute: how do you know which photo coverage will actually serve your organization’s goals? Too little coverage and you miss key moments. Too much and you overspend on deliverables you will never use. This guide walks you through every major package type, what each one includes, and how to match your choice to your event’s specific needs.

    Table of Contents

    Key Takeaways

    Point Details
    Coverage options Business event photo packages are offered in hourly, half-day, full-day, and multi-day formats to fit various event lengths.
    Included features Standard packages provide high-resolution edits, online galleries, and usage rights, with valuable add-ons available.
    Same-day delivery Quick image turnaround is now crucial for social and PR—ask for same-day highlights if needed.
    Choosing wisely Align your package and add-ons with the size, purpose, and publicity needs of your Oahu event.

    How to evaluate business event photo packages

    Before comparing prices or counting images, you need a clear framework for what matters most to your organization. Every Oahu business event is different. A product launch at a Honolulu hotel has very different documentation needs than a quiet board retreat in Kailua or a community awards ceremony in Kapolei.

    The core criteria to evaluate are:

    • Coverage time: How many hours does the package cover? Does it match your event timeline from setup through the final handshake?
    • Image volume and quality: How many edited, high-resolution images will you receive? Volume matters less than edit quality for corporate use.
    • Delivery speed: When will you receive the final gallery? Some events need images within 24 hours for press releases or social media.
    • Usage rights: Can you publish the images externally, print them in marketing materials, or only use them internally? Photo usage rights explained are often one of the most overlooked elements in a contract.
    • Add-ons: What extras are available, such as a second shooter, drone footage, same-day highlights, or executive headshots?
    • Event size and PR goals: A 300-person conference demands different coverage than a 20-person team-building session.

    Standard packages typically include edited high-res images ranging from 500 to 2,400 photos, an online gallery, and usage rights covering digital, print, and internal distribution, with add-ons like a second shooter, drone, same-day delivery, and headshots available at an extra cost.

    Pro Tip: If your event feeds directly into social media or a PR campaign, prioritize packages that offer same-day highlights delivery. Getting polished images into your team’s hands within hours of the final keynote is worth far more than 400 extra photos delivered two weeks later.

    Overview of business event photo package types

    With those selection criteria in mind, let’s break down the major types of business event photo packages you will encounter when booking coverage in Oahu.

    Business event packages are primarily structured by coverage duration, falling into four main categories: hourly, half-day (4 hours), full-day (8 hours), and multi-day or platinum packages. Each tier is designed for a different scale of event and budget.

    Package type Duration Typical image count Best for
    Hourly 1 to 3 hours 100 to 300 images Small meetups, quick ceremonies
    Half-day 4 hours 300 to 600 images Workshops, award luncheons
    Full-day 8 hours 600 to 1,200 images Conferences, product launches
    Multi-day 2+ days 1,200 to 2,400 images Retreats, trade expos, summits

    Here is a quick snapshot of who each package type serves best:

    • Hourly packages work well for networking mixers, ribbon-cutting ceremonies, or any event where the key moments happen in a tight window.
    • Half-day packages suit workshops, award luncheons, panel discussions, or community organization meetings that run through the morning or afternoon.
    • Full-day packages are the sweet spot for most corporate event coverage needs, including multi-session conferences, product launches, and major fundraisers.
    • Multi-day packages are ideal for annual company retreats, industry expos, and multi-day summits where your brand story unfolds over 48 hours or more.

    Understanding conference coverage details specific to Oahu venues also matters, since outdoor settings, ocean-facing backdrops, and natural light at locations like the Hawaii Convention Center or Ko Olina require photographers with genuine local experience.

    Smart planning event photography before you sign any contract will save you from choosing the wrong tier. Map out your event timeline first, then match the package duration to the moments that truly need to be documented.

    Attendees view photos at Oahu outdoor event

    Once you know which overall package fits your event, it’s time to look at what’s included and the extras that can make a real impact on how your organization uses the final images.

    Most professional packages for Oahu business events include these standard features:

    Feature Hourly Half-day Full-day Multi-day
    High-res edited images
    Online gallery
    Digital usage rights
    Print usage rights Sometimes
    Second shooter Add-on Add-on Add-on Often included
    Drone photography Add-on Add-on Add-on Add-on
    Same-day highlights Add-on Add-on Add-on Add-on
    Executive headshots Add-on Add-on Add-on Add-on

    According to industry standard package inclusions, edited high-res deliverables typically range from 500 to 2,400 images depending on the package tier, alongside an online gallery and usage rights that cover digital, print, and internal applications.

    Here is a step-by-step approach to choosing add-ons for your specific event needs:

    1. Define how you will use the images first. If your marketing team needs content for LinkedIn the same evening, same-day delivery is not optional.
    2. Assess your venue’s scale. Ballrooms, outdoor luau setups, or beachfront locations in Oahu often benefit from drone photography to capture the full atmosphere.
    3. Count your key participants. If executives, keynote speakers, or award recipients need fresh headshots, bundle them into the package during the booking conversation rather than scheduling a separate session.
    4. Think about crowd size. Events with 150 or more guests benefit from a second shooter so that breakout sessions, hallway conversations, and formal presentations are all covered simultaneously.
    5. Review understanding usage rights before you sign. Internal-use-only rights will limit your ability to share images in paid advertising or media pitches, so clarify this upfront.

    Pro Tip: For any event tied to a press release, investor announcement, or media pitch, same-day photo delivery is not a luxury add-on. It is a PR tool. Journalists and editors move fast, and having polished images in your media kit within hours of your event closing can be the difference between landing coverage and missing the news cycle. Check event package pricing to find same-day delivery options built into premium tiers.

    Choosing the best package for your Oahu event

    With features and add-ons in mind, consider which photo package truly matches your business event’s unique goals and expectations. Not every Oahu organization has the same communication priorities, and your package should reflect those differences.

    Think about your primary goal: is this event for internal morale and documentation, for external PR and brand storytelling, or for generating social media buzz before, during, and after the event? The answer shapes every package decision that follows.

    Here are common Oahu event scenarios and the coverage approach that typically fits each one:

    • Annual company meeting (50 to 100 employees): Half-day or full-day package, digital usage rights, consider adding executive headshots to maximize the assembled team.
    • Chamber of commerce networking event: Hourly or half-day package, candid-heavy coverage, online gallery with quick turnaround.
    • Multi-day industry conference at Honolulu Convention Center: Full-day or multi-day package, second shooter essential, same-day highlights for social, drone for venue exterior.
    • Community foundation fundraiser gala: Full-day package, formal group photos plus candid reception coverage, print usage rights for annual report.
    • Product launch or press event: Full-day package, same-day delivery mandatory, editorial-style candids for media use.
    • Corporate retreat in Kailua or North Shore: Multi-day package, relaxed candid style, outdoor natural light expertise required.

    Balancing candid and formal photography matters more than most event planners realize. Candid images tell the story of your event: the laughter during a panel Q&A, the handshake sealing a partnership, the crowd reaction during a keynote. Formal shots provide the polished visuals your PR team needs for press releases and annual reports. Both styles together create a complete picture of your brand in action.

    “Balancing candid and formal shots for storytelling and PR is essential, and same-day highlights delivery is critical for social and PR workflows in 2026.”

    Same-day photo delivery has become a standard expectation at high-profile business events, not a special request. Oahu organizations competing for media attention need to move at media speed.

    Comparison: which package is right for your needs?

    For a final check before making your decision, compare the major package types side-by-side to confirm you are choosing the right fit.

    Package type Estimated price range Key deliverables Ideal use case
    Hourly $250 to $600 100 to 300 edited images, gallery Small networking, brief ceremonies
    Half-day $600 to $1,200 300 to 600 edited images, gallery, rights Workshops, panel discussions, luncheons
    Full-day $1,200 to $2,500 600 to 1,200 edited images, full rights Conferences, galas, product launches
    Custom/multi-day $2,500 and up 1,200 to 2,400+ images, full rights, add-ons Summits, trade expos, annual retreats

    Price ranges vary based on the photographer’s experience, Oahu location logistics, and which add-ons you include. Always request an itemized quote so you know exactly what you are paying for. Package structures by duration are the industry standard, but local photographers may customize based on your event’s needs.

    For community functions: a half-day package with candid-forward coverage is usually sufficient and cost-effective.
    For corporate conferences: invest in a full-day package with a second shooter and same-day highlights.
    For high-profile product launches or press events: a full-day custom package with same-day delivery is non-negotiable.

    Pro Tip: If you are unsure about coverage length, start with a slightly smaller package and negotiate an hourly extension option in your contract. Most professional Oahu photographers will accommodate additional time on event day if agreed in advance, giving you flexibility without committing to a more expensive tier upfront.

    Our unique perspective on choosing event photo packages in Oahu

    After more than 15 years documenting business events across Honolulu, Waikiki, Kailua, and surrounding areas, we have seen the same mistakes made over and over. The most common one is not about budget or image count. It is about clarity.

    Organizations come to us with a vague brief: “We need someone to take photos at our event.” That single sentence leaves too much room for missed expectations. The sponsor who expected drone footage did not mention it until setup day. The marketing director who needed same-day images for a press release assumed it was standard. The executive who wanted headshots did not realize they needed to book a separate slot.

    Clear written communication before the event date is not optional. It is the foundation of great event photography. Always send your photographer a detailed brief covering: the event timeline, the key moments you cannot miss, the primary image use case, and any specific shots your team requires. Capturing authentic corporate moments becomes dramatically easier when the photographer has context about your brand story before they arrive.

    Another thing we push back on is the idea of one-size-fits-all packages. A rigid package structure that worked perfectly for a Waikiki hotel conference may not serve a small Kailua nonprofit gala. Local knowledge changes the equation significantly. Understanding the light at a North Shore outdoor venue, knowing how to navigate the layout of the Hawaii Convention Center efficiently, or timing shots around a sunset backdrop at Ko Olina is not something you can replicate by simply showing up with expensive gear.

    The organizations that get the most value from their investment are the ones who treat the photographer as a communication partner, not just a vendor. Share your PR goals. Discuss your social media strategy. Clarify your usage rights needs in writing before signing anything.

    Get tailored event photo coverage for your next Oahu event

    Ready to secure the best event photo coverage for your next Oahu business gathering?

    https://creativemediaprod.com

    Working with a local Oahu specialist means you get more than a package. You get someone who understands the venues, the light, the culture, and the pace of events across the island. Whether you are organizing a community function in Kapolei, a multi-session conference in Honolulu, or a corporate retreat along the North Shore, the right coverage starts with the right conversation. Explore corporate event photographer options in Oahu to find package levels tailored for local organizations, or see all event photography types to understand the full scope of what professional coverage can deliver for your business. Reach out today to discuss your event goals, and we will help you build a package that fits both your timeline and your budget.

    Frequently asked questions

    What is included in a standard business event photo package?

    Most standard packages include edited high-res images ranging from 500 to 2,400 photos, a downloadable online gallery, and usage rights covering digital, print, and internal distribution. Add-ons like a second shooter, drone footage, or same-day highlights are typically available at an extra cost.

    Is same-day photo delivery available for business events in Oahu?

    Yes, same-day highlights delivery is widely available as an add-on for Oahu business events and is especially valuable for organizations with active PR or social media timelines following the event.

    How do I decide between hourly, half-day, and full-day packages?

    Base your decision on your event’s total timeline and the number of key moments you need documented. As a general guideline, half-day coverage works for most focused workshops or luncheons, while full-day packages suit multi-session conferences and major launches.

    Can I request both candid and formal photos in my package?

    Absolutely. Most professional event photographers build their coverage to include a blend of candid and formal styles, since both serve different storytelling and PR needs for business organizations in Oahu.

  • Create a seamless wedding photo timeline in Oahu

    Create a seamless wedding photo timeline in Oahu


    TL;DR:

    • Planning a detailed wedding photo timeline in Oahu ensures all key moments are captured despite unique island logistics. It aligns vendors, preserves golden-hour light, and reduces stress by providing clear schedules tailored to local traffic, weather, and venue rules. Collaborating with an experienced photographer who knows the terrain enhances flexibility and guarantees a memorable, smoothly run day.

    Planning a wedding on Oahu is exciting, beautiful, and, if you’re honest, a little nerve-wracking. One of the biggest fears couples share is missing key moments because nobody coordinated the photography schedule properly. A rushed ceremony exit, a forgotten family portrait, a sunset that came and went while everyone was still eating appetizers. These aren’t just inconveniences. They’re irreplaceable memories. The good news is that a well-built photo timeline removes almost all of that anxiety, giving you a clear roadmap from the moment you start getting ready to the final send-off under the stars.

    Table of Contents

    Key Takeaways

    Point Details
    Start with local logistics Plan for Oahu’s unique venues, traffic, and weather to avoid stress on your wedding day.
    Prepare your resources Collect all necessary contacts, checklists, and timeline tools before you begin.
    Follow a clear workflow Use a sequenced photo timeline to make sure every key moment is covered from start to finish.
    Allow for flexibility Build in extra time and be ready to adapt for unexpected delays or island challenges.
    Consult with experts Partnering with an experienced Oahu photographer ensures nothing gets overlooked.

    Why a wedding photo timeline matters in Oahu

    Oahu weddings come with a set of logistics that mainland couples never have to think about. Traffic on H-1 can turn a 15-minute drive into 45 minutes. Golden-hour light along the North Shore arrives and disappears fast. Outdoor ceremony permits at places like Waimea Bay or Kailua Beach have hard stop times. All of these realities make it impossible to just “wing it” and hope the photos work out.

    A planned timeline does several important things at once:

    • It aligns your photographer, videographer, officiant, hair and makeup team, and family members on the same schedule
    • It protects your access to golden-hour light, which is especially dramatic in Hawaii
    • It gives your photographer enough buffer time to move between locations without rushing compositions
    • It reduces the chance of missing critical moments like the ring exchange or the first dance
    • It helps your vendors communicate clearly so no one is waiting around or overlapping

    Planning a wedding photo timeline is one of the most effective things you can do before your wedding day. Research shows that well-planned timelines cut stress during photo sessions by roughly 40%, letting you actually enjoy the moments instead of managing them. When you work with experienced Oahu wedding media services, that number becomes even more believable because the photographer already knows the terrain, the light patterns, and the traffic quirks.

    After setting up why timelines are essential, it’s time to gather your requirements.

    What you need: Tools and info required for your timeline

    Before you open a spreadsheet or download a planning app, gather every piece of information that will affect your day. Trying to build a timeline without all the details in front of you is like packing for a trip without knowing how long you’ll be gone.

    Here’s what you need to collect first:

    • Full contact list for the couple, immediate family, wedding party, officiant, photographer, and videographer
    • Venue rules, including arrival times, hard stop times, and any restrictions on locations for photos
    • A detailed wedding photo checklist moments document so nothing important gets skipped
    • A weather backup plan, especially for outdoor beach or garden ceremonies
    • A timeline template or app (Google Sheets works perfectly, or ask your photographer for their preferred format)
    Tool Purpose Free or paid
    Google Sheets Build and share timeline with vendors Free
    Zola wedding planner All-in-one wedding organization Free/Paid
    The Knot app Timeline templates and vendor contact Free
    Photographer’s custom template Tailored to your specific venue Free with booking
    Weather app (Weather.com) 24-hour monitoring of conditions Free

    Pro Tip: Send your shot list to your photographer at least two weeks before the wedding. Expert planning leads to 40% less time wasted during photoshoots, which on a wedding day translates directly into more frames, better light, and a calmer experience for everyone involved.

    The shot list deserves special attention. Don’t just write “family photos.” Break it down by specific groupings: parents of the bride, parents of the groom, siblings, grandparents, full wedding party, etc. A photographer working from a vague list will spend 10 minutes figuring out who belongs in each frame. A photographer working from a detailed list will move through those same groupings in half the time.

    Now that you have your requirements, let’s map out the step-by-step workflow.

    The step-by-step wedding photo timeline workflow

    This is the heart of your planning. Follow this sequence and adjust the timing blocks to fit your specific venues, travel distances, and ceremony length.

    1. Getting ready (2 to 2.5 hours): This covers hair, makeup, dressing, and detail shots like rings, shoes, bouquets, and invitations. Don’t rush this window. It’s where the emotion starts and where photographers capture the story of the morning.
    2. First look (30 to 45 minutes): An optional but highly recommended private moment between the couple before the ceremony. It creates calm, generates beautiful images, and lets you do some couple portraits before everyone else arrives.
    3. Ceremony (30 to 60 minutes): Depends on your officiant and ceremony type. Religious ceremonies typically run longer. Build in 15 minutes of buffer on either side.
    4. Family and group portraits (30 to 45 minutes): Work through your shot list systematically, starting with the largest groups and moving to smaller ones. Dismiss people as you go so they can head to cocktail hour.
    5. Couple portraits (45 to 60 minutes): This is the creative session, ideally timed to catch golden-hour light. In Oahu, sunset times vary by season, so confirm the exact time for your wedding date and count backward.
    6. Reception (4 to 5 hours): Covers cocktail hour, grand entrance, toasts, first dance, dinner, cake cutting, and dancing. Each of these has its own mini-timeline within the larger event.
    7. Send-off (15 to 20 minutes): Sparkler exits, floral confetti, or a simple walk to the car. Whatever you plan, block the time and make sure guests are briefed.
    Phase Traditional timeline Modern timeline
    Getting ready 2 hours, separate locations 2.5 hours, same venue
    First look Skipped, first sight at altar 45 minutes before ceremony
    Couple portraits After ceremony only Before and after ceremony
    Golden hour session Not prioritized Built into schedule deliberately
    Group photos During reception Between ceremony and reception

    Timeline planning with your Oahu photographer should happen during your consultation, not the week before the wedding. Questions for your wedding photographer like “How long do you need for golden hour portraits?” and “How do you handle travel between venues?” will shape the entire structure of your day.

    Pro Tip: Add a 20-minute “float” buffer somewhere in the middle of the day, ideally between group portraits and couple portraits. This absorbs any delays from the morning and keeps the rest of the schedule intact.

    Professional communication between couples and their photographer ensures clear expectations for every part of the wedding photography timeline. And working with professional services contributes directly to a stress-free experience on the day itself.

    With your timeline created, ensure lasting success by knowing how to check and adapt it.

    Infographic outlining Oahu wedding photo timeline steps

    Troubleshooting and common mistakes to avoid

    Even a well-built timeline can fall apart if certain details are overlooked. Here are the most common mistakes Oahu couples make and exactly how to fix them before they become problems.

    • Forgetting island travel time: Oahu is not a large island, but traffic near Honolulu and Waikiki can be unpredictable. Build in at least 20 to 30 minutes of travel buffer between any two locations, more during peak hours on weekends.
    • Underestimating getting-ready time: Hair and makeup almost always runs longer than expected, especially for larger wedding parties. If you have more than four people getting ready, start 30 minutes earlier than you think you need to.
    • Not confirming logistics with vendors: Every vendor on your team should have a copy of the timeline at least a week before the wedding. Don’t assume everyone knows where to be. Confirm it explicitly.
    • Vague shot list communication: Handing your photographer a generic list with “family photos” written on it creates confusion and eats into shooting time. Specificity saves time and saves memories.
    • Skipping the weather backup plan: Oahu weather is generally beautiful, but rain showers are common, especially on the windward side. Know exactly what happens if it rains during your outdoor ceremony or golden-hour session.

    “Double-check travel time between ceremony and photo spots. What looks like five minutes on a map can turn into 20 minutes on a busy Saturday afternoon in Waikiki.” This single adjustment has saved dozens of timelines that would otherwise have collapsed under the weight of traffic.

    Organizing your Hawaii wedding photos starts before the wedding day, not after. The way you structure your timeline directly affects how your photos are organized chronologically, which makes editing, delivery, and album design significantly smoother for your photographer and more meaningful for you.

    After troubleshooting, you can verify your plan and confidently approach your wedding day.

    Family preparing group wedding photos in hotel lobby

    How to finalize and adapt your photo timeline

    The final version of your timeline isn’t a document you file away and forget. It’s a living tool that you keep refining right up to the day before the wedding.

    Here’s how to lock it in properly:

    • Send copies to every vendor and VIP: Your photographer, videographer, florist, caterer, officiant, day-of coordinator, and any family members who are managing logistics should all have the same document. Use a shared Google Drive folder or email a PDF with clear version dating.
    • Review and adjust for weather 24 hours out: Check the forecast the morning before your wedding. If rain is likely during your beach portrait session, move it earlier in the day when weather is typically clearer, or shift to a covered location.
    • Keep both a digital and hard copy on hand: Phones die. Wi-Fi disappears. Print one clean copy and keep it in your day-of bag or give it to your coordinator.
    • Designate a timeline point person: This is the single most underused strategy. Assign a detail-oriented friend, family member, or coordinator to watch the clock and gently keep things moving. Your photographer focuses on capturing. This person focuses on logistics.
    • Build a rain shuffle plan: Know in advance which shots can move indoors, which locations have covered areas, and whether your venue has a backup space. Finalizing your timeline with an Oahu photographer who knows local venues means you get built-in flexibility for exactly these situations.

    A finalized timeline that everyone understands transforms your wedding day from a series of managed tasks into a series of genuine moments. That’s exactly the shift you’re aiming for.

    Now that the workflow is complete, let’s discuss some real-world perspective on what makes timelines succeed or fail.

    What most couples get wrong about wedding photo timelines

    Here’s something most planning guides won’t tell you: the biggest timeline problems aren’t caused by bad luck. They’re caused by a false belief that more structure equals more control.

    Couples often build timelines that are so tightly packed that any small delay creates a cascade of stress. A ceremony that runs 10 minutes long shouldn’t derail your golden-hour portraits. But when there’s no breathing room built in, it does exactly that. The solution isn’t a looser timeline. It’s a smarter one with intentional flexibility baked into specific spots.

    The other mistake we see consistently is building the timeline without the photographer’s input. You might not know that your dream beach spot at Lanikai requires an extra 15 minutes to park and walk to. You might not know that the light at your venue goes harsh between 1 PM and 3 PM, making that window basically unusable for portraits. A local photographer brings that knowledge automatically. When you co-create the timeline together, those details get absorbed into the plan before they become surprises.

    Rigid schedules also tend to ignore human behavior. Family members get chatty during group photos. Someone always needs a few extra minutes after the ceremony. The couple wants to soak in a moment that wasn’t on the schedule. These aren’t problems. They’re the best parts of a wedding day. A timeline built with efficient photoshoot planning methods gives space for those natural pauses without sacrificing any critical moments.

    The most successful timelines we’ve seen all share one thing: they were built collaboratively, reviewed honestly, and handed to a real human being who kept things moving on the day. Not an app. Not a spreadsheet. A person.

    Next steps: Expert help for your Oahu wedding photo timeline

    Building your photo timeline doesn’t have to be something you figure out alone, especially when you’re planning a wedding in a place as dynamic and visually rich as Oahu.

    https://creativemediaprod.com

    Working with an experienced event photographer in Oahu means your timeline gets shaped by someone who already knows the venues, the light, the traffic patterns, and the little local tricks that make a huge difference on the day. At Creative Media Production, we’ve spent over 15 years photographing weddings across Honolulu, Waikiki, Kailua, and beyond. Whether you’re still in early planning or finalizing details, our team can help you plan your Oahu wedding photo timeline with precision and creativity. Explore our full range of Oahu wedding media packages and reach out to start a conversation about your day.

    Frequently asked questions

    How long does a typical wedding photo timeline take in Oahu?

    An Oahu wedding photo timeline usually spans 6 to 8 hours depending on the number of venues, the size of the wedding party, and whether a golden-hour session is included. Beach weddings with multiple locations often need the full 8 hours.

    Should we schedule a first look photo session?

    Scheduling a first look allows for quiet, emotional moments between the couple before the ceremony energy kicks in, and it also creates more flexibility in your overall timeline. You can learn more about how to structure this moment with your photographer during the planning consultation.

    What should go into our Oahu wedding shot list?

    Your shot list should include preparation moments, ceremony highlights, couple portraits, full family groupings, wedding party combinations, and sunset or beach sessions that are specific to Oahu’s landscape. A detailed wedding photo checklist helps make sure nothing important gets missed.

    How do we adjust our timeline for Oahu weather?

    Start monitoring the forecast 48 hours out and have a specific backup location or sequence already agreed upon with your photographer. Building weather flexibility into your timeline before the day arrives is far less stressful than making decisions in the moment.