TL;DR:
- Preparation, proper gear, and scouting venues are crucial for capturing high-quality graduation photos.
- Mastering Hawaii’s indoor and outdoor lighting conditions enhances image clarity and emotional impact.
- Following a professional workflow and planning group shots ensures a complete, memorable graduation gallery.
Graduation day arrives once, and blurry, poorly lit photos are a real heartbreak when you look back years later. Whether you’re walking across the stage at a university in Honolulu or celebrating with family at a beach party in Kailua, the difference between forgettable snapshots and images you’ll frame on your wall comes down to preparation, technique, and timing. This guide breaks down exactly what you need to know, from camera gear to posing strategies, so you can capture every emotional, joyful moment of your milestone with the quality it deserves.
Table of Contents
- Gear and prep: What you need before the ceremony
- Lighting and timing: Mastering Hawaii’s indoor and outdoor conditions
- Essential shots: Don’t miss the big and emotional moments
- Group dynamics and posing: Get everyone looking their best
- Why pro workflow makes a difference in graduation photos
- Connect with Hawaii’s event photography experts
- Frequently asked questions
Key Takeaways
| Point | Details |
|---|---|
| Dual camera setup | Using a wide-angle and telephoto lens guarantees you capture both sweeping scenes and close-up moments. |
| Lighting mastery | Knowing when and how to use high ISO, fast shutter speeds, and golden hour lighting prevents blurry or harsh images. |
| Essential shot list | Aisle, handshake, family hug, and candid reactions tell a meaningful graduation story. |
| Group photo tips | Staggered heights and dynamic movements make group portraits look natural and fun. |
| Pro workflow advantage | Applying pre-event scouting and organized shot lists elevates your photos from casual snapshots to treasured keepsakes. |
Gear and prep: What you need before the ceremony
Having the right tools before the big day is more important than any single technique you’ll use during it. Think of it this way: even the best chef can’t cook a great meal without the right ingredients in the kitchen.
Camera and lens selection
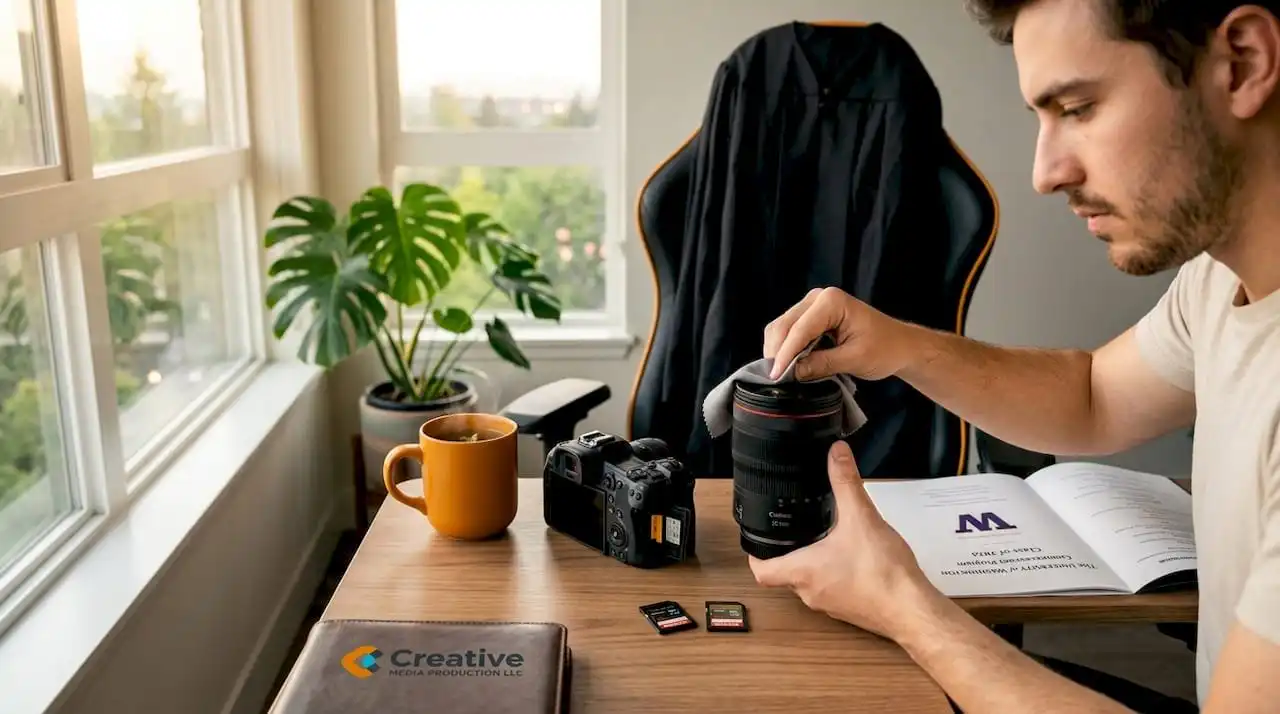
A two-body setup with one wide-angle and one telephoto lens gives you the flexibility to capture both sweeping scene shots and tight, emotional close-ups without missing moments while fumbling with gear. The wide-angle lens (roughly 24mm to 35mm) handles group shots, venue context, and candid scenes. The telephoto lens (70mm to 200mm range) gets you close to the stage handshake, the tassel flip, and that priceless look on a parent’s face from across the room.
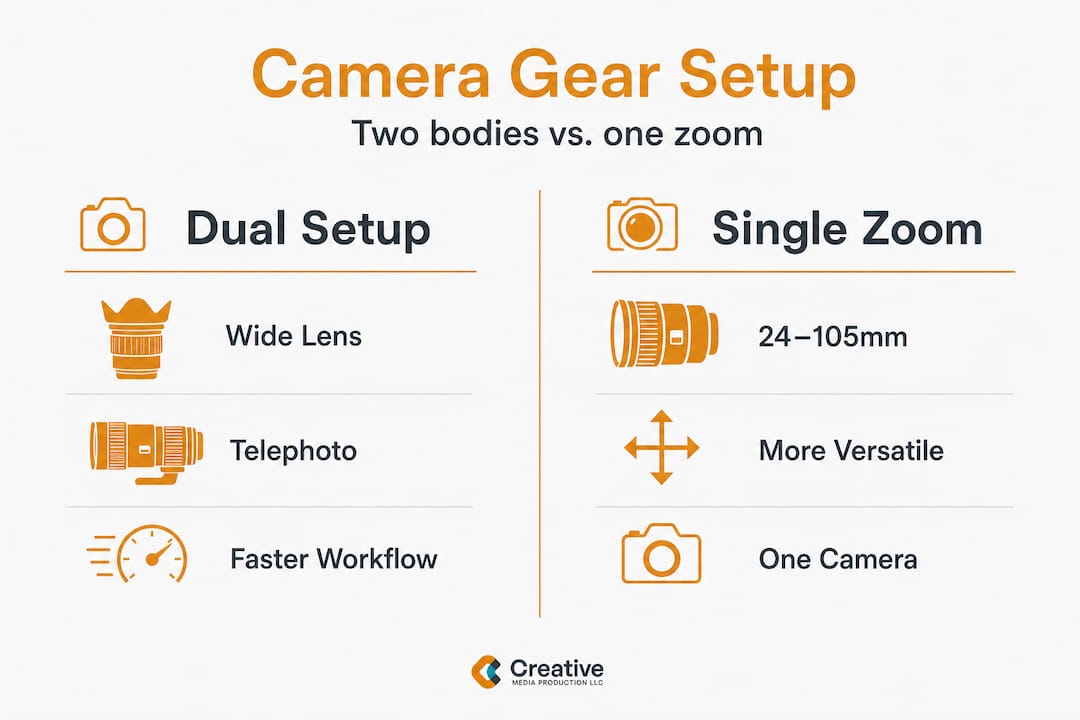
If you’re working with just one camera, use a versatile zoom lens in the 24mm to 105mm range. It won’t give you the same reach as a dedicated telephoto, but it’s far better than switching lenses mid-ceremony and risking a missed shot.
Outfit and prop prep
Steam your outfit the night before and choose neutral tones such as white or black that complement your gown without clashing. Bring a touch-up kit (powder, lip balm, a small brush), and pack props like confetti, your diploma, or a meaningful accessory that tells your personal story. For more detailed guidance on outfit selection and what reads well in photos, check out these graduation outfit tips that apply directly to grad portraits.
Scouting your venue
Walk the ceremony venue at least once before the day itself. Look for where the light falls during the time your event starts, identify any columns or obstructions that might block key sightlines, and figure out parking so you’re not rushing in stressed. Stress translates into rushed, unfocused shooting.
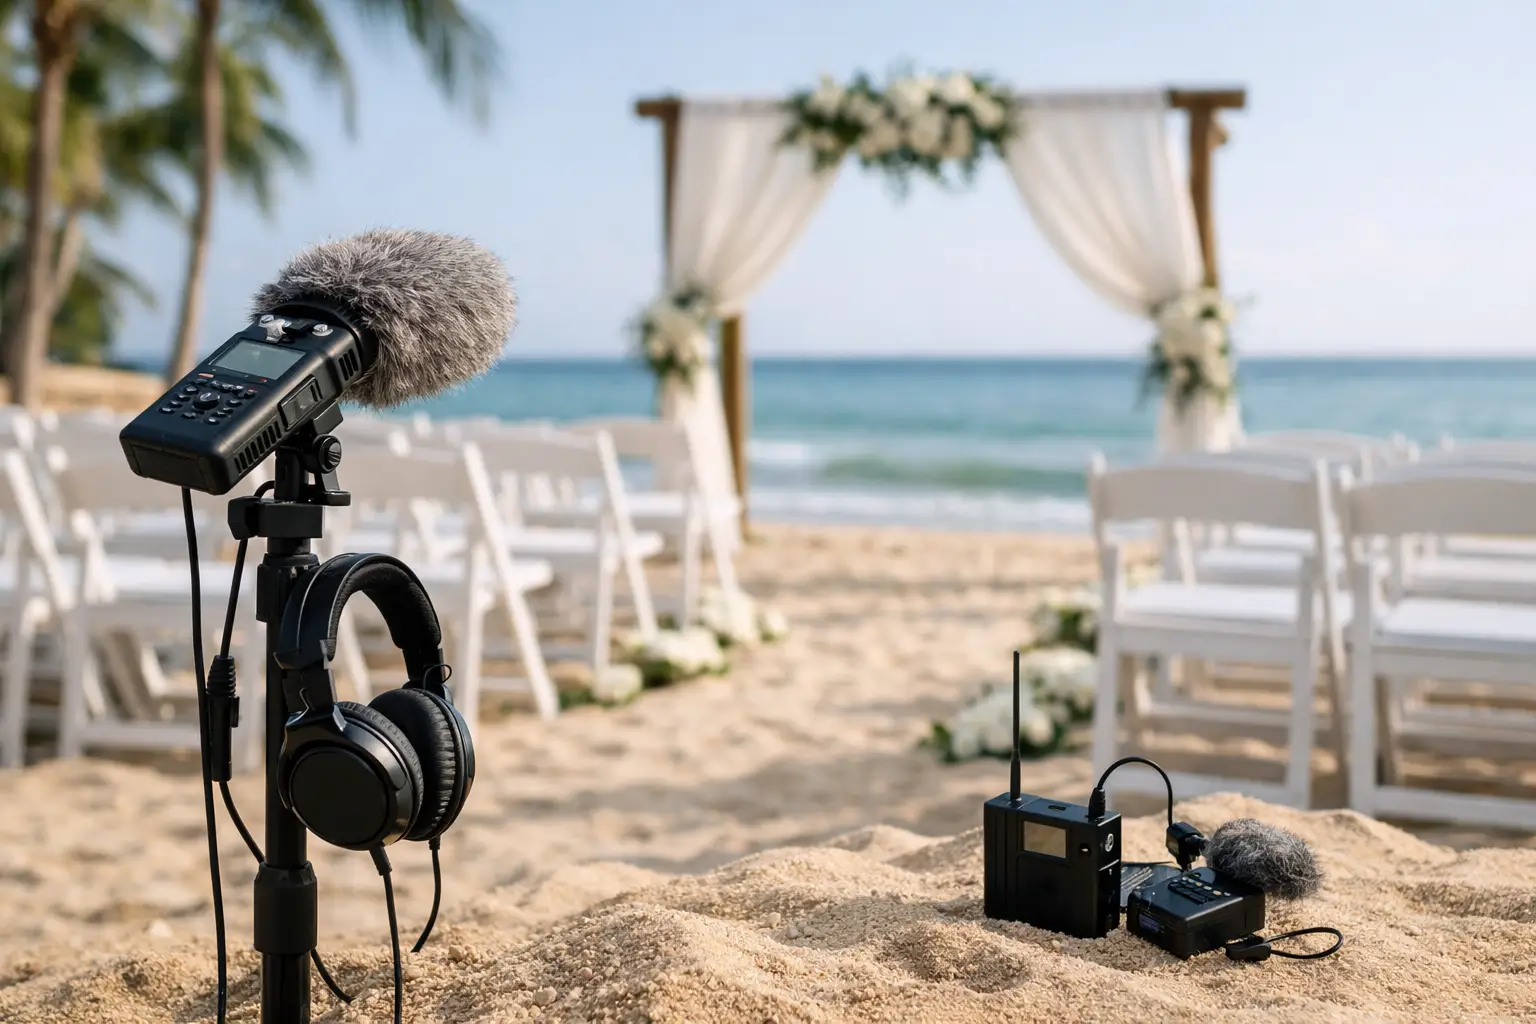
Pro Tip: Avoid using flash during the ceremony. Flash draws attention, can disrupt the event, and often creates flat, unflattering light. Instead, rely on your camera settings to handle available light, which we’ll cover in the next section.
| Gear item | Purpose | Recommended spec |
|---|---|---|
| Wide-angle lens | Group and venue shots | 24mm to 35mm |
| Telephoto lens | Stage and close-up moments | 70mm to 200mm |
| Extra batteries | Avoid power loss mid-event | Two minimum |
| Memory cards | Backup storage | Two 64GB minimum |
| Touch-up kit | Outfit and appearance refresh | Powder, brush, lip balm |
| Props | Personalization | Diploma, confetti, flowers |
Lighting and timing: Mastering Hawaii’s indoor and outdoor conditions
With your prep ready, perfecting your lighting and timing is the next critical step in creating great images. Hawaii’s natural light is genuinely stunning, but it also creates unique challenges that catch many photographers off guard.
Indoor ceremony settings
Most university auditoriums and event halls in Hawaii use fluorescent or mixed artificial lighting, which can cast a yellow or green tint on skin tones. For indoor low-light shooting, set your ISO between 3200 and 5000, use a wide aperture of f/2.8, and keep your shutter speed between 1/150 and 1/800 of a second to freeze movement without blur. These settings work together to let in enough light while keeping your subject sharp even when they’re moving.
Silent shutter mode (available on most modern mirrorless cameras) is another tool worth using in quiet ceremony moments. It lets you fire off shots without the mechanical “click” that can turn heads and disrupt the atmosphere. For more on working with challenging indoor environments, explore these low-light photography tips that translate directly to graduation settings.
Outdoor portrait sessions
Hawaii’s golden hour, the 60 to 90 minutes after sunrise or before sunset, is the single best time to schedule outdoor graduation portraits. The light is warm, directional, and flattering, which means less editing work later. As outdoor lighting research shows, shooting during golden hour or in open shade avoids the harsh midday shadows that fall directly under the brim of graduation caps, effectively hiding the graduate’s eyes in shadow.
Open shade is any shaded area where the sky still serves as your light source. Think of standing under a large tree near a bright open field. You get soft, even light without the squinting and harsh shadows that direct midday sun creates.
Pro Tip: Try your camera’s silent shutter mode during quiet moments of the ceremony like speeches and the processional. You’ll capture more genuine, unposed expressions when people forget the camera is there.
| Shooting condition | ISO | Aperture | Shutter speed |
|---|---|---|---|
| Bright outdoor midday | 100 to 200 | f/8 to f/11 | 1/500 to 1/2000 |
| Golden hour outdoor | 200 to 400 | f/2.8 to f/4 | 1/250 to 1/500 |
| Open shade outdoor | 400 to 800 | f/2.8 to f/4 | 1/125 to 1/250 |
| Indoor fluorescent | 3200 to 5000 | f/2.8 | 1/150 to 1/800 |
For a deeper look at how lighting choices shape the entire feel of an event, the principles behind event lighting mastery apply directly to graduation photography decisions.
Essential shots: Don’t miss the big and emotional moments
With your lighting and timing mastered, here’s what to focus on for capturing the moments that matter most. A strong graduation gallery tells a complete story from anticipation to celebration.
Ceremony must-haves
The core ceremony shots that every graduation gallery needs include:
- The aisle walk – Capture the graduate processing in with full regalia, ideally from slightly to the side to show both face and movement.
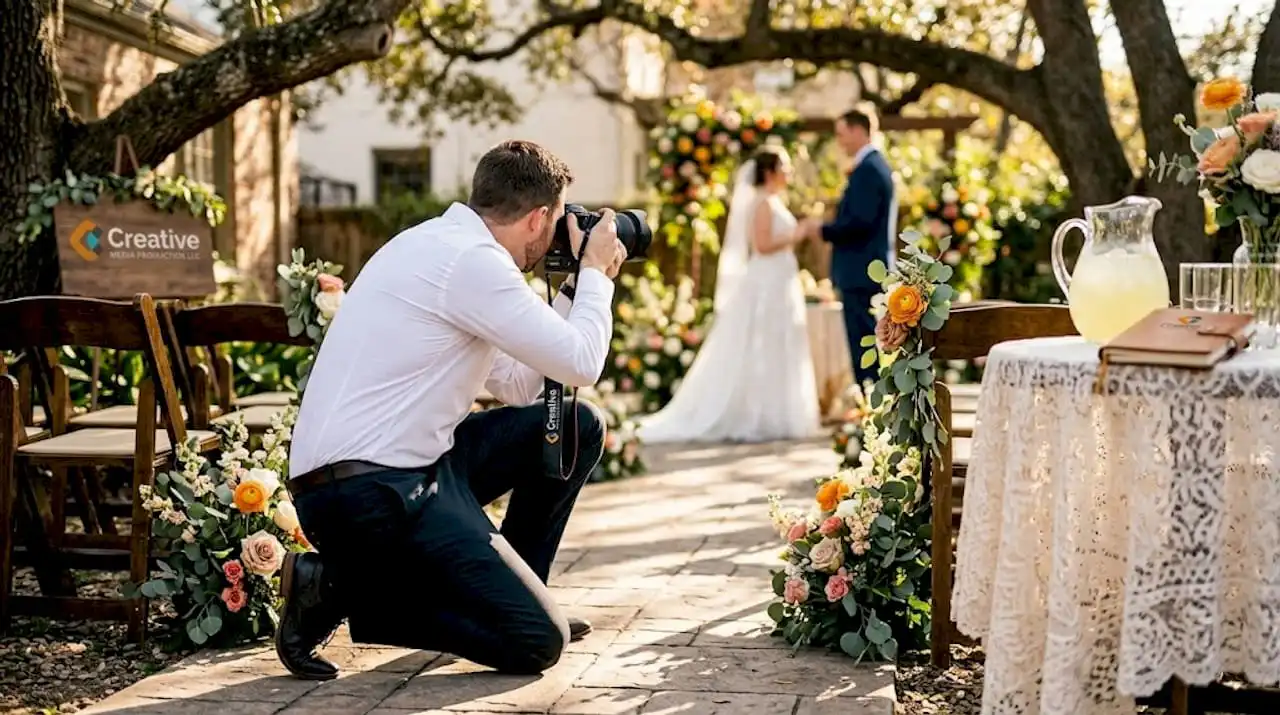
- The stage handshake – Position yourself where the graduate’s face is visible when they receive the diploma, not just the back of their head.
- The tassel flip – This is a split-second moment, so use burst mode (continuous shooting) to catch every frame.
- Crowd reactions – Parents tearing up, siblings cheering, friends waving from the stands. These are gold.
- Family hugs after the ceremony – The relief and joy on everyone’s face right after the ceremony ends is raw and genuine.
Detail shots that tell the story
Don’t skip the small stuff. A close-up of the diploma against the gown, a shot of the decorated cap, the tassel on its own, a hand holding the degree. These images might seem minor, but they anchor the larger emotional story of the day.
Candid emotional moments
Candid reactions and emotional moments alongside posed shots create the emotional storytelling that makes a gallery feel alive. Parents tearing up, friends embracing, a quiet moment of a graduate looking out at the venue before the ceremony starts. These aren’t shots you can plan. They’re shots you have to be ready for. For guidance on building a structured approach to these moments, a solid graduation portrait session or a detailed shot list approach helps you stay organized without becoming rigid.
Pro Tip: Use your camera’s burst mode (continuous shooting) for the tassel flip, diploma handshake, and any moment where the graduate is in motion. Shoot five to ten frames per second and pick the sharpest, most expressive image afterward.
For capturing those raw, unscripted moments throughout the day, the techniques behind candid event photography translate beautifully to graduation settings where real emotion is always close to the surface.
Group dynamics and posing: Get everyone looking their best
Once individual moments are captured, mastering group shots adds variety and energy to your graduation gallery. Group photography is genuinely one of the hardest things to do well, and it’s also where most amateur photographers lose control of the moment.
Height staggering and positioning
For group photos, stagger heights by placing taller individuals at the back and shorter people at the front. This creates a natural visual hierarchy and ensures every face is visible in the frame. Avoid flat, straight lines where everyone stands side by side at exactly the same distance from the camera.
Adding movement and energy
Encourage the group to lean in toward the camera, jump on the count of three, throw confetti, or simply walk toward the lens together. Movement kills stiffness. Even a slight lean forward from the back row changes the energy of the entire image. These dynamic approaches to event group shots are what separate lively, memorable galleries from collections of static lineups.
Props and personalization
Matching accessories, school colors, meaningful objects, or even just coordinated outfits add personality to group images. You don’t need to be overly formal. Some of the best graduation group shots look more like a celebration than a posed portrait because they capture who the people actually are.
Key tips for smooth group organization:
- Assign one trusted person (a sibling, close friend, or partner) as your “group coordinator” to help gather and position people quickly
- Announce each group shot in advance so people know when they’re needed
- Shoot each group combination at least three times to guarantee at least one sharp, eyes-open frame
- Keep the session moving briskly, especially with elderly relatives or young children who lose patience fast
Pro Tip: Plan your group shot order from largest group to smallest. Start with the biggest family configuration when everyone is fresh and present, then work down to smaller, more intimate combinations. People naturally drift away as time goes on, so capture the hardest shots first.
Studies consistently show that group photos taken within the first 30 minutes after a ceremony end capture the highest percentage of all invited guests, since people haven’t yet left to find parking or head to restaurants.
Why pro workflow makes a difference in graduation photos
Here’s an honest truth that most photography guides skip: the gap between a good graduation photo and a great one is rarely about camera brand or lens price. It’s almost entirely about workflow, which means the decisions made before, during, and after the shoot.
Professional photographers who cover graduation events don’t arrive and improvise. They scout the venue days in advance. They build a shot list tailored to that specific ceremony layout. They prepare two camera bodies so a battery failure or memory card error never costs them a critical moment. They understand the lighting at 10am versus 2pm at that specific venue. This advance preparation is what allows them to be present and reactive during the event itself, rather than problem-solving.
The dual camera setup is a perfect example of workflow thinking in action. Switching lenses mid-ceremony takes 30 to 60 seconds. The diploma handshake happens in under 10 seconds. If you’re fumbling with a lens, you simply miss it. Two bodies eliminate that risk entirely. Amateurs can apply exactly this kind of workflow thinking by preparing checklists, creating shot lists, assigning helpers, and scouting locations in advance, all before picking up a camera.
The other thing professionals do well is capture reactions, not just actions. The graduate walking across the stage is the action. The parent grabbing their partner’s arm in excitement at that exact moment is the reaction. Both together make the story complete. Developing the habit of constantly scanning for reactions while the main event unfolds is a skill worth practicing at any event, not just graduation.
If you’re curious about how this kind of structured, professional approach translates to every type of celebration, the principles behind a solid event photography workflow are directly applicable to graduation day and well worth exploring before you shoot.
Connect with Hawaii’s event photography experts
You now have the tools, the settings, and the strategies to shoot graduation photos that genuinely tell the story of this milestone. But sometimes knowing all the right techniques and executing them flawlessly in a fast-moving, emotionally charged ceremony are two very different things.

That’s where a seasoned local professional makes all the difference. At Creative Media Productions, we’ve spent over 15 years capturing milestones across Oahu, from Honolulu to Kailua to Waikiki, and we know exactly how to handle every lighting scenario, venue layout, and family dynamic Hawaii throws at us. Explore the full range of event photography services we offer, or connect directly with an experienced Oahu graduation photographer who can make sure every moment of your ceremony is documented with the care and quality it deserves.
Frequently asked questions
What camera settings are best for indoor graduation ceremonies?
Use high ISO 3200 to 5000, a wide aperture of f/2.8, and a fast shutter speed between 1/150 and 1/800 of a second to produce sharp, well-exposed images in dim or fluorescent-lit venues.
What time of day is ideal for Hawaii graduation photos outdoors?
Golden hour or later afternoon delivers soft, warm, directional light that is far more flattering than harsh midday sun, which creates deep cap shadows over the graduate’s face.
How can I organize large family and group graduation shots?
Stagger heights with taller people in the back, encourage natural movement like leaning in or jumping, and assign a trusted helper to gather groups quickly between each configuration.
What props or accessories help create unique graduation photos?
Bring confetti, diplomas, and touch-up kits to add personality and polish, keeping shots feeling celebratory and personal rather than stiff or generic.