Category: Oahu’s Most Beautiful Photo Locations

Explore the best photography spots in Oahu, Hawaii, featuring stunning beaches, lush mountain landscapes, and iconic island views. From sunrise sessions at Lanikai Beach to dramatic North Shore backdrops, Oahu offers breathtaking locations perfect for weddings, engagements, family portraits, and corporate photoshoots. Discover top Oahu photo locations and find the ideal setting to capture unforgettable memories in paradise.

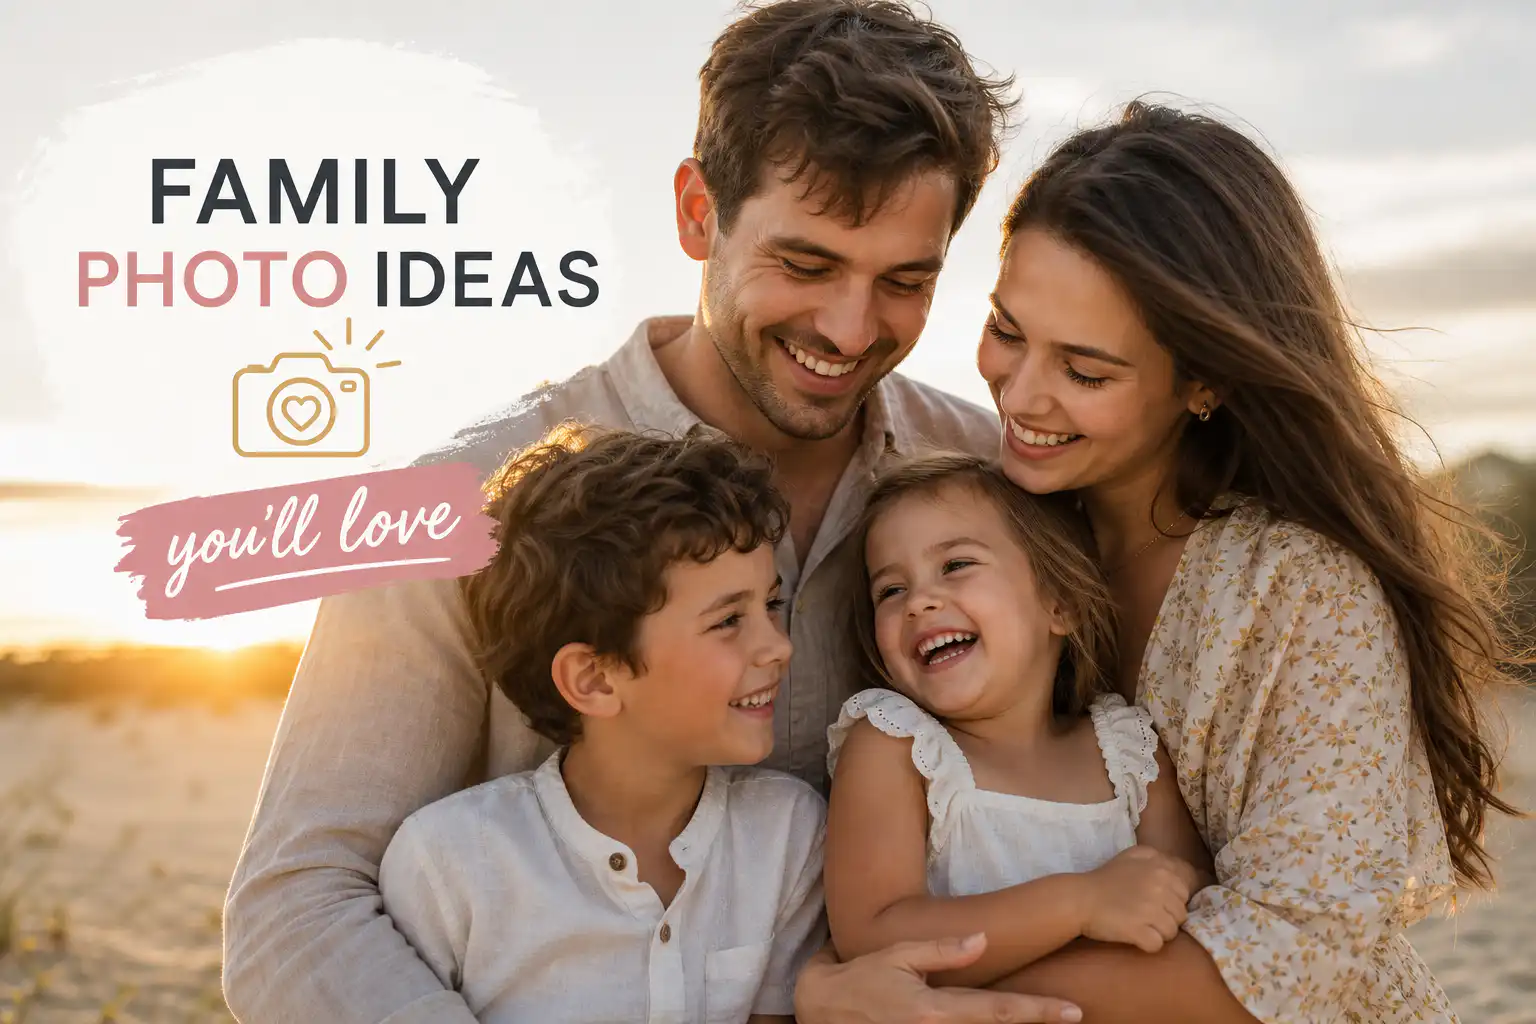
  • 12 family photo session ideas your family will actually love

    12 family photo session ideas your family will actually love

    We often see families arrive without a plan, and the gallery can feel stiff as a result. After years photographing families across Oahu for Creative Media Production LLC, we’ve found the best sessions start with a clear idea before the shutter clicks. Here are 12 family photo session ideas to help you choose the scene, set a few anchors, and then let real life fill the frame.

    Below are 12 proven concepts, organized from locations to props and activities, with quick photo session prompts and a printable family photo shot list you can bring to your session. You’ll also get simple outfit formulas and seasonal timing so you know when and where to shoot. No fluff. Just ideas that work in the real world.

    Family photo session ideas: location-based setups that set the scene naturally

    Family photo session ideas: beach and coastline sessions

    Beaches are a classic for a reason: open light, natural movement from waves, and a relaxed vibe that helps everyone loosen up. Golden hour is the sweet spot, roughly 30 to 60 minutes after sunrise or before sunset. On Oahu, places like Lanikai, Waimanalo, Magic Island, Ko Olina Lagoons, and Kualoa Regional Park give you turquoise water, palms, and mountains in one frame. Backlight your family and let kids play at the waterline. We capture in bursts and pick the peak moment.

    Parks, botanical gardens, and green spaces

    Lush greens and soft florals create layered, forgiving backgrounds that keep the focus on faces. Benches, paths, and open lawns double as natural props so you do not need to haul anything in. Aim for morning or late afternoon to avoid dappled shade. Keep outfits neutral with one or two accents so you stand out from the foliage.

    Urban and hometown backdrops

    Downtown streets, murals, and architecture add texture and attitude, which works well for older kids or a modern aesthetic. Honolulu’s core offers a lot within a single block: brick, glass, painted walls, and crosswalks for movement shots. Keep the palette simple and let the lines and colors do the styling. Urban sessions feel fresh when you mix still portraits with walking frames to keep energy up.

    Home and backyard settings

    Home sessions are underrated. This is where real life happens, so you get honest, candid family photos without trying. Morning window light often beats anything staged outside, and kids relax faster in their own space, which is why home sessions often yield very candid, documentary-style frames.

    Family photo session ideas with props and themes that add meaning without clutter

    Meaningful objects from your daily life

    Bring what you already love: instruments, a favorite book, the dog, a worn baseball glove, or a grandmother’s quilt. These are not decorations. They are context clues that quietly say who you are. Keep it to one or two items per setup so the scene stays clean. Personal beats Pinterest every time.

    Coordinated outfits and color themes

    Use the three-color rule: a neutral base, one accent, and one pop. Matching exactly hurts more than it helps; coordinated palettes keep the focus on faces. For beaches, soft neutrals, blush, coral, and light blues photograph beautifully; in tropical greens, avoid wearing green so you do not blend in. Avoid neon, big logos, and busy patterns that pull attention from expressions. For specific color palettes and examples, check trusted guidance on colors to wear for family photos.

    Holiday and seasonal themes

    Seasonal sessions make creative direction easy. Think pumpkins for fall, string lights for winter, floral crowns for spring, or leis for island flavor any time. Keep props minimal so they add context, not clutter. For peak holiday slots and on-time cards, book 3 to 6 months ahead and confirm your print lab’s turnaround.

    Family photo session ideas with activity and movement that produce real reactions

    The best family portraits happen when nobody is thinking about the camera. Motion gets you there fast, so start with high-energy sets, then land on calm closers to let kids burn off jitters before you ask for stillness.

    Action-based poses and movement shots

    There are a few action setups that always deliver: piggyback rides, airplane lifts, the tickle chain, and a group hug where kids sprint in from both sides. These posing ideas for families work because they replace “pose” with play. We shoot these in short bursts, then pick the frame with peak laughter. If toddlers are involved, hit these first while energy is high.

    Candid storytelling sessions: capturing everyday moments

    Build a session around your routine: cooking breakfast, reading on a blanket, playing a board game, or taking a walk to the corner store. These frames feel like memories instead of a portrait sitting and are perfect for candid family photos. They work especially well at home or in a favorite outdoor spot. The trick is to keep hands busy and conversation flowing while we work the angles.

    Nine battle-tested prompts that spark real smiles

    • Sneak-up hug: kids face forward while parents surprise-hug from behind for instant giggles.
    • Tickle chain: line up and tickle your neighbor at the same time for rolling laughter.
    • Group hug sandwich: parents hug, kids crash in from the sides to squeeze tight.
    • Look at each other, not me: stare contests, whispers, or secret jokes on cue.
    • Hold hands and follow the leader: skip, zigzag, or dance toward the camera.
    • Cheek-to-cheek or nose touch: whisper “I love you so much” for tender smiles.
    • Piggyback parade: parents carry and stagger toward the camera, laughing.
    • Airplane lift: lift the toddler overhead and freeze mid-giggle.
    • Through-the-legs peek: shoot through a parent’s legs while kids peek and crack up.

    Sequence matters. Start with movement, then shift to cozy connection prompts. Keep each action going for 5 to 10 seconds while we shoot continuously. Give kids a job and they will give you real smiles. For more family-friendly prompts and activity suggestions, see this collection of family photo poses, prompts, and activities for kids, and if you want additional creative ideas to capture genuine smiles, this list of creative family photo ideas to get genuine smiles is very handy.

    Specialty session concepts for memorable results

    Multi-generational family portraits

    When grandparents, parents, and kids all show up, efficiency is everything. Start with the largest group first, then peel away branches into smaller sets while patience is still high. Prioritize grandparents with all grandkids, then each household, siblings, and individuals. Big to small is the fastest path to a complete gallery and keeps the must-have family portrait ideas covered early.

    Sunrise and sunset silhouette sessions

    Silhouettes are simple and dramatic. You need a clean horizon and backlit skies. Sunset and sunrise times vary by month, check local tables or use a golden-hour calculator to plan the timing. We position your family against the glow so posture and body language tell the story. Find local sunrise and sunset times and consider tools like PhotoPills to map angles.

    Nature trail and outdoor adventure sessions

    For active families, a short trail session where kids lead and parents follow creates genuine, joyful frames. Changing terrain keeps everyone engaged and adds variety fast. Wear closed-toe shoes, bring water, and pack bug spray. Movement plus scenery equals built-in candids.

    How to customize your family session from the start

    No two families are the same. The ideas above are your toolkit, not a script, so plan the flow, not just the poses, and make sure the session fits your people and your timeline.

    Starting with a planning consultation

    As our policy at Creative Media Production LLC, we begin every booking with a short consult. We ask about family size, the youngest child’s age and temperament, the mood you want on your walls, must-have groupings, and any physical limitations. We also review location fits and timing by season, including golden hour windows and nap schedules. A short conversation typically reduces on-set time and keeps the session moving.

    Building a personalized shot list

    A custom family photo shot list removes guesswork and guarantees coverage. We prioritize the must-haves first, leave space for spontaneous moments, and pace the session by age. Toddlers usually have a 45 to 60 minute window before patience runs out, while in-home documentary sessions can stretch to 90 minutes comfortably. For more on how long a typical family photo session takes, this guide is useful. We send our clients a working shot list before every session so nothing is missed and everyone knows what comes next; for additional detail on planning and coverage, review our essential family photoshoot tips.

    1. Full family portrait, smiling at camera and then looking at each other.
    2. Parents with all kids together, then group hug moment.
    3. Each child individually, with a quick personality prompt.
    4. Parent with each child separately, both smiling and snuggling versions.
    5. Siblings together: standing, seated, and one playful prompt.
    6. Parents or couple alone, classic and candid.
    7. Grandparents with grandkids, then grandparents with full family if present.
    8. Each household or branch of the family, if extended group.
    9. Movement set: hold-hands walk, piggyback, or sand play.
    10. One signature scene that matches location: shoreline splash, city crosswalk, or window-light cuddle at home.

    For large families, run the list top to bottom, then repeat items 7 and 8 by branch while everyone is in place. Clarity up front makes the session calm and efficient.

    Plan it, then let it breathe

    Great family photos are not about perfect poses or perfect light. They come from a simple plan that gives real moments room to happen. The 12 session concepts above, from beach silhouettes to candid kitchen stories, are enough to walk in confident and walk out with images worth keeping.

    Pick three or four family photo session ideas that match your family’s energy, choose a location that fits the season and your palette, then build your shot list around those anchors. If you want help shaping it into something custom, Creative Media Production LLC can plan, scout, and lead the flow for you. For Oahu family photo session ideas tailored to your crew, and a clear delivery timeline, book a quick planning consult. See examples of Family Photos in Kailua That Feel Like You for location inspiration. We will bring the experience. You bring your people.
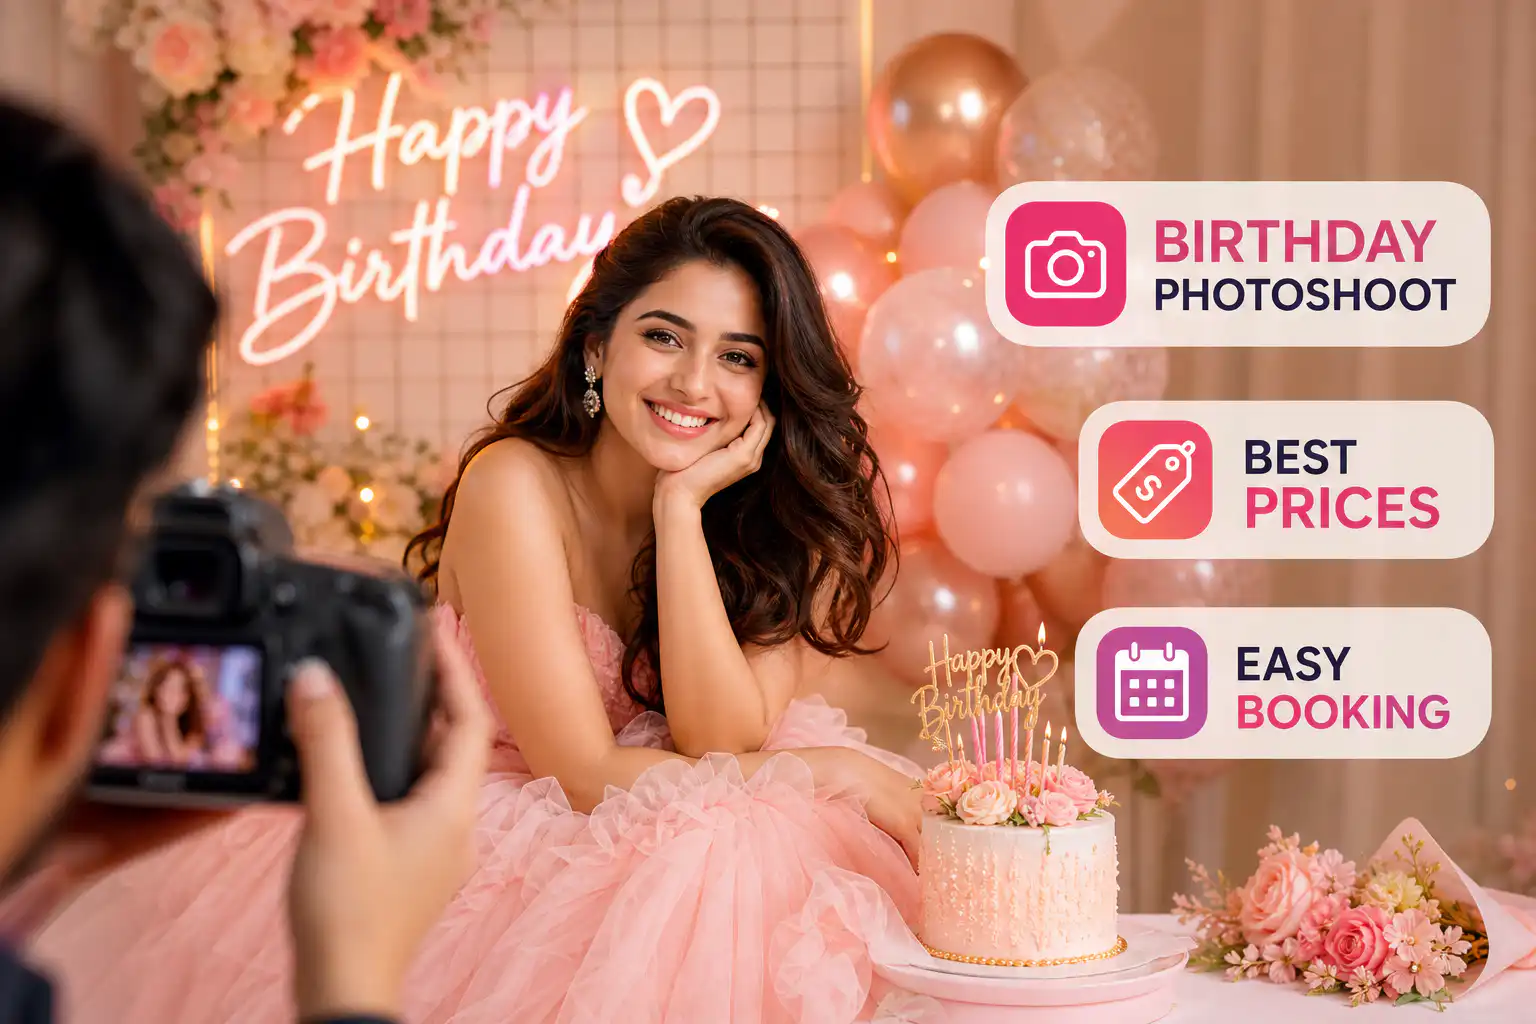
  • Birthday Photoshoot Near Me: Prices, Ideas & How to Book

    Birthday Photoshoot Near Me: Prices, Ideas & How to Book

    People type “birthday photoshoot near me,” skim through twenty tabs, stare at vague pricing, then pick someone who delivers six weeks late. This cycle repeats constantly, and it is completely avoidable if you know what matters and what is fluff.

    This guide gives you clean answers: realistic price ranges, what birthday photoshoot packages actually include, twelve shoot themes that photograph well, and the questions that keep you from getting burned. On Oahu, Creative Media Production LLC sets the standard with same-day preview galleries and transparent pricing. That kind of accountability is what you should demand wherever you book a local birthday photoshoot.

    What a birthday photo session near me actually costs

    Price tracks experience and deliverables, not effort. Two photographers can shoot for an hour and produce wildly different results. You are paying for consistency, editing quality, and how cleanly they run the process, not just time with a camera. For birthday photoshoot packages and pricing, think in two lanes: mini sessions and full sessions. Minis exist for speed and simplicity; full sessions exist for range, variety, and milestone storytelling. Judge value by price per edited image and delivery speed, not sticker price alone.

    Mini sessions: what you get and what you don’t

    Across the U.S., mini birthday sessions run about $150 to $300 for 20 to 30 minutes and include roughly 3 to 10 edited images. They work well for quick portraits or a tight budget. The downside is limited time for warming up, outfit changes, or multiple locations.

    Many studios use minis as a loss leader, a low session fee at booking followed by a big upsell for the full gallery. Galleries priced at an extra $300 to $700 after the shoot are common. Before you put down a deposit, confirm exactly how many images you own and what it costs to unlock more.

    Full sessions: better value for milestone birthdays

    Full birthday sessions typically land at $400 to $700 or more for 60 to 90 minutes. You get multiple outfits, more poses, and a fuller edited gallery, often 40 to 80-plus images. It is the better value if you plan to print, share widely, or want real options to choose from.

    For milestone parties with guests, speeches, and cake moments, plan beyond portraits. A 3 to 4 hour coverage package captures arrivals, décor, group photos, candids, and the hero moments without rushing. That window is the sweet spot for 21sts, 30ths, 40ths, and beyond.

    How city and location shift the numbers

    Your market sets the floor. Expect higher mini-session pricing in California or New York, roughly $300 to $500, and $600 to $1,000 or more for full sessions. Texas and Florida tend to run more moderate: minis around $150 to $350, full sessions $350 to $600. Treat these as context checks, not ceilings. If you love a portfolio and the studio runs a tight ship, the extra $100 often buys faster delivery and fewer headaches. For a deeper breakdown of factors that influence price, see what affects the cost of a photo session.

    How to find a birthday photoshoot near me

    Finding a birthday photographer near you is not hard. Filtering the noise is the real work. Discovery tools only get you names, your vetting decides the outcome.

    Platforms that surface local birthday photoshoot options fast

    Start with Google Maps. Search your city plus “birthday photographer” and open business profiles with strong recent reviews and real event photos. On Instagram, combine #birthdayphotographer with your location tag to see current work and how photographers pose, light, and edit. Specialized directories like PartySlate can speed up shortlisting, but use them for discovery only. The platform matters less than the portfolio and how the photographer communicates once you reach out.

    Trust signals that separate professionals from hobbyists

    Look for a portfolio with birthday-specific shoots, not just weddings and landscapes. Professionals publish clear packages, timelines, and contracts. During your first inquiry, they should answer questions directly and reply within 24 hours, that response speed predicts what delivery and day-of coordination will feel like. A studio that is organized before booking will be organized on shoot day.

    Why turnaround speed should be a filter, not an afterthought

    Many photographers promise galleries in 4 to 6 weeks. For birthdays, that delay kills momentum. Typical portrait delivery in 2026 runs 2 to 3 weeks, with preview proofs in 1 to 3 days, and you can do better than average. Prioritize studios that commit to fast turnarounds and preview galleries upfront. At Creative Media Production LLC on Oahu, same-day previews are built into every birthday photo session so families can relive the moment while the excitement is still fresh. If a photographer cannot state their delivery timeline clearly from the start, treat that as a professionalism gap. For industry context on typical turnaround expectations, see typical photo turnaround times.

    Birthday shoot themes for every age and vibe

    Themes make planning simple. They focus outfits, props, and location so everything points to one clear mood. Below are ideas that photograph well, grouped by age.

    Kids birthday shoot ideas (ages 1 to 12)

    Animal Kingdom Adventure sets a playful tone with safari hats, binoculars, and plush animals. Outdoor parks with open trees give kids space to explore and make candid expressions easy to capture. Under the Sea brings whimsy with a studio backdrop in blues and greens, seashell accents, and a bubble machine, the controlled setup keeps little ones engaged and the light consistent.

    Superheroes Assemble leans bold with capes, masks, and bright colors. A park or studio with graphic backdrops gives room for action poses and jump shots. Rainbow Picnic keeps things candid and joyful: oversized balloons, a mini cake, and open grass in soft natural light. Simple props, big smiles, and very little that can go wrong.

    Teen and adult themes that photograph well

    For teens, Vintage Glamour pairs elegant outfits with candlelight and a textured studio wall for a classic, cinematic feel. Space Odyssey uses star and planet props on a dark backdrop so neon accents pop. Enchanted Garden lives best at a botanical garden or floral courtyard, where backlight filtering through leaves adds a dreamy glow.

    For adults, James Bond Formal belongs in a lounge or upscale bar with dramatic lighting, a tailored suit or sleek dress, and a champagne toast. Birthday Picnic works with coordinated blankets, gourmet bites, and a scenic park at golden hour. All-White Elegant keeps it timeless with a monochrome wardrobe and a clean studio or modern architecture as the backdrop. Boho Chic uses earthy tones, woven textures, and wild florals in a natural outdoor setting. Milk Bath is artistic and serene, done in a luxury tub with florals and soft window light for a fine-art result. Choose a theme that fits the personality first, then pull props and location to match.

    Universal props that work at any age

    Numbered balloons, mini cakes, confetti, and meaningful personal items always read well on camera. Natural light setups bring out true color and skin tones. Personal props beat rented décor because authenticity shows up in the final image in ways that generic rentals simply do not.

    What a solid birthday photography package should actually include

    Most people shop by hours and price. That is exactly how expectations get missed. A strong birthday portrait studio spells out deliverables, file specs, and delivery timeline in writing before you sign anything.

    Core deliverables to expect in any package

    • Professional editing with true color correction and basic retouching, not just raw exports
    • High-resolution files for print and web-ready files for sharing
    • Password-protected online gallery with easy download and sharing options
    • Clear coverage times and a written contract with timeline and deliverables spelled out

    Duration-based party coverage is standard: 2 to 4 hours for smaller gatherings, 4 to 8 hours for larger events, and full-day with multiple photographers when the guest list demands it. Judge packages by outcomes you can see, not by how long someone is on site.

    Add-ons worth considering for milestone shoots

    Book a dedicated 10 to 15 minute portrait window for the birthday person and key groups. These are the frames people print and hang on walls. Premium albums are a worthwhile investment if you want something tactile on the coffee table rather than photos that live only on a phone. Photobooth rentals change the guest experience by creating keepsakes on the spot. At Creative Media Production LLC, photobooths pair with event coverage so guests leave with prints while the full gallery is being finalized. If you want guidance on combining event coverage and on-site features, see Hiring a Holiday Party Photographer on Oahu for examples of package pairings and logistics.

    Same-day previews: why fast delivery separates good studios from great ones

    Excitement peaks in the first 24 to 48 hours. Same-day preview galleries give you hero images to share while the party buzz is still alive, and some studios also enable on-site printing or quick online print orders to keep the energy going. Studios that build fast previews into their workflow are prioritizing client experience, not just final delivery. Ask for this upfront and treat it as a quality benchmark when comparing your options. For services that offer quick print fulfillment and same-day pickup, many studios partner with local labs or services like Walmart Photo same-day prints to give guests physical keepsakes before they leave.

    Questions to ask before you book a birthday party photographer near me

    Booking should feel straightforward. If the conversation feels slippery, walk away. Use these questions and trust the answers you get in the first exchange.

    Contracts, insurance, and backup plan questions

    Ask three things directly: Do you have a written contract? Do you carry liability insurance? What happens if you have an emergency on the day of the shoot? Professionals answer without hesitation and send proof. No contract means no protection for you, period. Also confirm how overtime works if the party runs long, clarity now avoids awkward money conversations later.

    Style, delivery, and communication questions

    Ask to see a full birthday gallery, not just highlight reels. Confirm editing style, number of edited images, and delivery timeline in writing. Ask whether same-day previews or sneak peeks are included in the quoted price. Then cover lighting, many birthdays happen indoors with mixed light sources. A professional should discuss off-camera flash, soft boxes, or LEDs and explain how they balance ambient light for clean skin tones. If they only shoot outdoors in natural light, that is a real limitation you should know before booking.

    Red flags that should end the conversation fast

    • No birthday-specific portfolio or only vague, unrelated samples
    • Suspiciously low pricing with unclear deliverables
    • No contract, no insurance, or no backup plan
    • Slow, evasive, or inconsistent communication
    • Rigid packages with zero flexibility for your actual event

    A pre-shoot prep checklist so nothing gets missed

    Lock the basics first. Finalize timeline and location in writing, share a short shot list of priority moments, and confirm permits if you are using a public beach or park. Choose outfits around a simple color palette that photographs cleanly, trying to force everyone into one exact shade usually backfires.

    Decide on props and who brings what. For adults, 2026 trends lean toward monochrome sets, metallic accents, and rich jewel tones. For kids, comfort beats perfection every time. Shoes and hair matter far less than energy and mood.

    On the day, arrive 15 minutes early so your photographer can map light and angles before the session starts. Brief family or friends on when group portraits happen so candids do not get interrupted at the wrong moment. Have a backup indoor spot ready if weather turns, especially for outdoor birthday photo sessions on Oahu or other coastal locations. If your photographer offers same-day previews, plan a 20 minute window at the end to review hero images before everyone disperses. For step-by-step planning specific to island families, check Essential birthday party photography steps for Oahu families.

    Conclusion

    Searching for a birthday photoshoot near me gets a lot easier once you know what to look for: real pricing, clear deliverables, a theme that fits the person you are celebrating, and a studio that communicates well and delivers fast. Do not settle for vague quotes or six-week timelines. Your birthday memories deserve better than that.

    If you are planning a birthday shoot on Oahu, Creative Media Production LLC covers every detail, personalized planning, island-friendly logistics, premium photobooths, and same-day preview galleries built into every package. From Kailua to Kualoa to Magic Island, we know the permits, the light, and the locations that make birthdays look exactly as good as they felt. Learn more about How family photoshoots enhance Oahu celebrations: 5 key benefits to see why local expertise matters when you book.

    Ready to book a local birthday photoshoot this year? Reach out to Creative Media Production LLC to check availability and talk through your vision. We will keep it simple, clear, and on time.

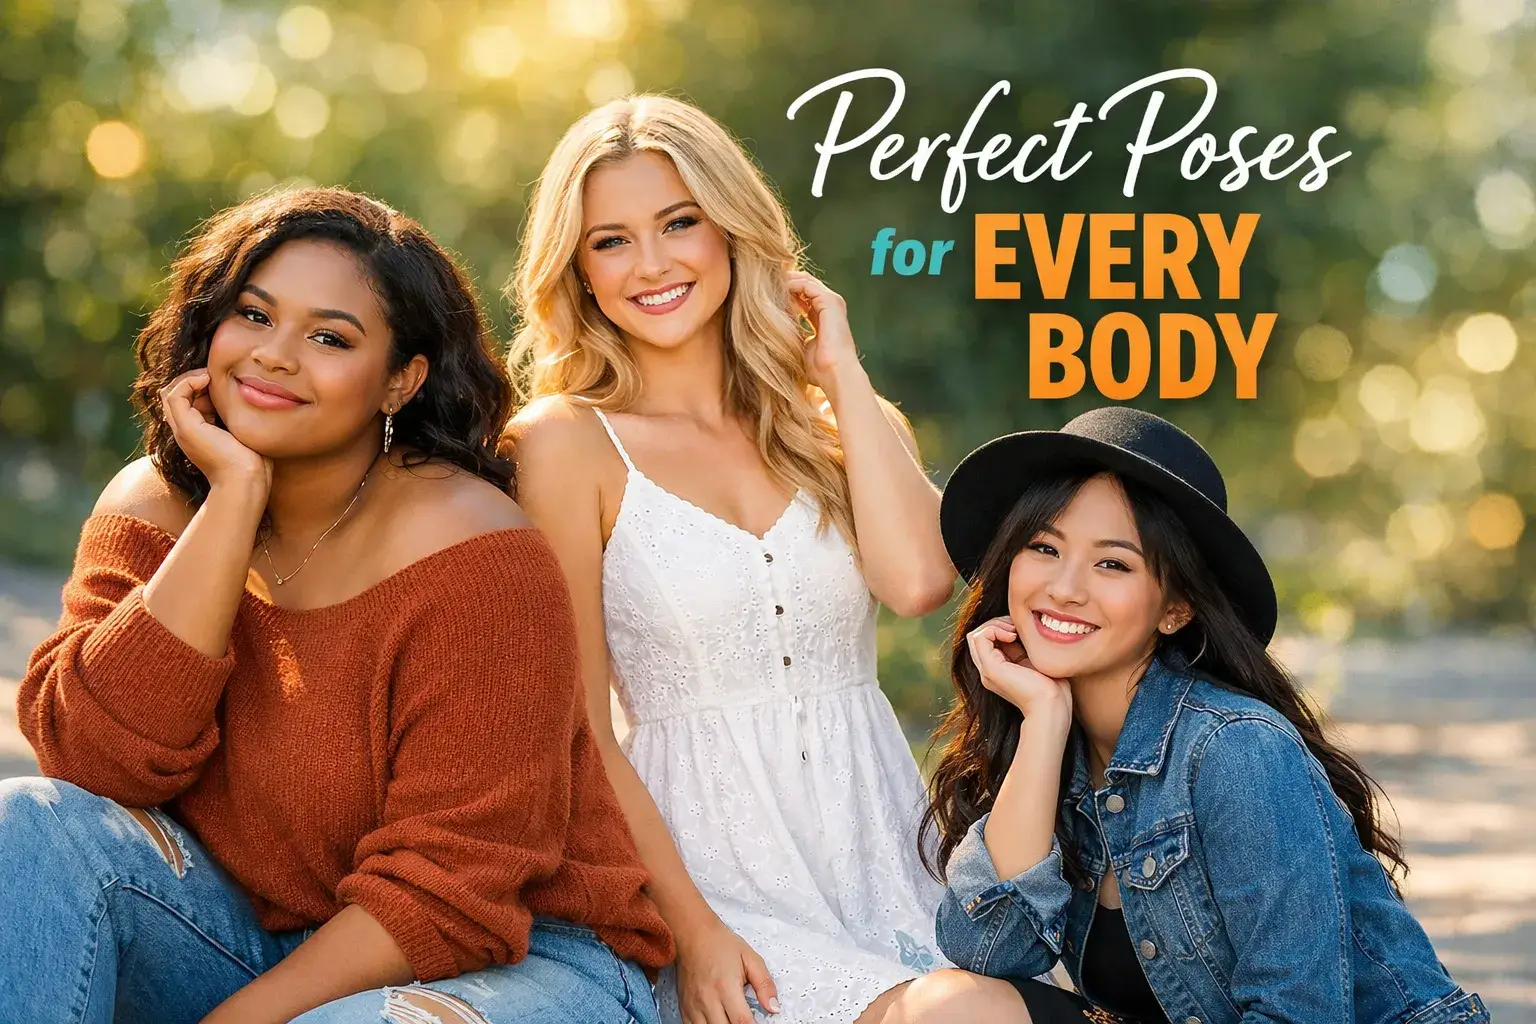
  • 15 Senior Photoshoot Poses That Flatter Every Body Type

    15 Senior Photoshoot Poses That Flatter Every Body Type

    Most seniors walk into their portrait session with no idea what to do with their hands. They don’t know where to look, how to stand, or what to do when the photographer says “just be natural.” The result is stiff, forced photos that don’t look anything like the person in them. This guide walks you through 15 senior photoshoot poses sorted by gender, body type, and personality, with real, actionable cues you can actually use.

    Whether you’re working with a local photographer or planning your own senior photoshoot ideas from scratch, knowing which poses work for your body type and style makes a measurable difference in the final gallery. These senior picture ideas are designed to give you a confident starting point before you ever step in front of the lens.

    Why most seniors look stiff in photos (and what actually fixes it)

    The problem isn’t the person. It’s the lack of direction. Photography guides consistently note that generic cues like “just relax” or “be yourself” are largely unhelpful for nervous subjects, and they tell a 17-year-old exactly nothing actionable. Stiffness comes from uncertainty, and uncertainty comes from not knowing what to do with your body when a camera is pointed at you.

    Three things change everything: weight distribution, hand placement, and chin angle. Shift your weight to one leg and your posture instantly looks more natural. Give your hands something to do and the tension in your shoulders drops. Bring your chin slightly down and forward and your jawline sharpens. None of this is complicated. It just needs to be said out loud.

    Use this posing guide for seniors by screenshotting the poses that match your style and sharing them with your photographer before the session. Poses are starting points, not rigid rules. A good photographer adapts them in real time based on what’s working. On-set coaching significantly reduces guesswork and increases the number of usable shots, so you’re never left standing there wondering what to do next.

    Essential senior photoshoot poses for girls (poses 1, 7)

    Standing poses that slim and define (poses 1, 3)

    Pose 1: Basic hip pop. Point your toes at 45 degrees from the camera, shift your weight to the back leg, and rest one hand softly on your hip with fingers relaxed. Bring your chin slightly down and tilt your head toward your raised shoulder. This is the foundation of almost every standing female senior portrait pose because it creates a natural S-curve and works regardless of outfit or location.

    Pose 2: Lean and giggle. Start in the hip pop, then lean your torso slightly toward the camera with your weight shifting forward onto the front foot. Keep your hands soft on your hips or lightly grab your opposite forearm. The photographer cues a genuine laugh by saying something like “laugh at that random tree over there,” and the head tilt down or over the shoulder happens naturally.

    Pose 3: Over-the-shoulder look. Turn your body 45 degrees away from the camera, shift weight to the back leg, and place your hands softly on your hips or in your hair. Squeeze your shoulder blades back, then turn your head last with your chin parallel to the ground. This one defines the collarbone, elongates the neck, and creates a strong profile without requiring any forced expression.

    Seated and kneeling poses for a relaxed, editorial look (poses 4, 5)

    Pose 4: Forearm grab. Sit or kneel with one knee up and the other leg tucked or extended. Cross your arms softly and grab the opposite forearm with loose, curved fingers. Angle your head slightly up or toward the camera. Sitting takes the pressure off standing perfectly and gives your body a natural anchor point.

    Pose 5: Sitting on steps or ground. Bring both knees to one side, put your weight on one hip, and place one hand flat on the ground beside you for support. This pose reads as relaxed and editorial without trying to be either. It works especially well on outdoor stairs, curbs, and open shorelines where the ground itself becomes part of the composition.

    Hair and movement cues that make the difference (poses 6, 7)

    Pose 6: Hair touch close-up. Shift your weight to one side with knees slightly soft. Bring one hand up to touch or run fingers through your hair, keeping your elbow down and your wrist loose. Tilt your head toward your hand at roughly a 15-degree angle and hold eye contact with the camera. This is one of the best close-up poses because it frames your face and gives your hands clear purpose. For additional inspiration, photographers often reference lists of favorite poses for senior girls to adapt the hair-touch idea to different looks.

    Pose 7: Walking away with a glance back. Start with a relaxed stride away from the camera, shoulders back and down. On cue, lift your chin and turn your head back over your shoulder. Let your dress or jacket catch the movement. These shots work best as bookend images in a session, they deliver variety and a sense of story without requiring a full reset of position or lighting.

    5 confident senior photoshoot poses built for guys

    Standing and leaning poses that look effortless (poses 8, 10)

    Pose 8: Hands in pockets, slight lean. Hook one or both thumbs into your front pockets, shift your weight to your back leg, and let your shoulders drop. Look straight at the camera or slightly off to one side. The key for any standing guy pose is keeping hands occupied. Idle hands create tension that reads immediately on camera.

    Pose 9: Shoulder lean against wall or tree. Put one shoulder into the surface, cross one arm or drop one hand into a pocket, and plant your feet at a natural angle. Look toward the camera or let your gaze drift slightly. This pose communicates ease without requiring any expression work, which is exactly why it’s one of the most reliable setups for guys in any senior photo session.

    Pose 10: Arms crossed, standing tall. Stand with feet roughly shoulder-width apart, loosely cross your arms, and hold your chin parallel to the ground or slightly elevated. Keep your arms loose, not locked. This pose reads as confident and composed without looking like you’re posing for a LinkedIn headshot. If you want more variations tailored for male seniors, see this practical collection of my go-to poses for senior guys.

    Seated poses that communicate confidence without looking posed (poses 11, 12)

    Pose 11: Elbows on knees, forward lean. Sit on a staircase, bench, or curb. Rest your elbows on your thighs and let your hands hang loosely clasped in front. Lean slightly forward from the waist. This grounded position drops physical tension out of the body, which is why expressions in this pose tend to look more genuine than almost any standing setup.

    Pose 12: Staggered legs on stairs. Place each foot on a different step so your body sits at a natural diagonal angle. Rest one elbow on the higher knee and let your other arm hang or rest loosely. The asymmetry does all the work, it creates visual interest without requiring the subject to think about posing at all.

    How to match any pose to your body type

    Body type changes which version of a pose works, not which poses are available to you. Small adjustments in angle, arm placement, and camera position are the difference between a pose that flatters and one that doesn’t. These are the same techniques commonly used by professional portrait photographers across a wide range of senior portrait sessions. For a short, actionable set of tips on flattering senior photos, many photographers consult guides like 5 tips for flattering senior photos when planning camera angles and lighting.

    Petite and curvy builds

    For petite seniors, stand with one leg slightly forward, tilt your hips, and keep your head up. A camera positioned slightly above eye level elongates the torso and creates more vertical space in the frame. For curvy builds, angle your body 45 degrees away from the camera and leave visible space between your arm and your waist. Crossing your legs while standing or seated creates a slimming vertical line that works across almost every outfit.

    Tall and athletic builds

    Tall seniors benefit from seated and perched poses that break up vertical length. Leaning against something solid, a tree, a wall, a railing, grounds the frame and adds visual anchor. For athletic builds, over-the-shoulder turns with backlight soften strong lines. Soft hand poses like the hair touch or forearm grab introduce gentle curves that balance out a more muscular silhouette. Camera angle does as much work as the pose itself. A mid-level angle balances tall frames naturally without distorting proportions.

    Movement senior photoshoot poses that feel genuinely candid (poses 13, 15)

    The most natural-looking senior photos usually aren’t still. Movement breaks tension, frees up expression, and gives photographers real moments to capture. Think of it as creating the conditions for a genuine reaction rather than waiting on a manufactured one.

    Walking and spinning variations (poses 13, 14)

    Pose 13: Walk toward or away from camera. Let your arms swing naturally or rest one hand on your hip. On cue, look back over your shoulder with your chin lifted. The photographer captures the expression mid-motion, which is where the authentic shots tend to live. Walking sequences like this consistently yield multiple usable frames in a short window, making them efficient for both photographer and subject.

    Pose 14: Spin or twirl. Hold the edges of your dress lightly with your fingertips and spin. Make eye contact each time you face forward. Let your hair move freely. This pose works particularly well on open beaches and grassy overlooks, where the environment adds context to the movement and natural light catches fabric and hair at the same time.

    The over-shoulder candid (pose 15)

    Pose 15: Mid-stride glance back. Keep your gait relaxed with shoulders down and back. Turn your head last, not your shoulders first, and let a laugh or smile come from the surprise of the cue rather than a countdown. Unlike the bookend version in Pose 7, this variation captures a full mid-stride moment with the body in motion, not at the start of a walk. The expression reads as unguarded precisely because it happens before the subject has time to compose a look. It’s a reliable closer for most senior portrait sessions because it tends to produce the kind of natural, off-guard shot that clients respond to most.

    Why on-set coaching matters more than any pose list

    A list gives you a framework. A coach gives you confidence in the moment. For most seniors, the hardest part isn’t knowing the pose, it’s executing it when there’s a camera pointed at you and time ticking down. That’s where the session environment does most of the work. If you or your subject are especially camera shy, our related guide How to Pose Camera Shy Couples Naturally, Creative Media Production LLC offers actionable cueing strategies that translate well to solo senior sessions too.

    An experienced photographer walks a senior through each pose with verbal cues in real time, adjusting chin angle, hand placement, weight distribution, and expression continuously. Seniors who are coached through their session tend to walk away with more usable images because fewer shots get wasted on figuring out the setup. The overall gallery is stronger, and the experience is considerably less stressful. For readers interested in common errors to avoid, the 15 common portrait mistakes resource is a useful checklist photographers and subjects can run through before a shoot.

    At Creative Media Production LLC, senior portrait sessions on Oahu are built around personalized pose planning, with each setup adapted on set to match the senior’s natural strengths rather than applied from a one-size-fits-all template. From outfit choices to preferred island locations, the session is structured around the individual, which shows in the final images, and if you’re exploring related family session options while you’re on-island, see our overview What is birthday photography: a family guide in Oahu for ideas that translate between session types.

    Take your shot list into the session with you

    Senior photoshoot poses aren’t about becoming a model for a day. They’re about showing up with a clear map so you can communicate with your photographer, stay out of your own head, and let the session actually be fun. The 15 poses in this guide cover the full range: standing, seated, and movement options for both guys and girls, adaptable to every body type.

    Pick 8 to 10 that match your style, enough to give the session variety without overloading a 1, 2 hour shoot. Screenshot them and share them with your photographer before the session so you’re both working from the same starting point. If you’re shooting on Oahu and want a team that coaches you through every pose in real time, reach out to Creative Media Production LLC to plan your session and come in knowing exactly what to expect. You can also review our Senior Photoshoot Tips: Capturing Milestones with Island Vibes, Creative Media Production LLC for planning checklists and location ideas.

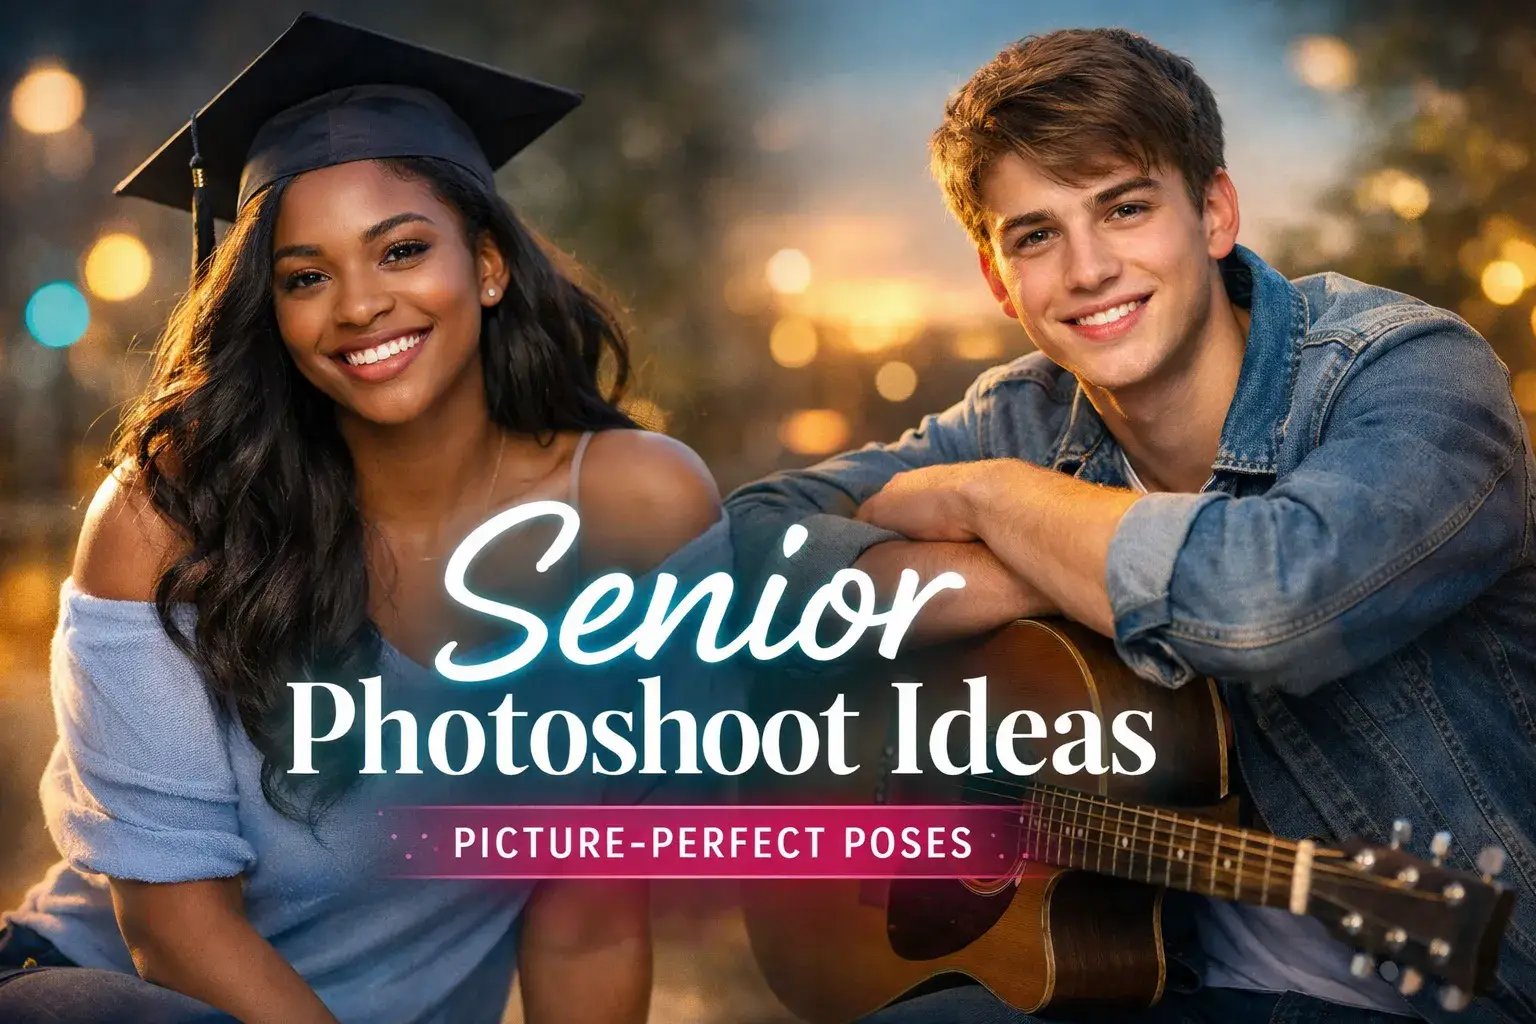
  • 10 Senior Photoshoot Ideas for Picture-Perfect Portraits

    10 Senior Photoshoot Ideas for Picture-Perfect Portraits

    Many people find themselves pulling out their senior portraits decades later, not because they planned to keep them, but because something in the image made it worth keeping. The right senior photoshoot ideas make that happen. That only occurs when the session was planned with real intention, not just a search for a pretty backdrop and a good angle.

    This guide covers 10 senior photoshoot ideas that actually work: locations with natural depth, props that tell a real story, styling choices that hold up under warm evening light, and a session structure that keeps things moving without feeling rushed. The team at Creative Media Production LLC has photographed seniors across Oahu and knows which concepts look great on a Pinterest board and which ones actually translate to frame-worthy portraits. These 10 ideas reflect that hands-on experience alongside current industry best practices. By the end, you’ll have a full plan you can take into any session.

    Location ideas that give your portraits natural depth

    Location is one of the most important variables in a senior session. A strong backdrop does half the compositional work before a single pose happens. These four senior portrait ideas cover the range of environments that consistently produce compelling results.

    Idea 1: Golden-hour fields and open natural landscapes

    Wildflower fields, rolling golden grass hills, and open meadows photographed in late afternoon light produce some of the most naturally beautiful senior portraits available without a single prop. The color contrast between warm grass tones and open sky frames the subject without competing with them. Shoot within the last 45 to 60 minutes before sunset, when golden-hour light is warmest and most flattering. Earthy outfit tones (cream, tan, mustard, and sage) harmonize with these environments rather than clashing. For additional guidance on ideal timing for portraits, see what is the best time of day to take senior portraits.

    Idea 2: Beach and coastal settings

    Coastal backdrops work year-round and offer three things that most settings don’t: water movement, open sky, and sandy texture that can be flattering for a wide range of skin tones. Barefoot walking shots and candid wind-in-hair moments feel authentic here rather than staged. Coastal light is also softer and more forgiving than midday urban light, which means fewer harsh shadows and more flattering results with less effort.

    Idea 3: Urban streets and historic architecture

    Brick walls, cobblestone alleys, and architectural framing create texture and leading lines that natural settings offer in entirely different ways. This setting suits seniors who want a less outdoorsy look, something more editorial and polished. It pairs especially well with structured, styled outfits and confident standing poses. The contrast between a well-dressed subject and a raw urban backdrop produces images with a lot of visual energy.

    Idea 4: Forest paths and woodland settings

    Dappled light filtering through a tree canopy creates a soft, cinematic quality that’s difficult to achieve anywhere else. Forests also offer natural leading lines: paths, rows of trees, and overhead branch patterns that draw the viewer’s eye directly to the subject. The cooler, muted tones in forested environments work best when the senior wears lighter colors or high-contrast outfits that stand out against the green and shadow.

    Senior photoshoot ideas: props and personal items worth bringing

    Props aren’t just accessories, the right ones tell a story about who the senior actually is, which makes the photos feel personal rather than generic. These three ideas consistently produce images with real meaning behind them. For more prop inspiration, check this list of props for senior photos, and for a practical packing checklist see the ultimate checklist: 15 must-haves to bring to your senior photo shoot.

    Idea 5: Sports gear, uniforms, and athletic accessories

    Jerseys, letterman jackets, sports balls, and cleats add energy and achievement context that a plain outfit can’t communicate on its own. These props work well in action-oriented poses against natural outdoor backdrops. One important note: bring the actual gear used in competition, not a generic stand-in. The worn-in quality of real equipment reads authentically on camera in a way that borrowed or brand-new gear doesn’t.

    Idea 6: Musical instruments and creative tools

    Instruments are among the most photogenic props available. Guitars, violins, and brass instruments have strong lines, natural holding positions, and they invite genuine, absorbed expressions rather than forced smiles. Art supplies, sketchbooks, and other creative tools work on the same principle. When a senior looks occupied with something they actually care about, the camera captures real focus instead of posed performance.

    Idea 7: Cap, gown, and graduation signage

    Cap and gown shots are a session must, not just a formality to check off. The cap alone opens up real variety: tossed in the air, held casually at the side, or angled low for a confident look. A diploma, tassel, and graduation year sign add clear celebration context without overcomplicating the frame. Shoot cap and gown first, before the gown wrinkles and energy starts to drop.

    Senior photo session ideas: style and concept choices that help seniors stand out

    Location and props do a lot of the work. But concept-level thinking is what separates good senior portraits from genuinely memorable ones. These three ideas operate at that higher level.

    Idea 8: Multiple outfit changes for visual variety

    Three to five outfit changes in a single session create completely different moods and give the senior a much wider range of final images to choose from. Sequence matters: start with the most formal look (cap and gown), move into casual, and finish with the most relaxed or personal outfit. Outfits should vary in color weight, not just style. Switching from a structured blazer to a flowy boho dress isn’t enough if both are the same shade of navy.

    Idea 9: Candid lifestyle shots and movement sequences

    The best senior portrait often isn’t a posed shot at all. Walking toward the camera, laughing naturally, or looking off-frame produces expressions that stiff, directed poses rarely deliver. A good photographer doesn’t just wait for accidents, they create the conditions for real moments by using prompts like “tell me about your plans after graduation” to pull out genuine smiles and relaxed body language. Movement is a tool, not an afterthought. For pose inspiration specifically for girls, this roundup of favorite poses for senior girls can be helpful when building prompts and sequences.

    Idea 10: Pets and meaningful personal accessories

    Pets, especially dogs, often produce genuine emotion on camera. Seniors tend to drop their posing face the moment a dog enters the frame, and the resulting shots are frequently among the most natural-looking of the entire session. Meaningful accessories work on the same principle at a quieter level: a grandmother’s jewelry, a college shirt from an early acceptance, or a hobby-related object adds layered personal meaning without needing any explanation in the photo itself.

    What to wear for outdoor and golden-hour senior sessions

    Outfit choices prevent the most common session mistake. Wearing something that blends into the backdrop or photographs harshly under warm evening light wastes the entire golden-hour window you scheduled the session around.

    Color palettes and textures that work

    Build each outfit around a neutral base: creams, tans, soft grays, and slate blues. Add one warm accent color per look, blush, mustard, sage green, or olive, without stacking multiple bold colors together. Texture is what makes a flat outfit look intentional on camera. Denim, lace, chiffon, velvet, and cable knit all add visual depth that solid, flat fabrics simply don’t. If you use a pattern, keep it subtle. The face should be the focal point, not the shirt. For more detailed wardrobe guidance, see this guide on what to wear for senior photos.

    What to skip

    Bright white reflects harshly in direct golden-hour light and can wash out naturally warm skin tones. Neon colors overwhelm everything around them, including the subject’s face. Overly busy prints compete with the face for the viewer’s attention. Each of these is an easy mistake to avoid once you know the reasoning behind it.

    How to structure a 60 to 90 minute session from start to finish

    Variety across full-body, close-up, posed, and candid shots is the goal, not sheer volume. A phase-based approach keeps the session moving without feeling rushed or chaotic.

    Phase 1: Cap and gown formal (first 10 to 15 minutes)

    Start with cap and gown when the gown is fresh and energy is high. Cover the essentials: full-body standing, close-up with the cap angled, walking toward camera with the gown flowing, and a medium shot showing cords or stoles. These shots have the most institutional value for families, so get them done well before anyone gets tired.

    Phase 2: Variety poses and props (next 30 to 40 minutes)

    This is the bulk of the session. Mix full-body dynamic poses, close-ups capturing expression and detail, prop-based shots, and medium candid-style movement. A rough ratio to work from: 40% full-body, 30% close-ups, 20% cap and gown, 10% candid.

    Outfit changes should happen between phases to maintain momentum and prevent the session from stalling out.

    Phase 3: Candids, lifestyle shots, and group moments (final 20 to 25 minutes)

    End with the least structured work. Walking shots, laughter, any friend or family additions (see our 10 Family Outdoor Photo Ideas for Oahu Events), and final hobby-based images. By this point in the session, the senior has already loosened up from the earlier phases. Spontaneity and genuine energy are highest here, which is exactly when the most personal photos happen.

    Planning your senior portraits on Oahu: what changes when the island is your backdrop

    All 10 senior photoshoot ideas in this article work anywhere. But they land differently in Hawaii. Oahu’s specific mix of coastal cliffs, rainforest edges, volcanic landscapes, and urban Honolulu settings means the backdrop options are unusually diverse, often within a 30-minute drive of each other. Kualoa Valley delivers cinematic mountain depth. Lanikai Beach gives you turquoise water and powdery sand. Ka’ena Point offers raw coastal drama. North Shore stretches provide long, uninterrupted golden-hour light with almost no crowds.

    The team at Creative Media Production LLC maps these session ideas to specific Oahu locations based on the session’s mood and the senior’s personality, and that planning process happens before the shoot, not on the day of it. Sessions are tailored to each senior, and the process typically starts with a consultation to work out which ideas fit best and which Oahu locations bring them to life, learn more about what to expect for your senior session during that planning conversation. If you’re ready to build your session around a few of these concepts, reach out and we’ll start with that conversation. You can also read our in-depth Senior Photoshoot Tips: Capturing Milestones with Island Vibes, Creative Media Production LLC for more on how we approach sessions.

    Build the session around who the senior actually is

    Senior portraits mark a finite moment. The photos follow the grad for years, sometimes decades. That’s the real reason this planning matters. A coastal candid with a favorite instrument hits differently than a generic studio pose, not because it looks better, but because it’s actually true to who that person was at that specific point in their life.

    The best senior photoshoot ideas are the ones that reflect the real senior, not just what looked good on someone else’s Instagram. Pick 8 to 10 ideas from this guide, build your shot list, sequence your outfits, and find a photographer who will execute the vision, not just show up and start snapping. If your session is also tied to a milestone like a birthday, consider our What is birthday photography: a family guide in Oahu to adapt these ideas for celebrations. The session is short. The photos last much longer.

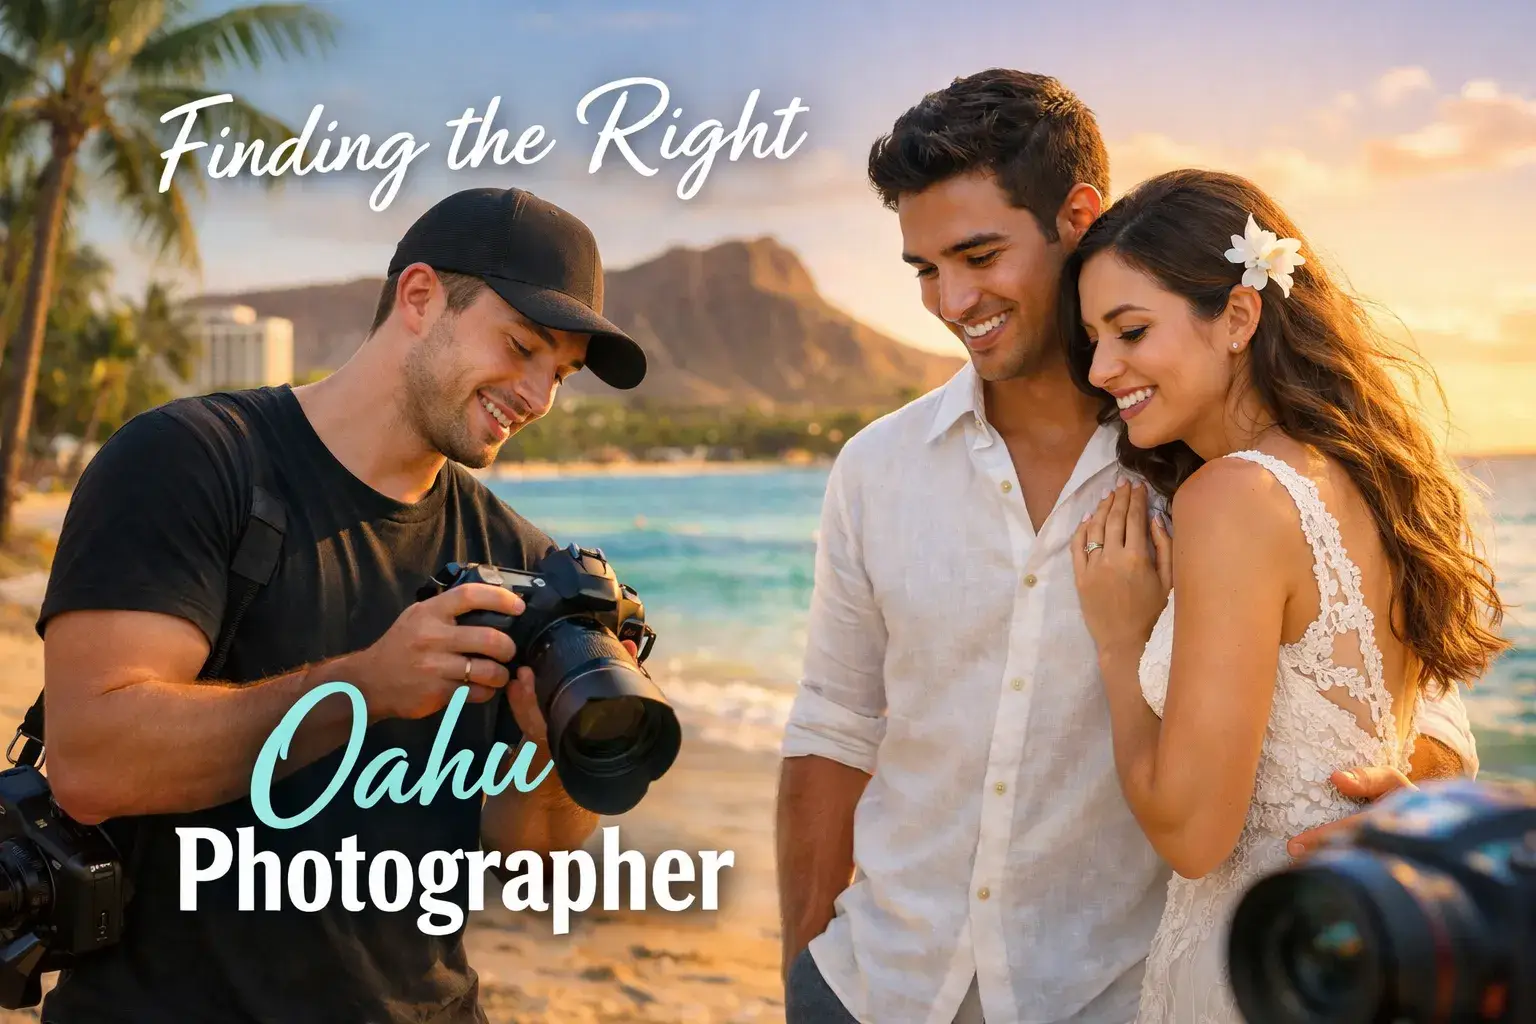
  • How to Choose the Best Oahu Wedding Photographer

    How to Choose the Best Oahu Wedding Photographer

    Choosing an Oahu wedding photographer is one of the most important decisions you’ll make for your wedding day, and one of the easiest to get wrong. Prices range from a few hundred dollars to nearly ten thousand. Many couples scroll Instagram for a few hours, fall in love with a handful of images, and book whoever responds fastest. That’s not a strategy. It’s a gamble with one of the most important days of your life.

    The couples who end up genuinely thrilled with their wedding images tend to start differently. They talk to locally rooted teams who know this island well: the beaches that photograph beautifully during golden hour, the permits that need to be filed weeks in advance, the backup plan when clouds roll in over the North Shore. That local knowledge is what a team like Creative Media Production LLC brings to every ceremony they cover on Oahu, from Waikiki to Waimanalo, with a planning process built around each couple’s specific vision and the real logistics of shooting on this island.

    This article covers everything you need to make a confident, informed booking decision: photography styles and how to evaluate them honestly, what Oahu wedding photography packages include, what quality coverage realistically costs in 2025, which locations photograph best and why, and the specific questions that reveal whether a photographer is worth your deposit.

    What photography style should drive your decision first

    The biggest mistake couples make is picking a photographer based on one stunning image. A portfolio tells a story, and you need to read the whole thing, not just the highlight reel. That single golden-hour shot you saved to your phone could represent the best image from an otherwise inconsistent body of work.

    Documentary, editorial, and fine art: knowing the real difference

    Documentary photography, sometimes called photojournalistic, focuses on candid, unposed moments as they unfold. It’s observational: the grandmother wiping her eyes during vows, the groomsmen laughing before the ceremony, the spontaneous first dance dip. You’re not directing anyone, you’re capturing real life as it happens. Editorial photography works differently. It’s structured, directed, and intentionally composed, the kind of images you’d see in a luxury wedding magazine. Fine art photography leans furthest into mood and aesthetics, often prioritizing light, color, and visual harmony over spontaneity. It’s painterly and deliberate.

    Many Hawaii wedding photographers blend all three across a full day of coverage. That’s the norm for experienced professionals. The question is: which approach do you want to dominate your gallery? Know the answer before you start reaching out to photographers, because it filters your entire shortlist. If you want practical steps for vetting local teams, our guide on How to Hire the Best Event Photographer in Oahu lays out the questions and red flags to watch for when you begin outreach.

    How to read a full wedding gallery, not just the highlights

    Any photographer can post their ten best shots. What you need to see is a complete gallery from a real eight-hour wedding. Ask for one directly, and specifically request a gallery from a similar venue or beach setting to yours. Then look for how they handle the harder parts of the day: low-light reception moments, candid family interactions, the chaos of getting ready, the quiet in-between moments that often define how a couple remembers the day. Also cross-check portfolios with local directories like WeddingWire’s Honolulu photographers directory to confirm availability and recent reviews.

    Consistency is the real differentiator. If quality drops sharply after the ceremony portraits, that tells you something important. Strong professionals deliver at a high level throughout the full event, not just during golden hour.

    Matching your photographer’s style to your venue and vibe

    A North Shore beach elopement with 12 guests calls for a completely different approach than a formal Honolulu wedding reception for 150. The location, scale, and atmosphere of your wedding should directly inform which style, and which photographer, you pursue. A fine art photographer who thrives in soft, controlled light may not be the right call for your high-energy outdoor celebration. Get clear on your venue and vibe first, then match your photographer to that context. If you’re looking for inspiration on love-story-focused imagery, see our notes on Oahu Wedding Photography for Beautiful Love Stories.

    What Oahu wedding photography packages typically include

    Two photographers charging the same rate can deliver dramatically different things. One might include a second shooter and full print rights. The other is a solo shooter with a 100-image cap. Understand what each number covers before you compare prices.

    Coverage hours, edited images, and delivery timelines

    Packages are typically tiered by coverage duration. Short sessions covering one to two hours work for intimate elopements. Four to six hours covers most ceremony-focused weddings. Eight or more hours gives you full-day coverage from prep through reception. Most packages include between 50 and 100 professionally edited, high-resolution images per hour, delivered through a private online gallery. Standard turnaround across Oahu photographers runs four to six weeks, though some photographers, including the team at Creative Media Production LLC, offer faster delivery for couples working with tight timelines. For help structuring your day-to-day shot plan, the Oahu Wedding Photographer Timeline Planning guide explains typical schedules and where photographers commonly allocate coverage.

    Second shooters, engagement sessions, and albums

    A second shooter matters when you have a large guest count, multiple simultaneous locations, or complex reception coverage. They capture angles and moments a single photographer physically can’t. Engagement sessions are either included in premium packages or offered as paid add-ons. They’re worth doing, the images are a bonus, but the real value is building a working relationship with your Oahu engagement photographer before the wedding day. Albums are almost always a separate purchase. Decide early whether a physical album is a priority, and budget for it accordingly.

    Print rights and usage explained simply

    Most Oahu wedding photographers include a personal print release with every package. This means you can print and share your images freely for personal use. Full copyright transfer, where you’d own the images outright and control all commercial usage, is rare and significantly more expensive. For most couples, a standard personal print release covers everything they need. Just confirm it’s explicitly included before you sign anything.

    What Oahu wedding photographer pricing realistically looks like in 2025

    The price range on Oahu is genuinely wide. Budget-friendly photographers start around $300 to $450 per hour. Mid-tier professionals who’ve built a real track record on the island run $500 to $750 per hour, with full-day Oahu wedding photography packages landing between $3,000 and $6,000. High-end and luxury photographers push $800 to $1,200 or more per hour. Short elopement sessions, typically one location and one hour, start around $600 to $1,000.

    Mid-range couples investing in quality Oahu wedding photography commonly spend between $3,000 and $6,000 for solid, experienced coverage of a standard ceremony and reception. That range reflects professionals with real island experience, comprehensive packages, and consistent delivery, not entry-level shooters filling a calendar. For a deeper look at typical Hawaii pricing and what to expect from combined photo and video packages, see this breakdown of how much a wedding photographer & videographer costs in Hawaii.

    What drives the price up (and what actually matters)

    Experience level is the biggest factor, followed by package inclusions and demand. A second shooter adds $100 to $600. Additional hours run around $500 each on average. North Shore-based photographers often add $100 to $200 in travel fees. These add-ons stack up quickly if you don’t account for them upfront. The cheapest option rarely represents a hidden deal, it usually reflects fewer deliverables, less experience, or both. When you’re looking at a price that seems surprisingly low, ask what’s missing before you assume you found a bargain.

    Why island knowledge changes the whole shoot

    Choosing a Honolulu wedding photographer or any Oahu-based team isn’t just about who takes beautiful photos. It’s about who knows this island well enough to protect your day when things don’t go as planned.

    The locations that photograph well (and the ones that disappoint)

    Waimanalo Beach delivers uninterrupted white sand with the Ko’olau mountains as a backdrop, and it’s far less crowded than Waikiki. Waialae Beach Park near Kahala is calm, secluded, and stunning on weekdays. Magic Island provides lagoon views with Diamond Head in the frame at sunset, a combination that’s hard to beat for drama. North Shore spots like Haleiwa give you that laid-back surf culture feel with golden-hour light that typically runs about 45 minutes before sunset year-round. Kualoa Ranch offers a fully controlled private backdrop with dramatic valley scenery for couples who want something beyond a beach entirely.

    An experienced local photographer will already know which spot works at which time of day and will have thought through your specific ceremony details before you arrive on-site.

    Permits, restrictions, and the logistics only a local navigates smoothly

    State beaches and parks in Hawaii require a beach use permit for organized ceremonies. Groups over 30 typically require permits filed 5 to 30 days in advance through the DLNR portal. Drone operation requires separate FAA and state approval. Amplified sound and roped-off areas are prohibited on public beaches. Permit fees are calculated at $0.10 per square foot per event, with a $20 minimum, and once issued, the date, time, and site cannot be changed without a new application. For specifics on permit procedures and site-by-site requirements, consult the official resources on Oahu wedding permits.

    A photographer who doesn’t know this creates real problems on your wedding day. Creative Media Production LLC has built relationships across Oahu’s venues and locations, understands which permits apply to which sites, and handles the logistics so couples can focus entirely on the ceremony. That’s not a small thing, that’s the difference between a smooth day and a stressful one.

    The questions to ask every photographer before you book

    You’ve narrowed your list. Now comes the part most couples skip entirely. Asking the right questions before you sign a contract protects you, reveals who’s prepared, and tells you a great deal about how a photographer handles pressure.

    Questions that expose experience and preparation

    • How many weddings have you photographed at this specific location or a comparable one?
    • What happens if you have an emergency or fall ill on our wedding day?
    • Do you carry backup equipment on-site, and what does that include?
    • Will you personally shoot our wedding, or is there a chance someone else from your team covers it?

    These questions aren’t about being difficult. They’re about understanding who’s showing up and what your protection is if something goes wrong. Any experienced professional will answer them without hesitation.

    Questions about timelines, contracts, and what happens after

    • When exactly will we receive our gallery, and how many edited images are included?
    • What does your contract say about cancellations, rescheduling, and deposits?
    • Can we see a complete wedding gallery from a similar event, not just portfolio highlights?
    • How far in advance should we book, and what dates do you still have available?

    That last question matters more than most couples realize. Top Oahu wedding photographers book out 12 to 18 months in advance for peak season dates. Spring, summer, and early fall are the busiest windows, and the best teams fill their calendars fast. Waiting until six months out means working with whoever’s left, not whoever’s best. For a practical scheduling and shot-list example to plan your day, review this sample Hawaii wedding photography & videography timeline.

    Frequently Asked Questions About Oahu Wedding Photography

    How far in advance should I book an Oahu wedding photographer?

    For peak season dates, spring through early fall, book 12 to 18 months in advance. Popular photographers and dates fill quickly once venues open their booking calendars.

    Do I need a permit for a beach wedding on Oahu?

    Yes. State beaches and parks require a beach use permit for organized ceremonies. Groups over 30 must file 5 to 30 days in advance through the DLNR portal. Permit fees start at $20 with a $0.10 per square foot rate per event.

    What’s the difference between Oahu wedding photography packages?

    Packages typically vary by coverage hours, number of edited images, second shooter inclusion, and delivery timeline. A one-hour elopement session and a full eight-hour reception package are priced, and structured, very differently. Always confirm exactly what’s included before comparing costs.

    What the right choice comes down to

    The right Oahu wedding photographer matches your style, delivers a package that covers what you need, charges rates that reflect genuine experience, and knows this island well enough to handle what you can’t predict. Every other consideration is secondary to those four.

    The couples who get it right don’t spend weeks scrolling. They define their priorities first, ask hard questions second, and book early enough to secure the team they want. That order matters.

    If you’re searching for an Oahu wedding photographer and want a locally rooted team that handles everything from location scouting and permits to personalized planning and fast gallery delivery, Creative Media Production LLC is built for exactly this. Reach out early, bring your questions, and treat the booking conversation as your first test of how well they listen. The right team will make that easy.

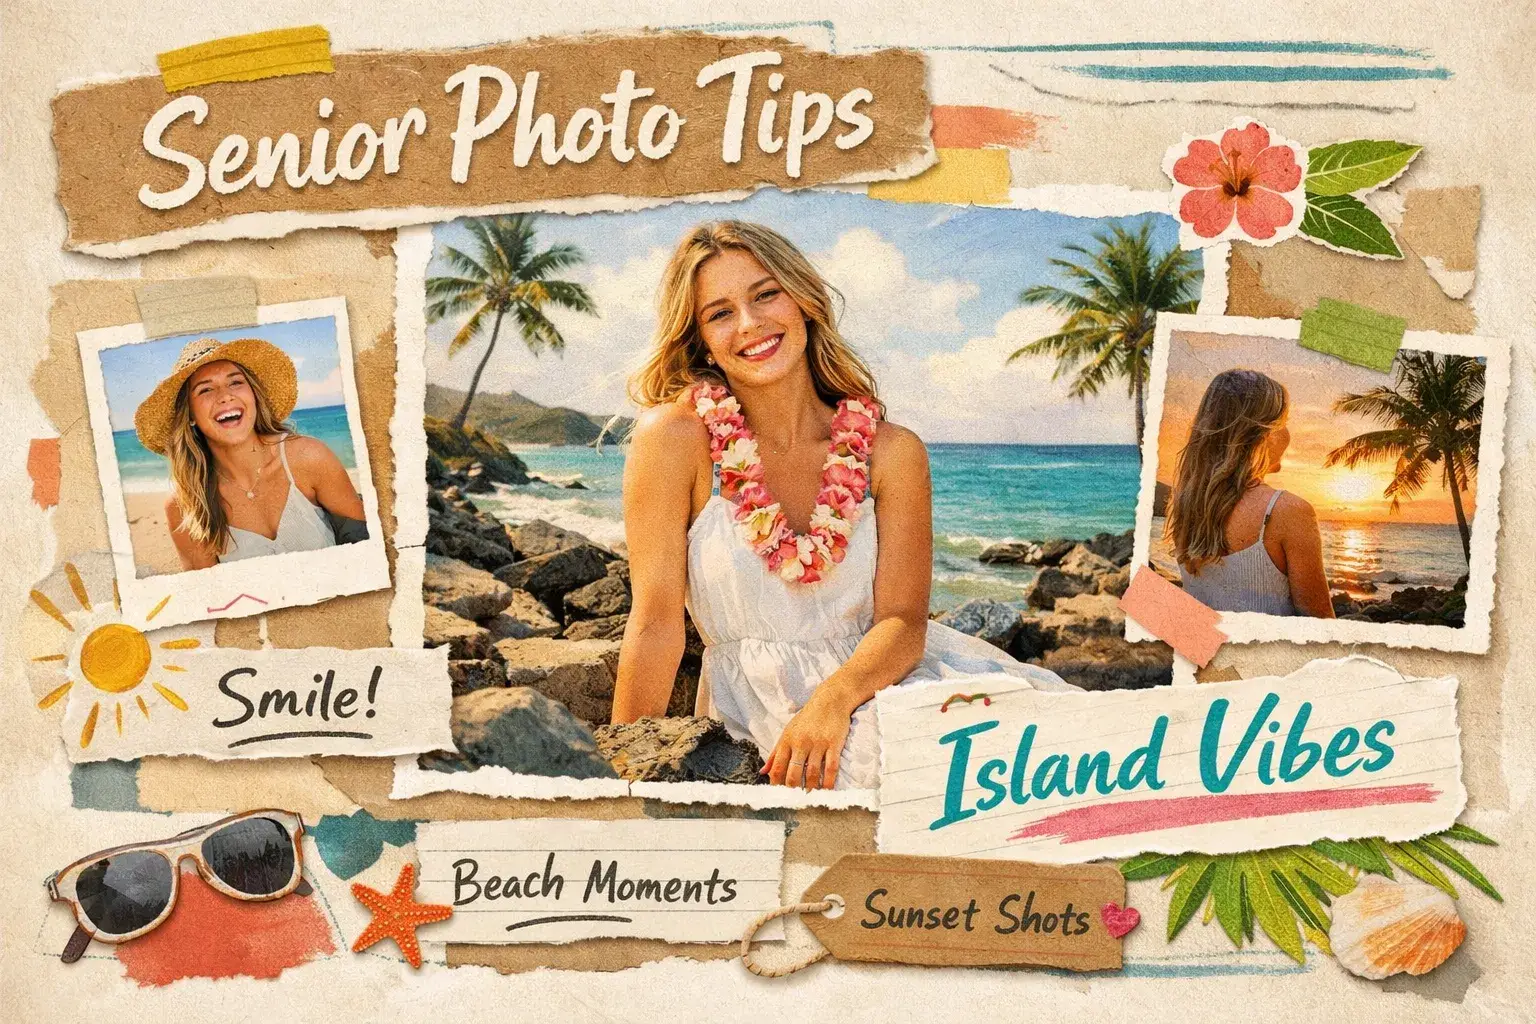
  • Senior Photoshoot Tips: Capturing Milestones with Island Vibes

    Senior Photoshoot Tips: Capturing Milestones with Island Vibes

    Senior photos are not a formality. A senior photoshoot is a record of who you were at one of the most specific, unrepeatable moments of your life. The right session, done well, produces images you’ll actually frame. Done poorly, it gives you a forced smile against a marbled backdrop you’ll never look at again.

    Oahu changes that equation entirely. The island hands you dramatic beaches, lush green parks, and textured urban streets that serve as extraordinary backdrops for a high school senior photoshoot. The scenery does real work here. Your job is to show up prepared. At Creative Media Production LLC, we’ve guided many seniors through this exact planning process across the island, and what separates the great sessions from the forgettable ones comes down to location, outfits, and preparation. By the end of this article, you’ll know how to handle all three.

    How to pick the right Oahu location for your senior photoshoot

    Location is the first decision, and it shapes everything else. The backdrop determines your color palette, your outfit choices, your shooting times, and the overall mood of the gallery. Don’t pick a location because it looks good on someone else’s Instagram. Pick it because it matches your personality.

    Beaches: drama, light, and iconic Hawaii shots

    Oahu’s beaches aren’t interchangeable. Lanikai gives you powdery white sand, impossibly clear water, and the twin Mokulua Islands in the distance. It’s clean, tropical, and stunning at sunrise before the crowds arrive. Waimanalo stretches wide with dramatic mountain ridges as a backdrop, best shot at sunrise around 6:30 a.m. or late afternoon around 4 to 5 p.m. The North Shore, particularly around Haleiwa Beach Park, delivers warmer golden light and a laid-back surfer energy that reads differently from the windward side beaches.

    Every beach session lives and dies by timing. Midday sun creates harsh overhead shadows, washed-out skin tones, and squinting subjects. Schedule beach sessions during golden hour, roughly within an hour of sunrise or sunset, when light is warmest and most flattering. Wind picks up through midday on most Oahu beaches, so early morning tends to be calmer for hair control and composed shots.

    Urban and park settings for a different kind of energy

    Not every senior wants a beach photo. If that’s you, Oahu’s urban and park options are genuinely strong. Honolulu’s street murals and architectural textures give you something grittier and more personality-driven. Kailua’s charming low-rise streets work well for a relaxed, warm-toned gallery. Kapiolani Park sits right at the edge of urban Honolulu with open grassy areas, tall trees, and Diamond Head visible in the background, a versatile setting that works for everything from casual senior photo ideas to more formal portraits.

    The real advantage of urban and park settings is variety within a small geographic footprint. A shaded banyan alley, a painted brick wall, and an open grassy field can all exist within a few minutes’ walk. This matters when you’re working with a two-outfit session and want each look to feel visually distinct.

    Why location scouting matters more than most seniors realize

    Showing up to a beautiful beach at the wrong hour, during a local event, or when the parking lot is full costs you a session. The difference between a good shoot and a great one is often just knowing which specific stretch of beach has the best angle at 5:30 p.m. in September. That’s local knowledge, not guesswork.

    Creative Media Production LLC includes location scouting as part of senior sessions, drawing on years of shooting across Oahu’s neighborhoods from Waikiki and Kailua to Kapolei and the North Shore. We match your style, your wardrobe palette, and your timing to a location that works together rather than fighting each other. It removes the planning burden entirely and means you walk into your graduation photoshoot with confidence, not questions.

    Senior photoshoot outfit ideas that actually work on the island

    Most seniors either show up with one outfit and wish they’d brought more, or pack six and change twice. The sweet spot for a 60-minute session is two to three outfits, planned intentionally, not grabbed in a rush the night before.

    Colors that pop against Hawaii’s backdrops

    Oahu’s visual environment is already working hard: turquoise water, bright white sand, deep green hills. Busy patterns and neon colors don’t complement that, they compete with it. The palettes that tend to photograph well here include soft neutrals, white, and warm earth tones. Jewel tones like rust, deep coral, and sage layer in beautifully. Against a beach setting, bold contrasts also work strongly: warm reds and oranges read well against blue water and white sand without looking forced.

    For urban or park sessions, deeper solids and more structured pieces read better. A navy linen shirt or a well-fitted blazer in charcoal gives you visual weight against textured walls or canopy paths. Avoid anything with large logos or busy graphics unless the photo is meant to be personality-driven and styled around that choice intentionally. For additional seasonal outfit guidance and style tips, see this guide on what to wear for your senior photos.

    The two-to-three outfit approach and how to execute it

    Think of your outfit structure as a simple framework: one dressed-up look, one casual or personality-driven look, and an optional third tied to a specific achievement, a cap-and-gown moment, a jersey, an instrument. This gives your senior photo gallery variety without turning your session into a wardrobe marathon.

    Fabric choice matters in Hawaii’s humidity. Linen, chambray, and flowy cotton move beautifully in an ocean breeze and don’t cling or wrinkle badly under the sun. Avoid heavy synthetics. For shoes, bring beach-friendly sandals for sand sessions and something more polished for park or urban locations. Do not try to wear heels on Lanikai Beach. It never works out.

    Senior photoshoot posing guide: looks that feel natural, not staged

    Most seniors freeze in front of a camera because no one gave them a framework. A rigid, static pose produces a rigid, static photo. The goal is movement and flow, not a fixed position held until the shutter fires.

    Standing and movement poses for energy and confidence

    The poses that work best for standing shots involve slight motion or weight shifts: a wall lean with hands in back pockets, an ankle cross with a relaxed shoulder drop, or a slow walk toward the camera with natural arm swing. Hair play, a look-back-over-the-shoulder, and a loose arms-crossed stance all produce better expressions than standing straight and smiling on command. If you want a concise list to practice, this set of 11 senior photo poses is a great visual reference.

    The mental cue that helps most is this: think about transitioning from one pose to the next rather than holding any single position. The in-between moments, when you’re shifting weight or turning your head, are where the most natural expressions live. A good photographer will capture those transitions, not just the endpoint.

    Sitting and low-angle poses for variety

    Mixing elevation dramatically expands what a single location produces. A ground sit with knees pulled to the chest reads completely differently from a cross-legged sit shot from above. A low kneel with a slight forward lean and a look-back gives you backlighting opportunities and a completely different body shape in the frame. The hug-knees sit creates a vulnerable and authentic look that stands out from the more polished standing shots.

    Plan to move through at least three elevation levels per location: standing, sitting mid-height on a wall or ledge, and ground level. This alone gives you the visual variety you need without changing locations.

    Using props and personality to make photos feel like you

    The shots that make a gallery feel personal are the ones built around something meaningful. Bring something with meaning, an instrument, a jersey, a college acceptance letter, and let your photographer build around it. The sunglasses slide-down, the jump shot, a mid-laugh candid while looking away from the camera: these aren’t gimmicks. They’re the images that tell people something real about you when the portraits are hanging on a wall years later. One or two well-chosen items go a long way.

    Senior photoshoot shot list: what to cover in 60 minutes

    A structured shot list reduces session anxiety and ensures nothing important gets missed. Think of it as a loose blueprint, not a rigid script.

    The breakdown: solos, closeups, and group moments

    A well-paced 60-minute session typically allocates about 20 minutes per outfit, with 10 to 15 solo poses per look. Weave in 8 to 12 closeup variations, headshots, expression changes, and profile angles, throughout for yearbook and announcement use. Save group or family shots for the final 10 to 15 minutes. Seniors are at their most relaxed and expressive at the start of a session; introducing guests early can shift the energy and lead to self-consciousness. If you’re unsure about timing and how long a session should run, this resource on how long senior portraits take answers common questions.

    The shots you don’t want to forget

    Detail shots take almost no time and add real storytelling depth to a gallery: hands with jewelry, shoes, a diploma, a varsity letter, or a college acceptance envelope. Candid laughing moments while looking off-camera round out the edit. These images give a gallery texture and make it feel like a full story rather than a portfolio of poses. Write your must-have detail shots down in advance and hand the list to your photographer at the start of the session, and consider using an ultimate checklist of must-haves to bring to make sure nothing gets left behind.

    Day-of prep: timing, hair, and the mindset that produces great photos

    Most session stress comes from poor day-of logistics. Arriving flustered, running late, or showing up with hair that needs 20 minutes of work at the location eats into shooting time and affects your energy in the frame.

    When to schedule your session for the best light

    The rule is simple: golden hour only for outdoor Oahu sessions. That means within roughly an hour after sunrise for cool, slightly misty light, or within one to two hours before sunset for warm, golden tones and dramatic sky color. Midday sun between 10 a.m. and 3 p.m. creates overhead shadows that flatten faces and cause squinting. No amount of great posing overcomes bad light. Check the local sunset time before booking and work backward from there. For practical tips on maximizing natural light for senior photos, this guide is useful.

    Hair, makeup, and how to arrive ready

    Arrive at your session with hair and makeup already complete. Styling at the location wastes shooting time and adds pressure. For outdoor Oahu sessions, many makeup artists recommend a matte setting spray for humid conditions, it tends to hold better than powder alone. Avoid heavy shimmer or glitter under direct sun, as it reflects unpredictably. Keep hair products strong enough to hold in an ocean breeze without going stiff.

    Do a brief pose run-through in front of a mirror the night before. Five minutes practicing a few standing and sitting poses shakes off the stiffness before the real session starts. You’ll feel more comfortable in your body, and that shows immediately in photos.

    How to find and brief an Oahu photographer for your senior portraits

    Not every photographer who shoots events or weddings produces strong senior portraits. The posing, the communication style, and the pacing of a senior session are genuinely different, and experience with the specific format matters.

    What to ask a photographer before you book

    Before committing to any photographer, ask these directly: Do they specialize in or have significant experience with senior portrait sessions? Do they offer location scouting or consultation before the session? What does the package include specifically, edited image count, print rights, turnaround time, and outfit allowance? What happens if the weather doesn’t cooperate? These questions surface the information you need and reveal how organized and experienced the photographer actually is.

    What a strong senior portrait package looks like

    A well-structured package includes a pre-session consultation to align on style, locations, and shot list. It covers multiple outfit changes, professionally edited images delivered in a full gallery, and clear print rights so you’re not charged separately every time you want a print. Turnaround time matters too, especially if you need images for yearbook submissions or announcement cards on a deadline.

    Creative Media Production LLC’s senior portrait packages are built around all of this. We serve Oahu’s full range of locations, from Waikiki and Kailua to Kapolei and the North Shore, with the island expertise to match every senior to the right backdrop for their style. Location scouting is included in our senior sessions to remove the guesswork, and we communicate our editing turnaround clearly so you know exactly when to expect your gallery.

    Plan it well and the photos will follow

    A great senior photoshoot starts with the right location, the right outfits, and a photographer who knows how to bring it all together. Nail those, and the session momentum takes care of itself. Oahu offers coastal beaches, lush parks, and vibrant urban backdrops that are genuinely hard to match anywhere else in the country. Don’t waste them on poor planning.

    If you’re ready to start putting your session together, reach out to Creative Media Production LLC for a complimentary consultation. We’ll talk through locations, timing, and what the right senior portrait package looks like for your session. No pressure, just a real conversation about making your senior photoshoot exactly what it should be. If you want additional inspiration on packing and prep, this checklist-style day-of senior photo session checklist and this practical video walkthrough session prep video can be useful references.

    Save time and stress: write your must-haves down, pick two to three outfits, and pick a photographer who knows Oahu. We’ll see you on the beach at golden hour.